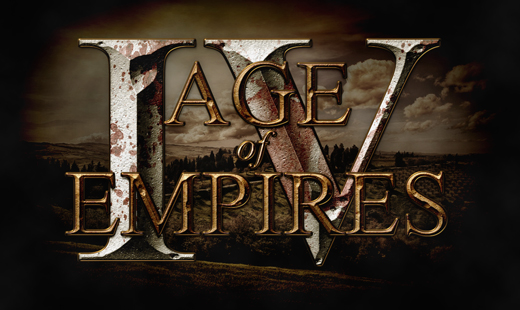
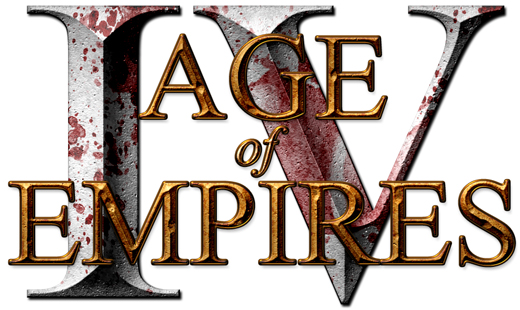
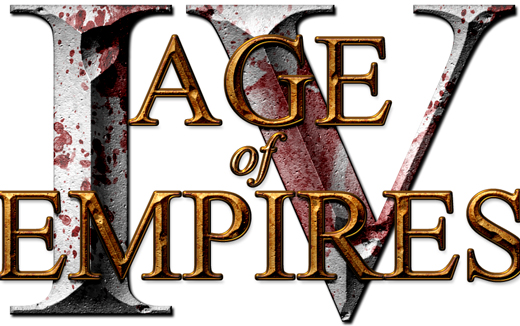
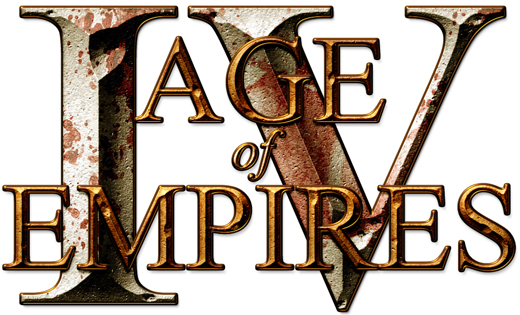
In this article we’re going to create a simple video game logo inspired by the Age of Empires series.
Tutorial Details
- Program: Adobe Photoshop
- Version: CS5
- Difficulty: Beginner/Intermediate
- Estimated Completion Time: 1 hour
Final Result
Step 1
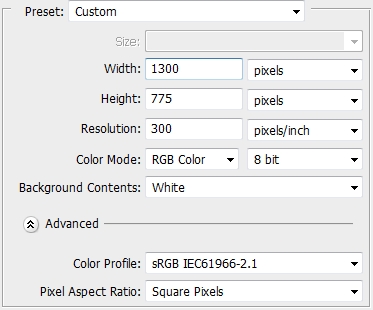
Create a new file in Photoshop.
Step 2
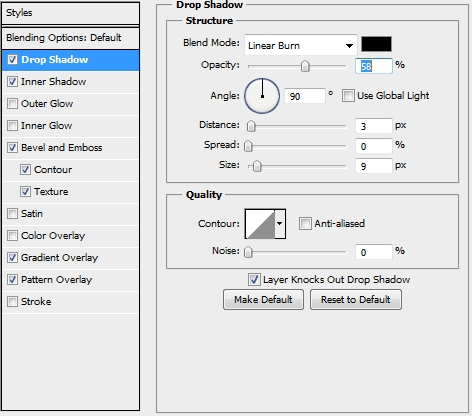
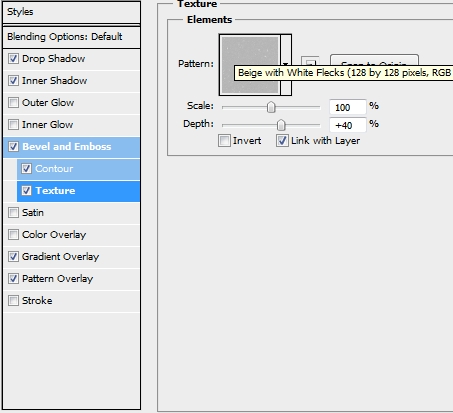
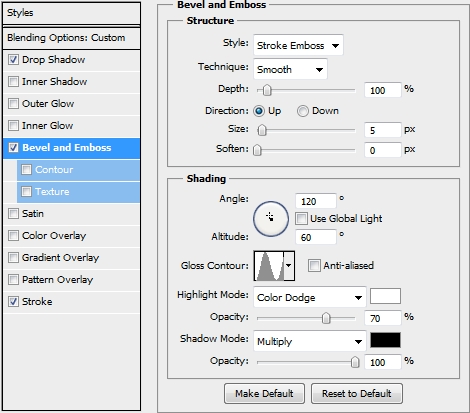
Pick the Type Tool (T) and write anything you want. The font we used is Times New Roman; size: 55pt, color: #c69c6d. Apply the following effects.


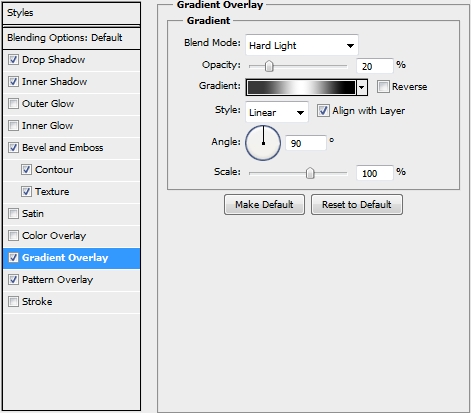

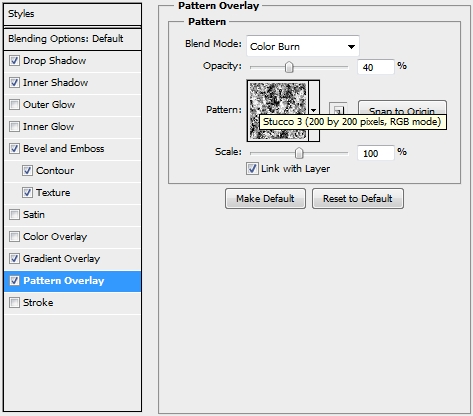
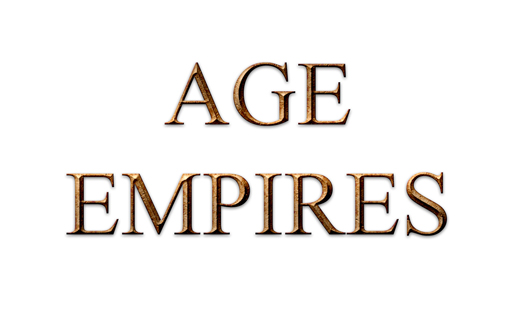
Step 3
Add a mask to the text layer and using a random brush create some cracks (click anywhere on the text and it will automatically create a nice effect).

Step 4
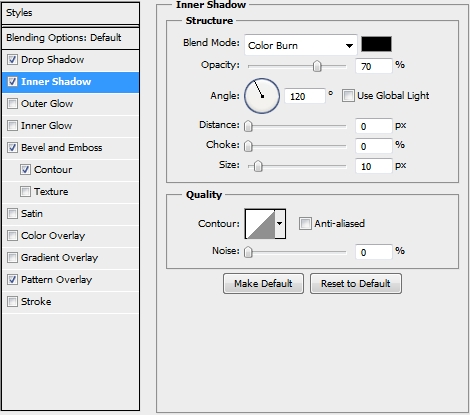
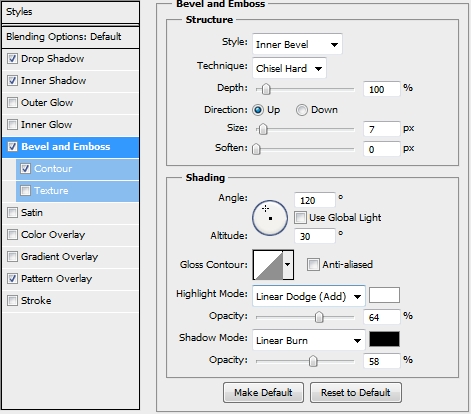
Duplicate the text layer twice, clear the styles, turn their Fill to 0% and delete the masks. Then select the first text copy layer and apply these styles.

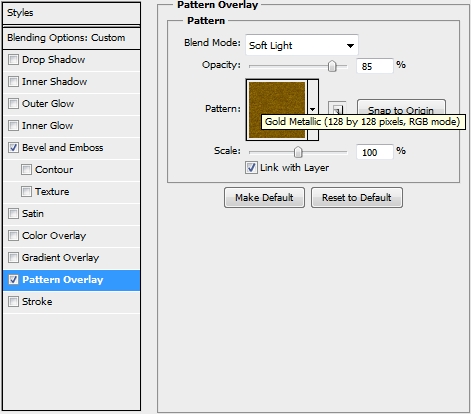
Step 5
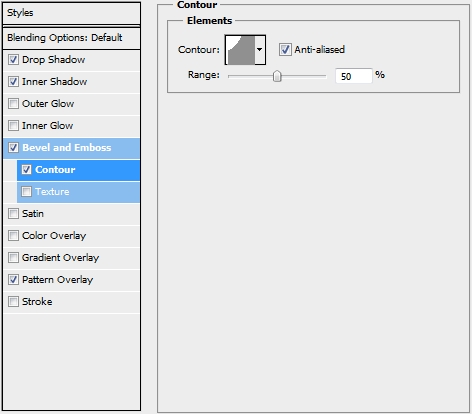
Now select the second copy layer and add these styles.


Step 6
Group these three layers and name the group “Age Empires” (or anything you wrote). Next, create a new layer and add some more text (“of”). The font we used is Vijaya; size: 30pt, color: #c69c6d. Apply the following styles.

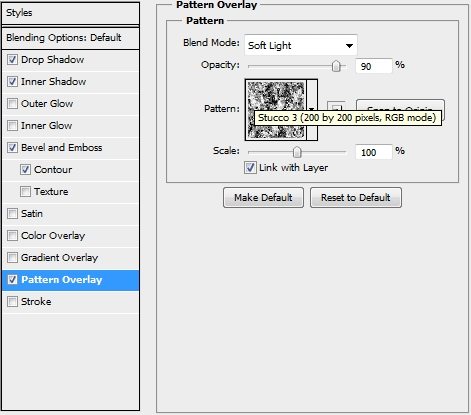
Step 7
Duplicate this layer and turn the Fill of the copy to 0%. Replace the existing styles with these.
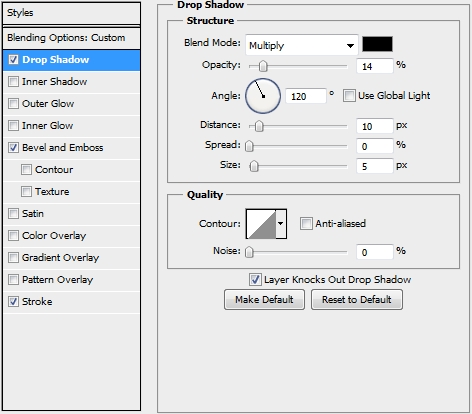
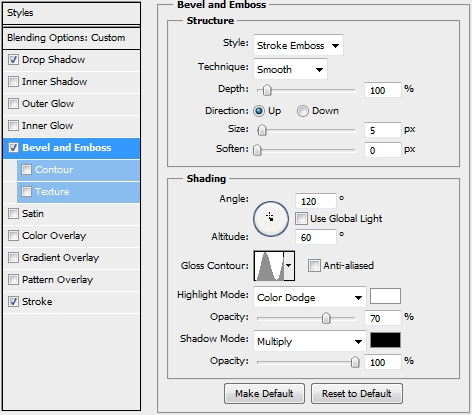

Step 8
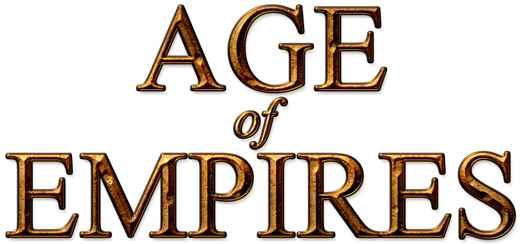
Your design should by now look like this.
Step 9
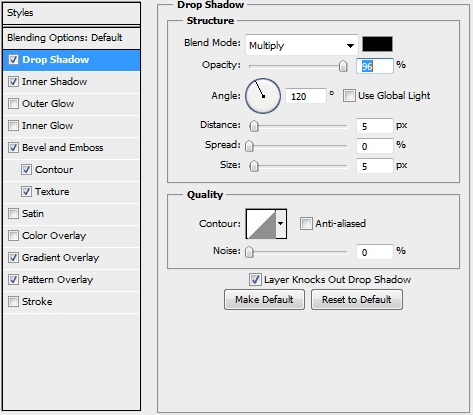
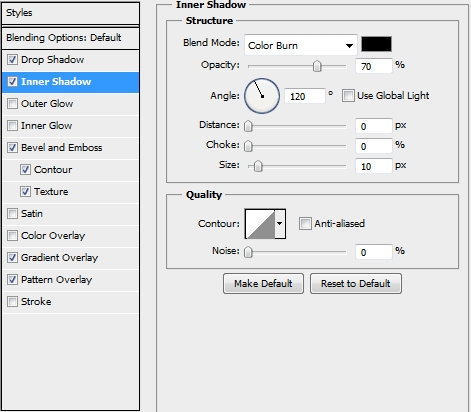
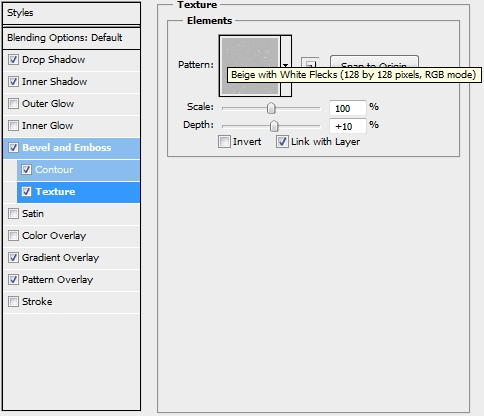
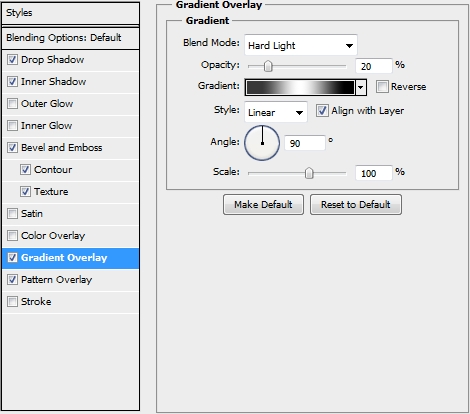
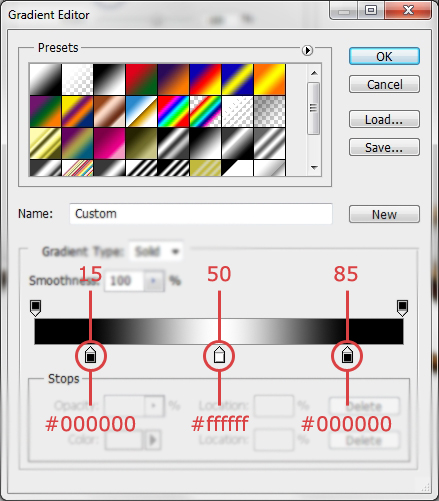
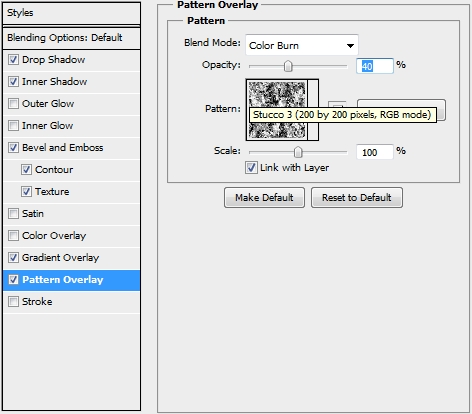
Duplicate the last two text layers and name the group “Of”. Next, add some more text (“IV”) and place this text layer under the “Age Empires” and “Of” groups. The font used for this layer is Times New Roman again; style: Bold, size: 200pt, color: #cccccc. Then simply apply the following styles. Duplicate this layer twice and turn the Fill of the copies to 0%.


Step 10
This step is optional. Create a new layer and draw some blood splatters (you can find hundreds of free splatter brushes all over the internet). Use #a3080a as your foreground color and change the Blend Mode to Linear Burn and the Opacity to 40-50%. Finally, make this layer a clipping mask to the original “IV” text layer.
Step 11
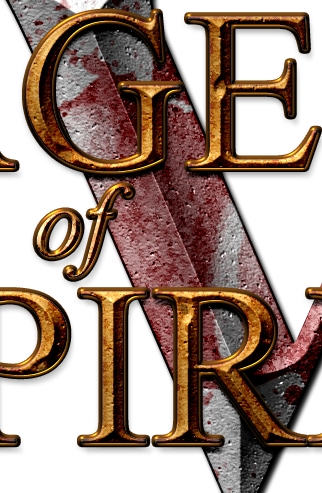
Add another layer right above the original “IV” text layer and make it a clipping mask also. Using a soft round Brush (B), draw some shadows under the “Age of Empires” text.
Step 12
Add a layer mask to your original “IV” layer and draw some cracks using a random brush.
Step 13
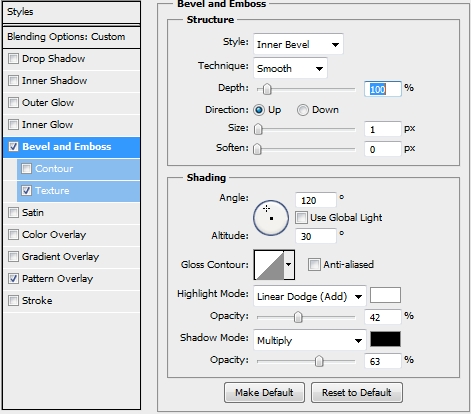
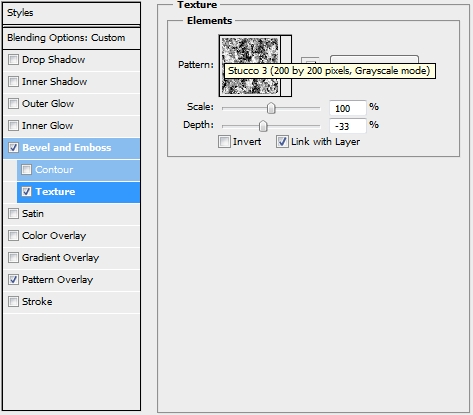
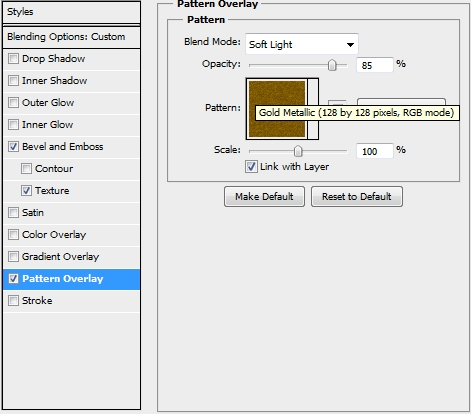
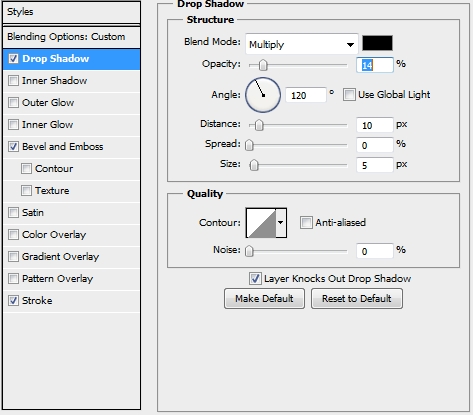
Select the first “IV” copy layer and replace its styles with these.
Step 14
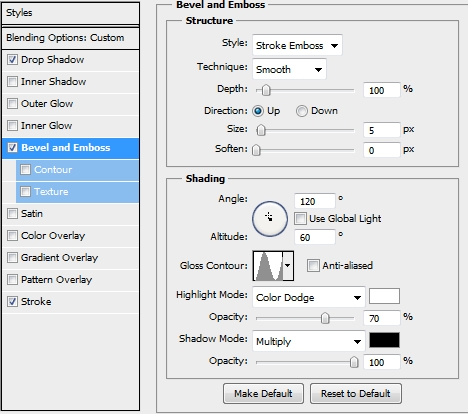
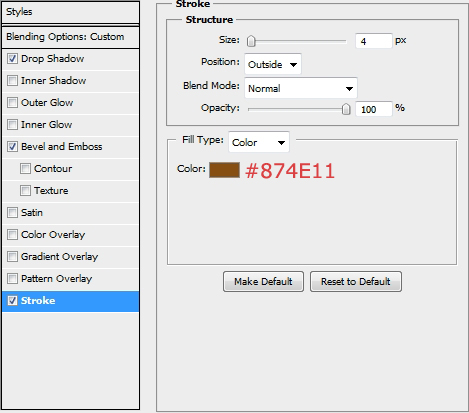
Now select the second copy layer and again replace the existing styles with the following ones.
Step 15
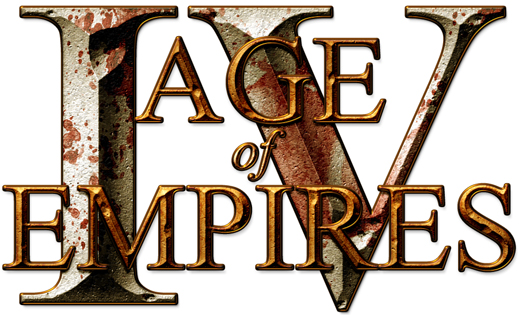
Group all the layers created in Steps 9-15 and name the group “IV”. Then group all the other groups, duplicate this new group and merge the copy. Then go Filter>Blur>Gaussian Blur (2-2,5px). Change the Blend Mode to Soft Light and the Opacity to 40%.
Step 16
Create a new layer and select the Brush Tool (B). Pick a soft round brush, increase its size a lot and draw some highlights (lower the Brush’es Opacity and Flow) mainly on the IV.
Step 17
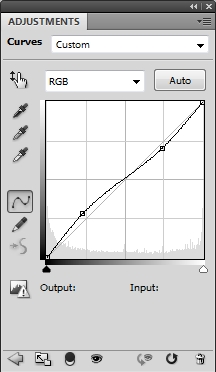
Add a Curves Adjustment layer and then create a new layer and paint the whole canvas black (or white). Change the Blend Mode of this layer to Color and reduce the Opacity to 20%.
Step 18
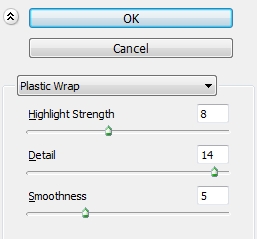
Duplicate once again the “mega group” created in Step 15 and merge the copy. Desaturate the layer (Hue/Saturation or Ctrl+Shift+I) and go Filter>Artistic>Plastic Wrap. Change the Blend Mode to Hard Light and reduce the Opacity to 40%.
Conclusion
That’s the end of this tutorial. Feel free to add your own background or some extra effects. We hope that you enjoyed the tutorial and if you have any question, post them in the Comments section and we’ll answer ASAP.


thanks for the tutorial..
Wonderful post, i learn excellent stuff here,thanks for share