Many people have their passion for photography. Many people also think that photography is as simple as looking for a good framing and pressing on the shutter button. But for those people who are really serious on photography, they go way beyond taking pictures. They look for various ways and techniques to make their photos look more appealing. They may use photo effects or even experiment on creating one. All of this for the aim of enhancing their photos and make it look more stunning than it looked like when they took it.
These days, we no longer use dark rooms and slides to develop photos. We are in the era of digital photography. But due to photography effects, we can still apply the effects that were used before in dark rooms. Aside from those old ones, there are also new effects that photographers use to enhance their photos. In today’s post, we will show you 15 photo effects that photographers have to be familiar of and would-be photographers need to know.
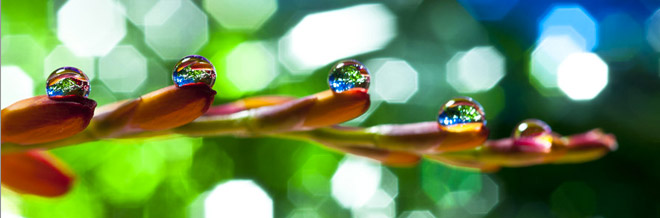
1.Bokeh Effect.
The term comes from the Japanese word ‘boke’ which means haze or blur. Hence, Bokeh refers to creating an aesthetic quality blur on the out of focus area of a picture. This blur is caused by the difference of lens aberrations and aperture shapes. Your Bokeh could be good if it is not too distracting to the extent that it draws the attention of the viewer to that area rather than to the subject. A good Bokeh can give more emphasis to the subject and can enhance the image.
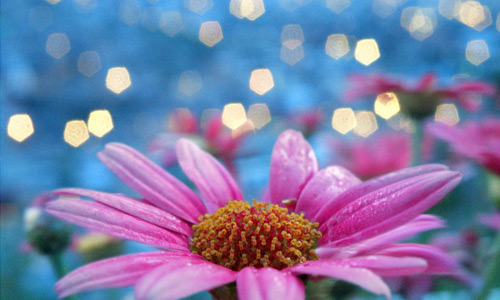
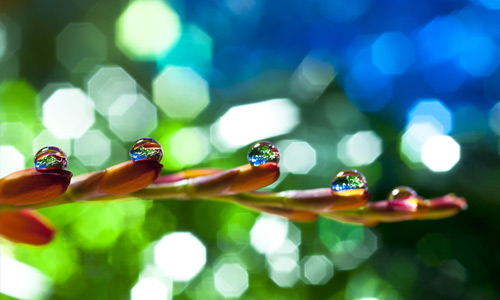
Image:pqphotography
2. Lomography Effect.
The resulting photo has a wide variation of saturation and light leaks. The picture looks like taken with random lens flashes and double exposures. Pictures are usually degraded around the images called vignetting. Pictures also don’t have a sharp focus with lomography.
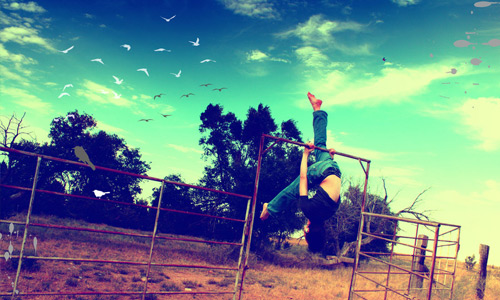
Image:gthersh
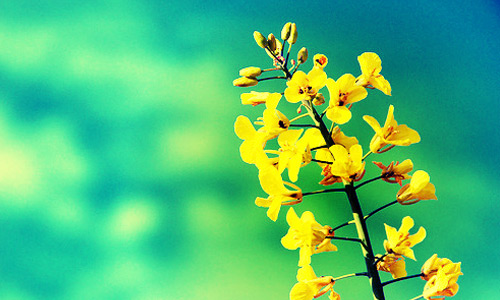
Image:nelsonpray
3. Tilt-Shifting Effect.
This refers to the use of camera movements and could also refer to the use of tilt for selective focus. The result would be like a miniature scene. This involves two different types of movements. First is the rotation of the lens plane in relation to the image plane which is called tilt. Second is the movement of the lens parallel to the image plane called shift. Tilt is used to control the orientation of the plane while shift is used to adjust the position of the subject without moving the camera back.
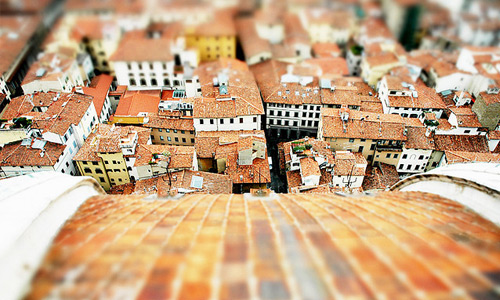
Image:timothysschenck
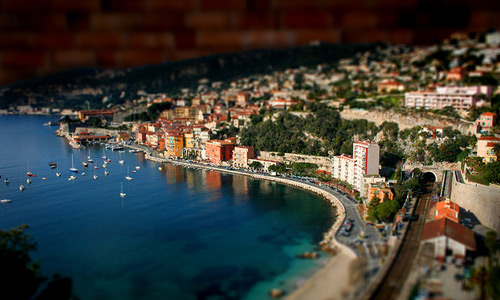
Image:delawarm
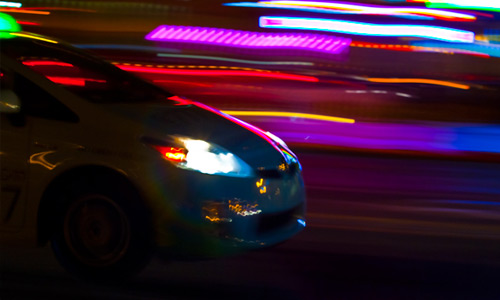
4. Panning.
This is an old age technique used up to this day. Panning refers to the horizontal, vertical or rotational movement of an image still or video. This is done by having a moving subject while framing the shot first and then pressing the shutter after. The subject looks sharp with a blurred background. This gives the effect of a moving object.
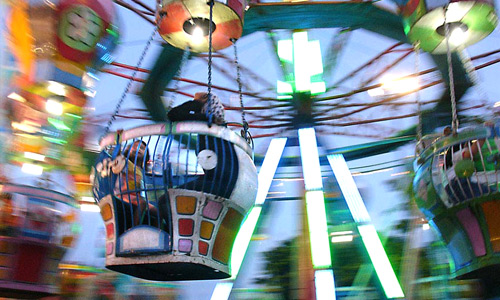
Image:ditya
5. Rule of Thirds.
You can do this by mentally dividing your view finder into nine parts. You then look for certain points to focus on and position your camera with those points inside the grid. This creates movement and interest in your image.

Image:foxtrot44

Image:ajzeller
6. Cross Processing Effect.
This is the result of developing color print or slide film in the wrong chemical. The effect is great especially that the colors look different. The image has a unique wild color and various contrasts. The picture looks great although the real color of the image is manipulated.
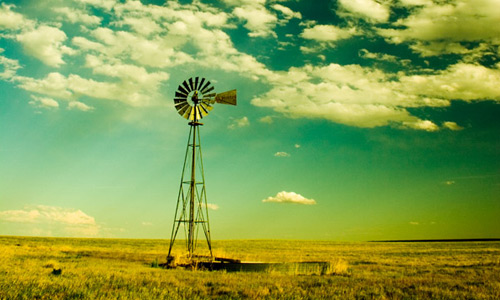
Image:usedtoit03

Image:french-errorist
7. Golden Hour Photography.
This refers to the time of taking the image. It should be taken in the first hour of the sunrise and last hour of the sunset. The light from the sun gives a different effect and drama to the image. The result of the picture varies depending on what time of the day it is taken.
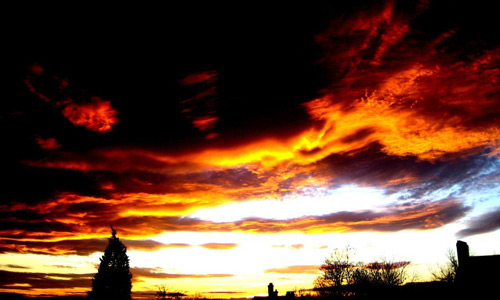
Image:mihi2008
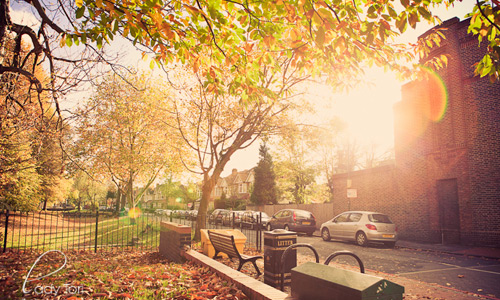
Image:lady-tori
8. Infrared Photography.
Just imagine looking a full colored picture. You’ll surely see the colors clearly with red roses and green grasses. But if you use the infrared effect, the picture would look different with a different color, too. This is how some animals view the outside world.
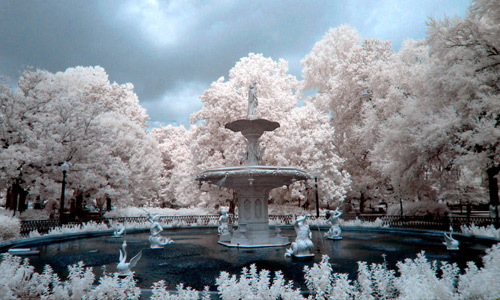
Image:ilimel
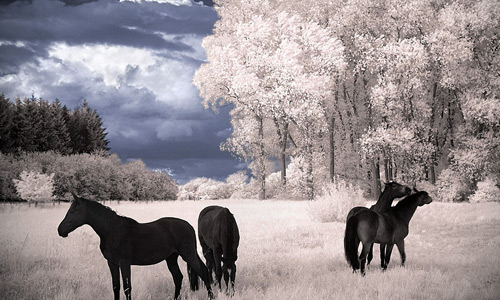
Image:michilauke
9. Long Exposure Photography.
A photographer could have a good image of lights, stars and even fog by using a narrow aperture and long duration shutter speed. It can capture stationary elements with blurred moving elements. Images are taken with low light that is why it is usually taken during the night. It is also use to take pictures of running water and fog.
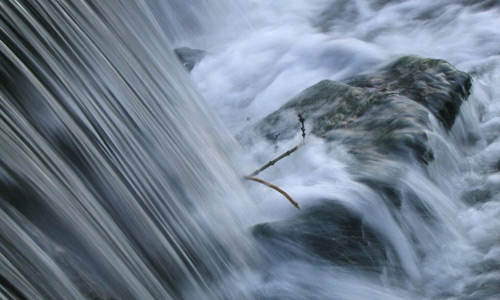
Image:thomas-darktrack
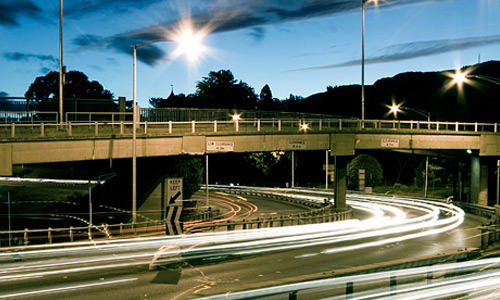
Image:alexwise
10. Silhouette Photography.
For this effect, the light is located directly behind the subject resulting into a silhouette. You can have high contrast photos with this. The subject of the photos is black and the backgrounds are usually dramatic.
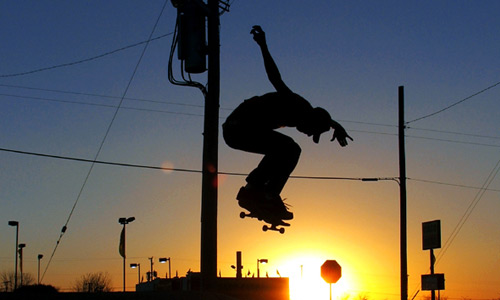
Image:matinee
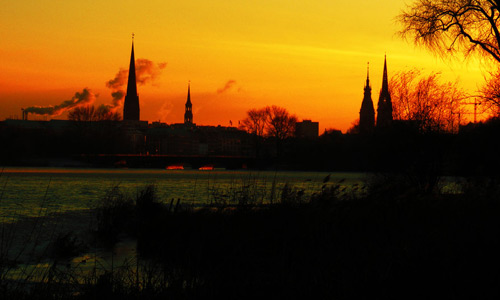
Image:rockmylife
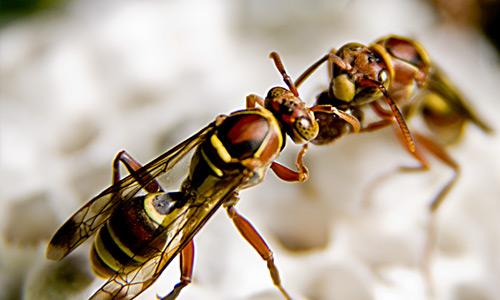
11. Macro Photography.
You can do this if your camera has a macro lens. You have to focus on a subject nearer that usual. Even little things can look large with macro photography. It makes little things bigger, thus emphasizing on the details of it.
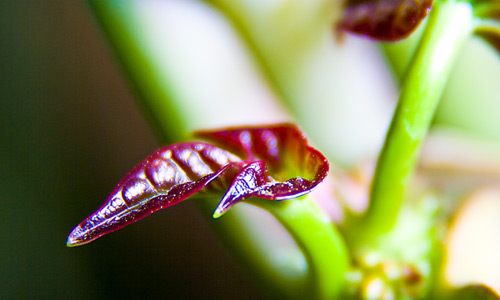
Image:lee-sutil
12. Sabatier Effect.
This is also called Solarization. The picture looks unique for light areas are dark and dark areas become light. You can also see a thin line on areas where colors are contrasting. This happens when the film has been overexposed when working in the darkroom.
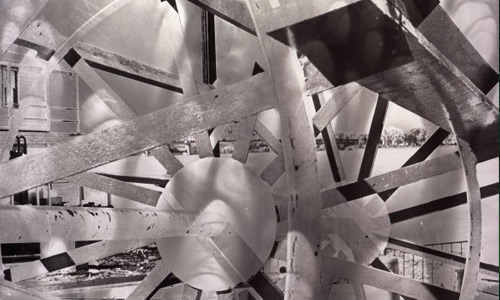
Image:leeeuh
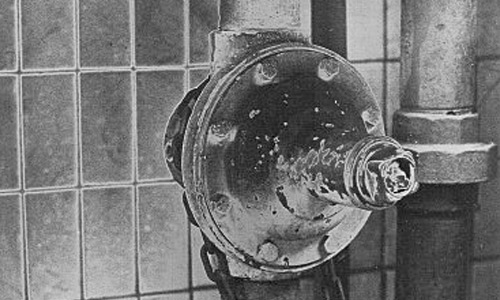
Image:kkog
13. Fill Flash Effect.
Fill flash effect is used when there is more light at the background, when you are so near to the subject and when there is shadow in the subject. It brightens shadowed areas by using flash to fill those dark areas. In these photographs, the background is brighter than the subject. The quality of the background is retained even if it is exposed while the subject or the foreground is enlightened using flash.
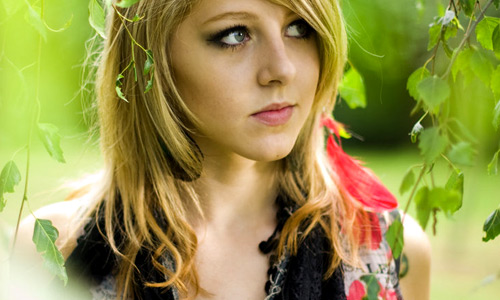
Image:john–anthony

Image:alliec
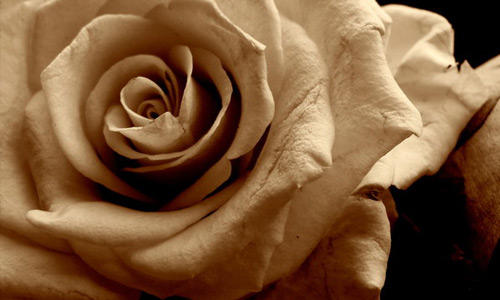
14. Sepia Effect.
Pictures with this effect uses a brown monochromatic color set that can give a rustic, dramatic look. It can add life and warmth to a picture. Sepia images show more depth and definition than full colored ones.
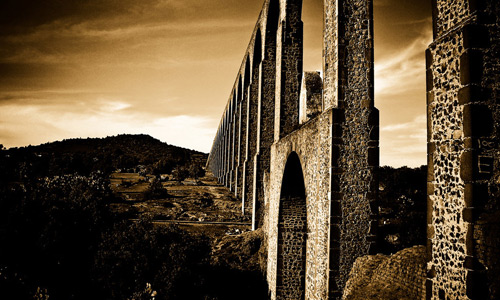
Image:bodhisattva-psyche
15. Black and White Effect.
Obviously, the images are colored with black and white. This gives a classic look to the photos. Black and white photos were the first photos that we had but are still used these days for it gives more emphasis and detail to the subject.
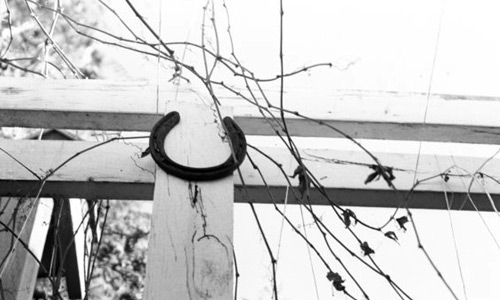
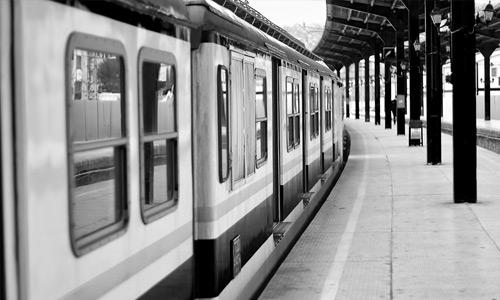
Image:holyrage
It’s Your Turn Now
Well, aren’t these photos stunning? With the use of different photo effects, you will surely enhance your photos to the next level. These effects can be done in Adobe Photoshop and some of them are already in your digital cameras. There are still other photo effects that could make your images look more appealing. You can share those effects to us. Or you may want to share your own works here.


Hi Ebrian
Nice post. I loved the Bokeh Effect.
Definitely a good post, you’ve taken Photography essentials and put them into a neat list!
BW