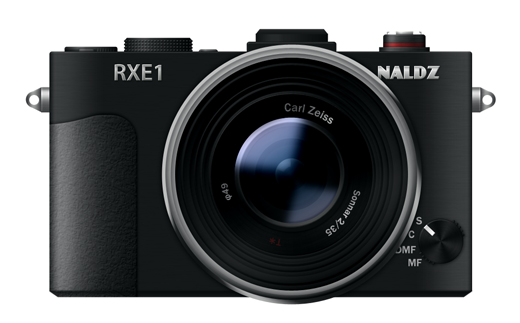
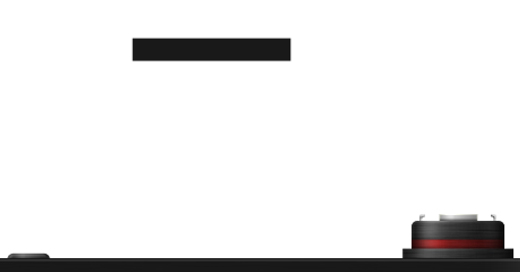
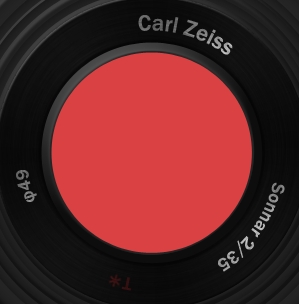
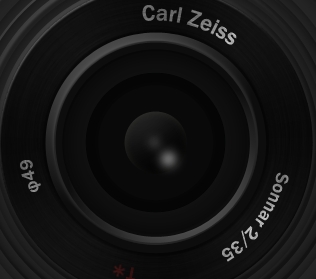
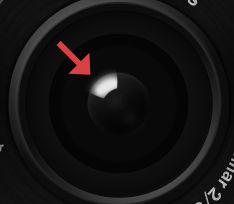
In this tutorial we’ll be creating a nice realistic camera icon. The design is inspired from the Sony’s RX1 model.
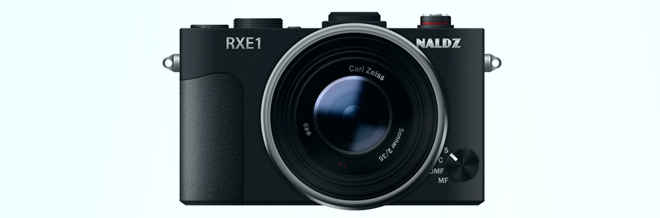
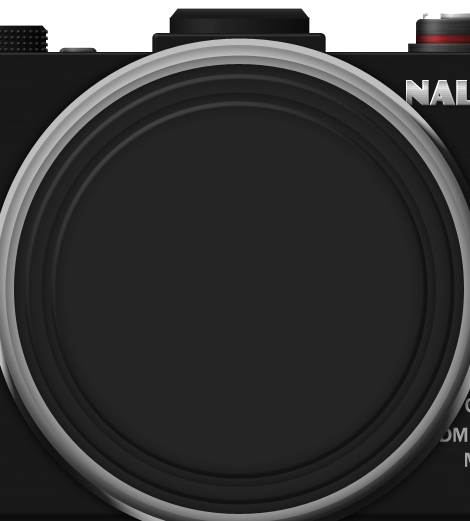
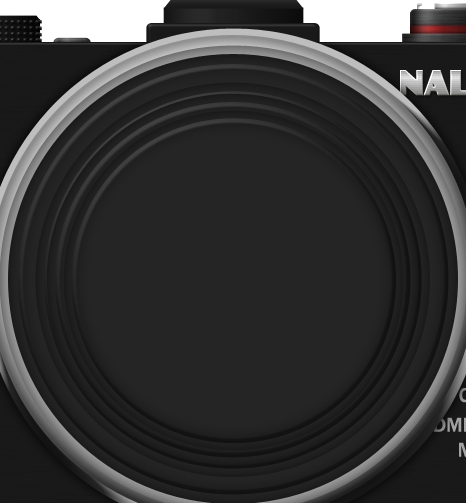
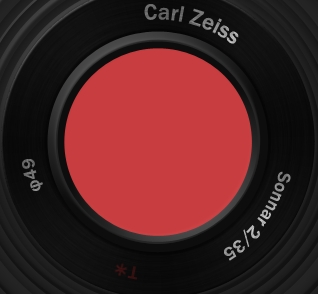
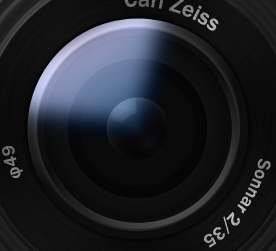
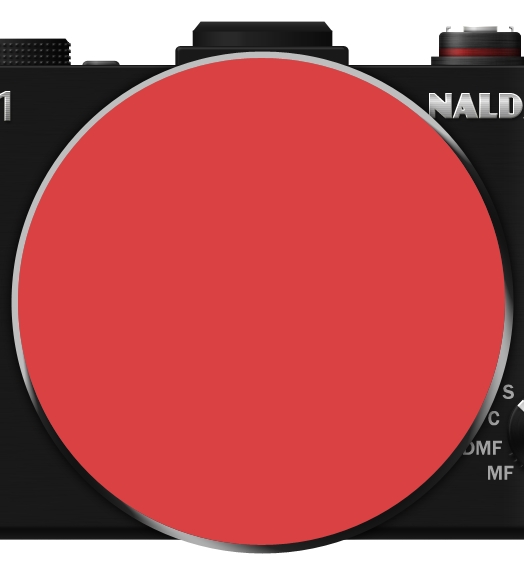
Final Result
Step 1
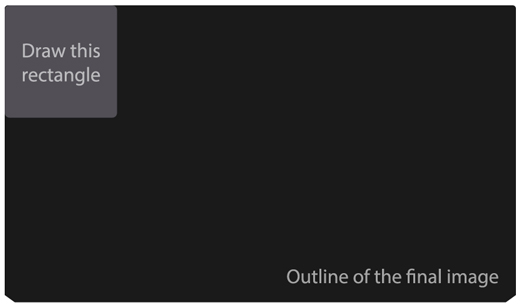
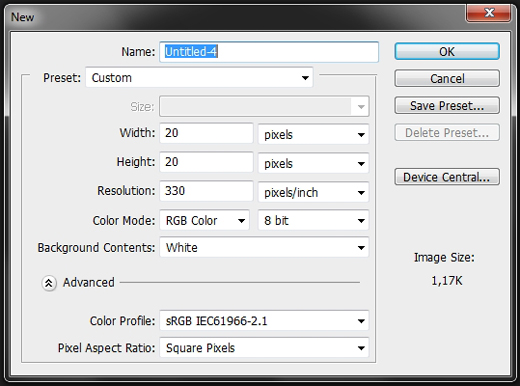
Create a new file in Photoshop. I chose 1300×1300 px, 330 px/in, RGB color 8 bit and a simple white background.
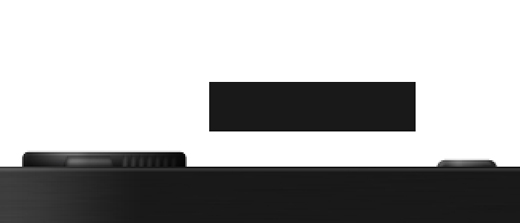
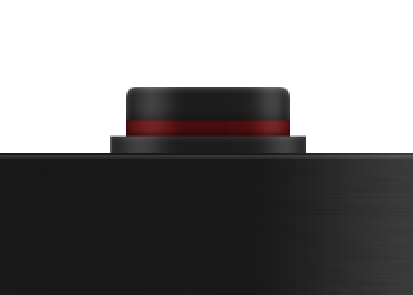
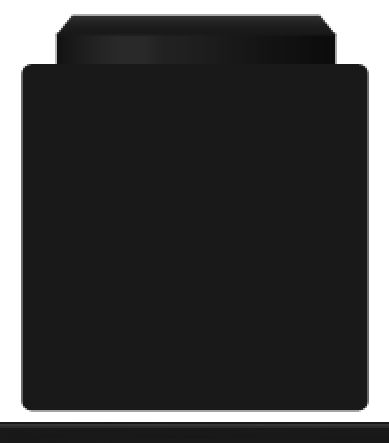
Pick the Rounded Rectangle Tool (U), set the Radius to 5 px and while holding Shift, draw a square. Set the color to #1a1a1a. Though the camera will be relatively big, the rectangle has to be small. Use the image below as a guide.
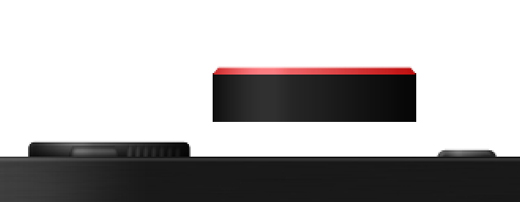
• I changed the color to purple for demonstration purposes.
Step 2
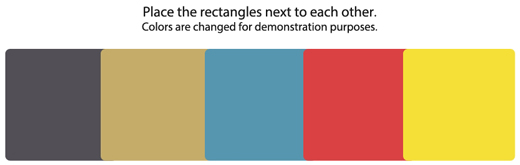
Duplicate the rectangle several times and place the copies next to each other. Remember that each new copy has to overlap the previous one. The image below will explain it better. Once you’ve done it, select the rectangles and merge them.
Step 3
Pick the Rectangle Tool (U), and draw a rectangle like the one below.

Step 4
Duplicate the previously created shape and transform its height. Then go Edit> Transform Path> Perspective. Hold Shift , grab the lower right corner and move it to the center a bit.
Step 5
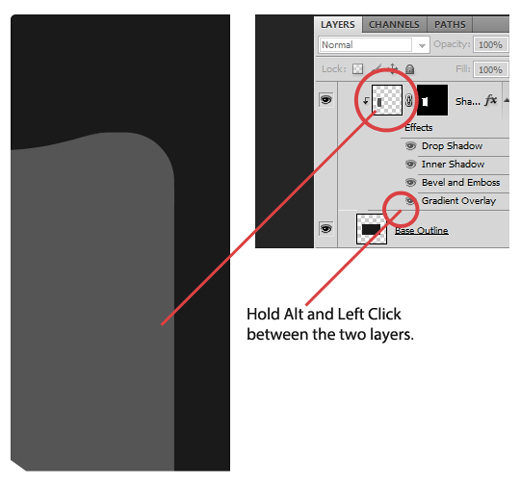
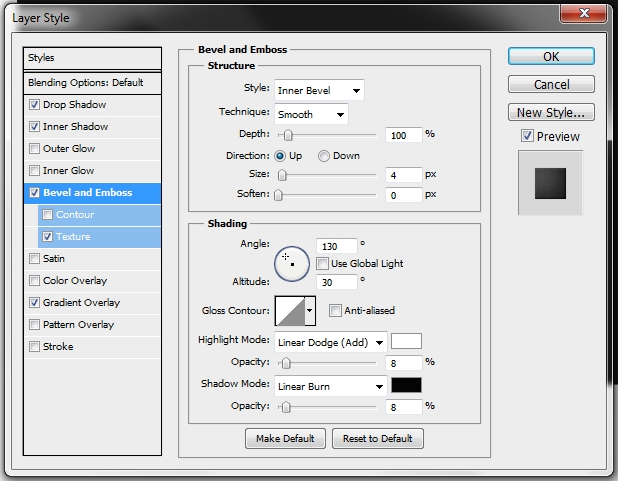
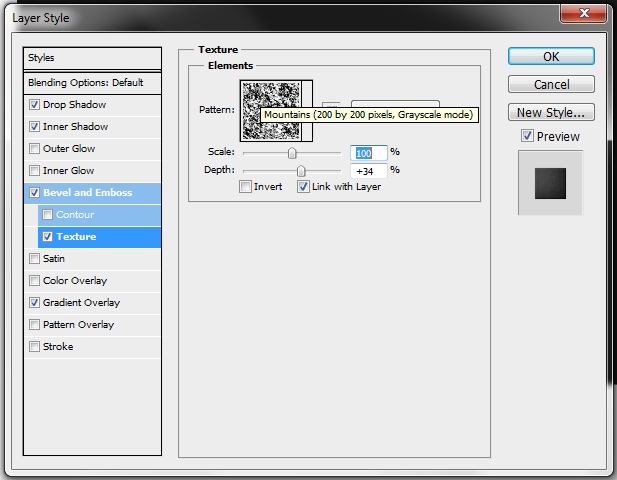
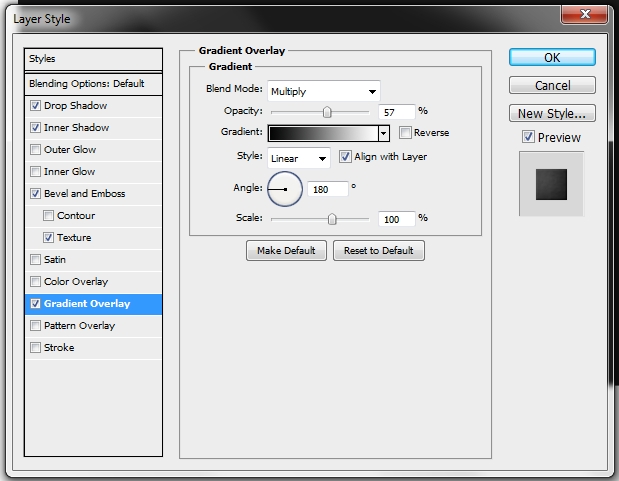
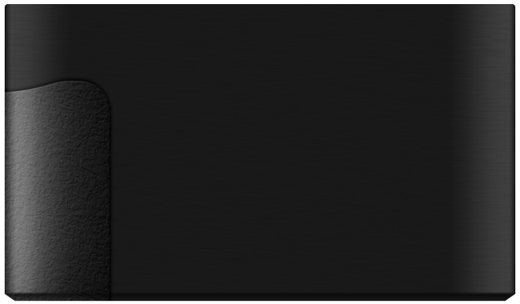
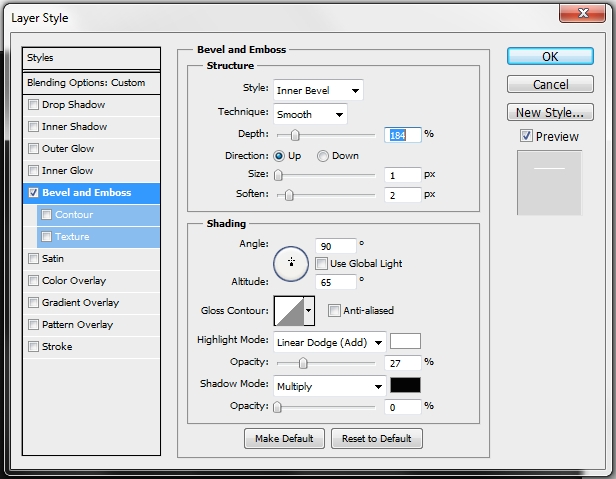
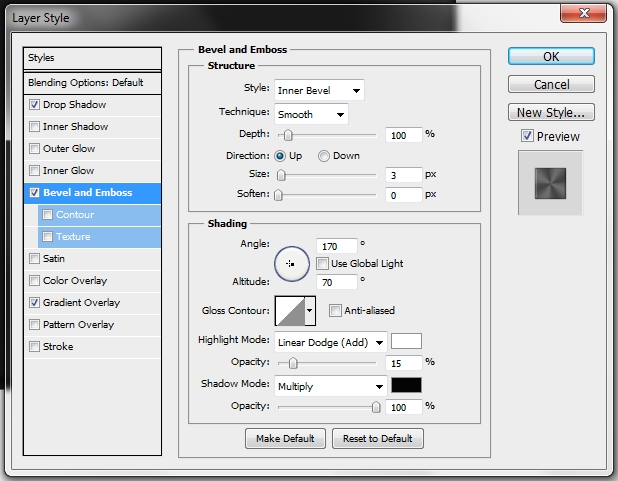
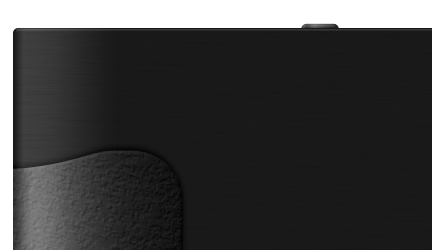
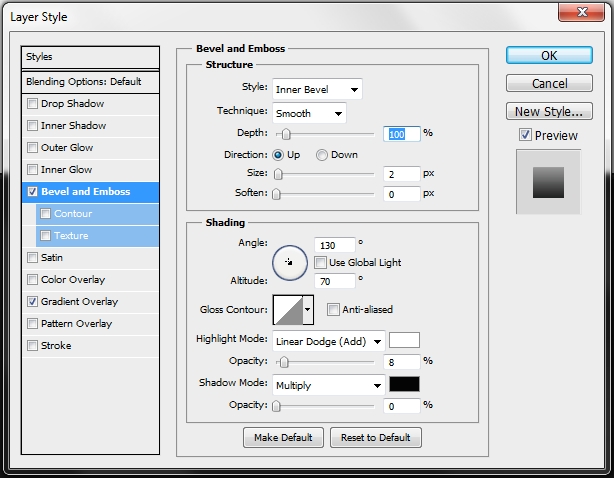
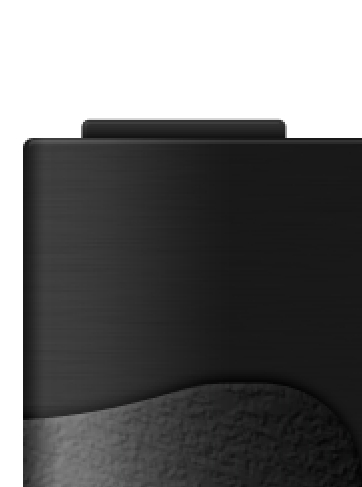
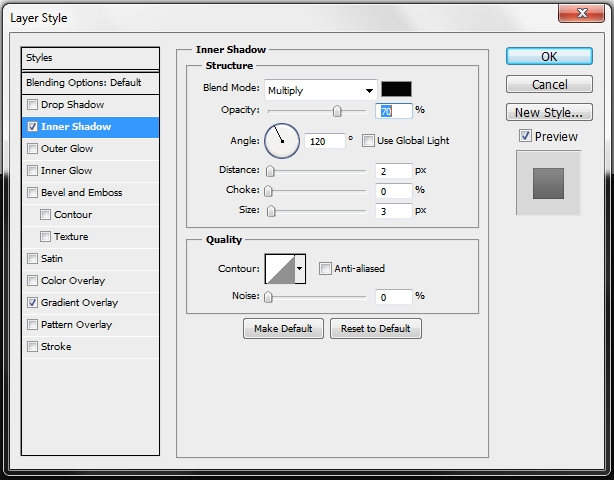
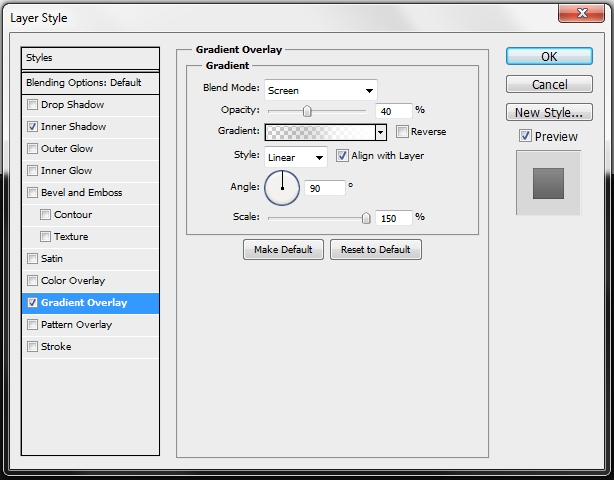
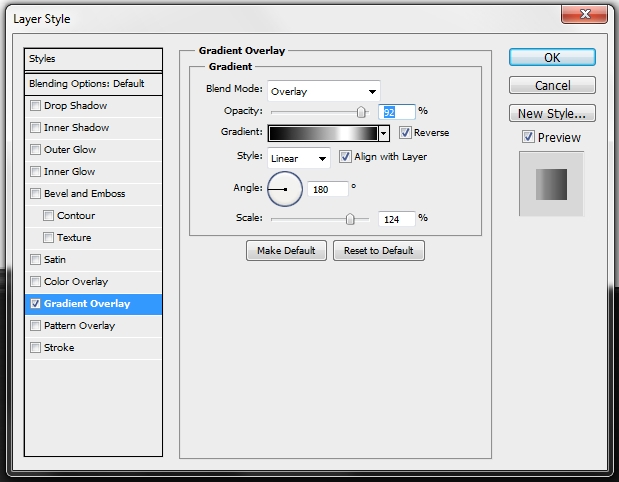
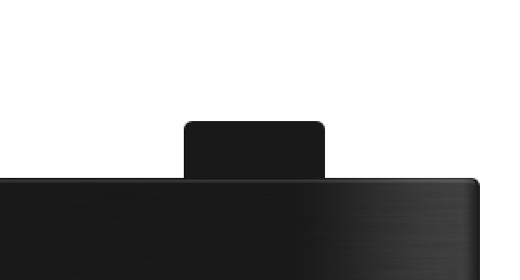
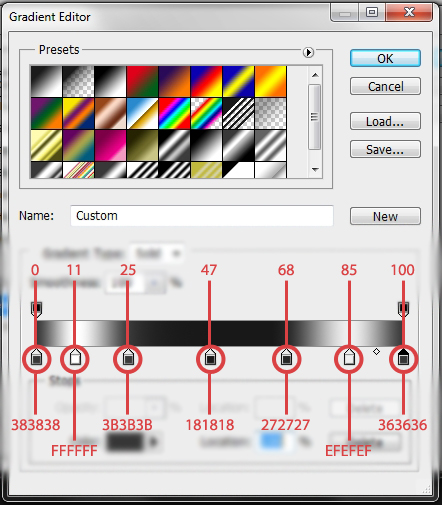
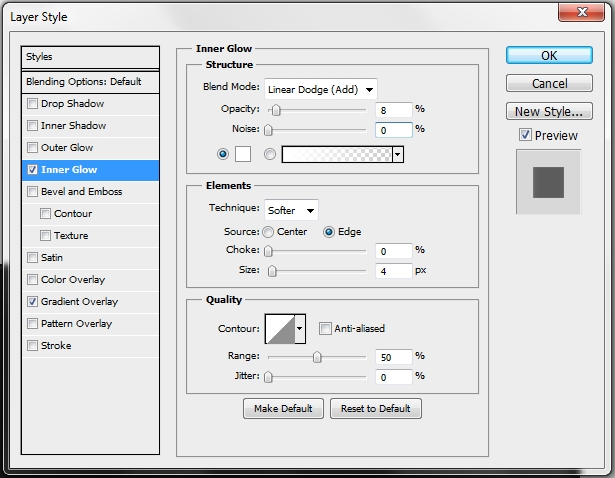
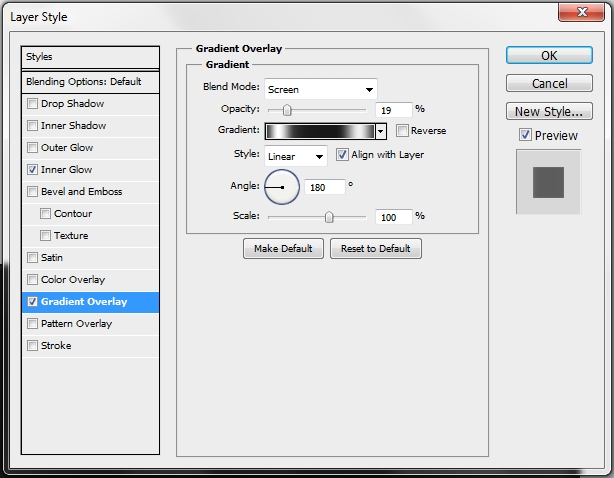
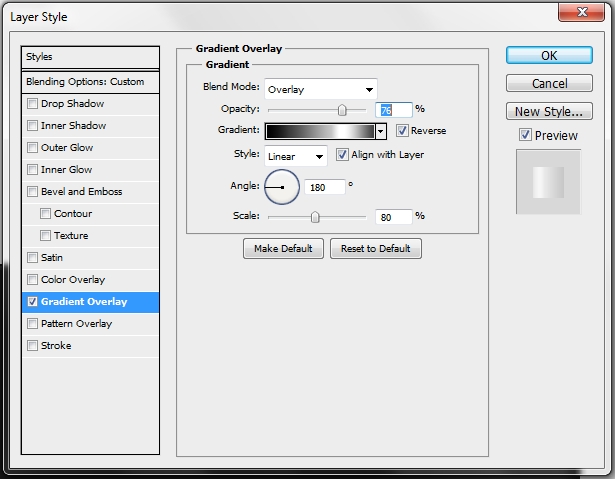
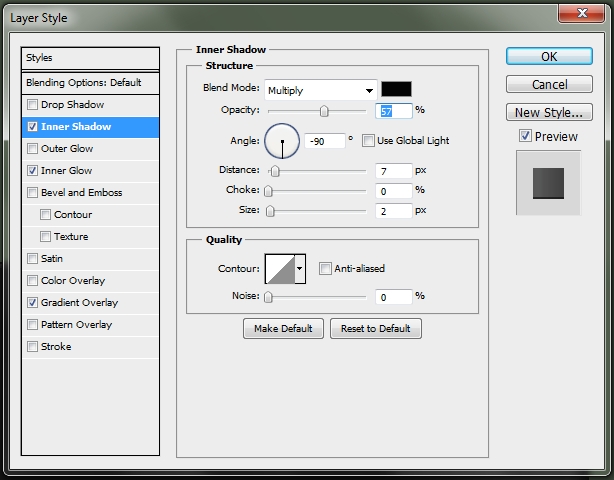
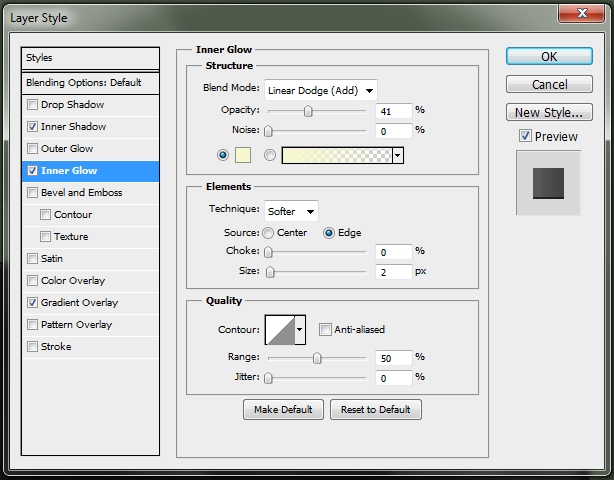
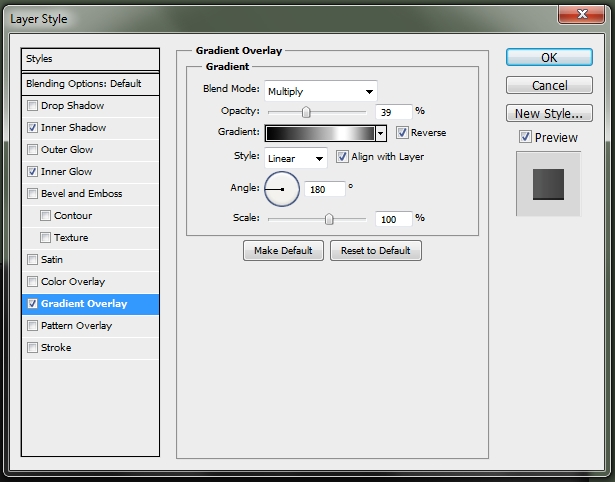
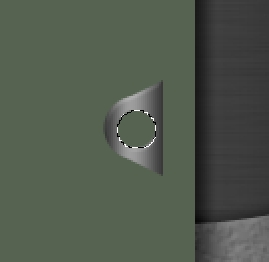
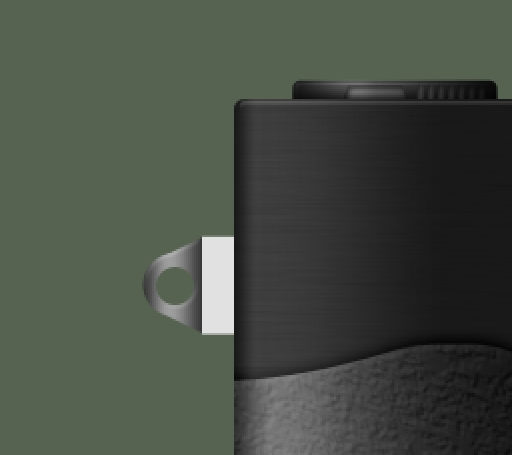
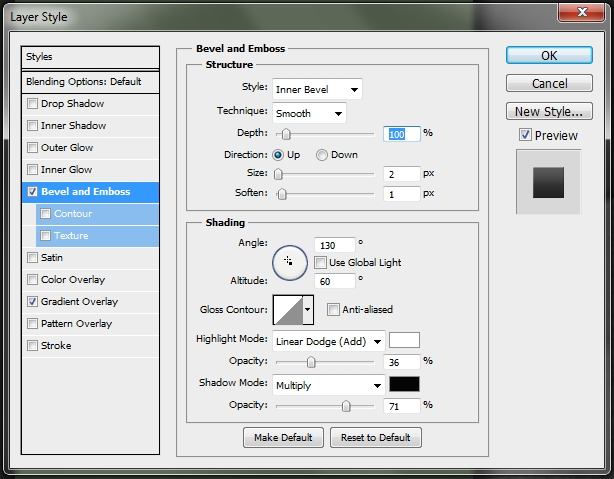
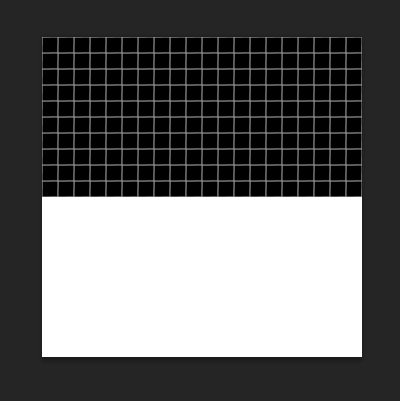
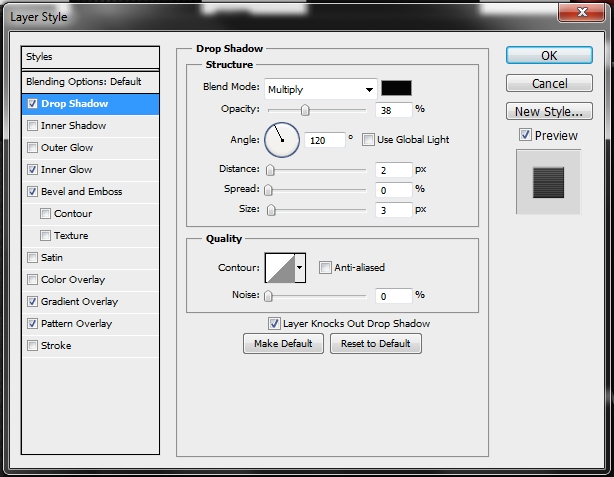
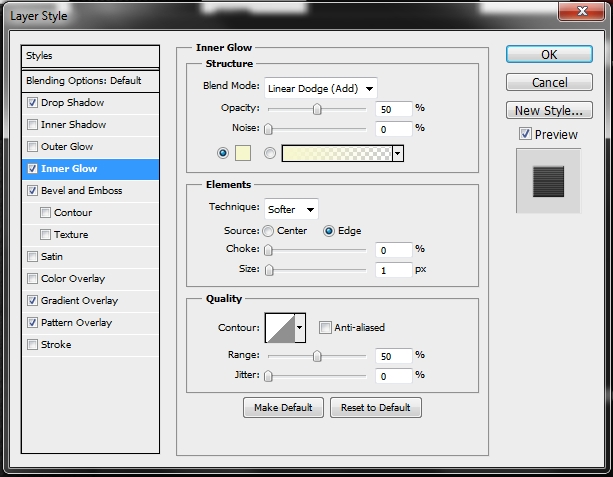
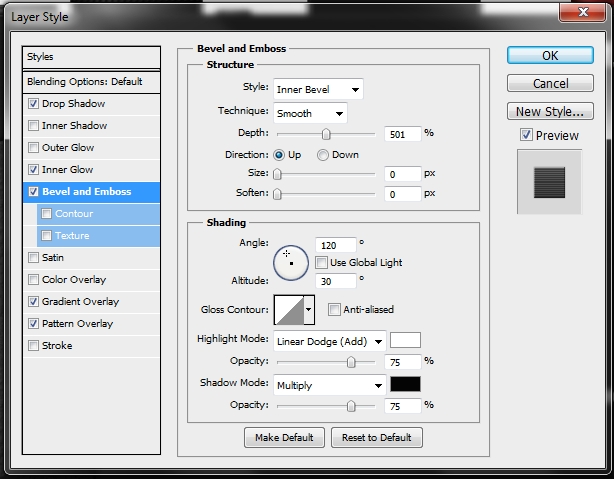
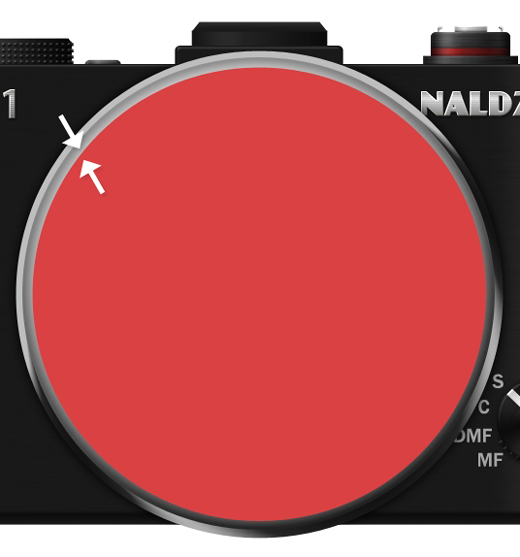
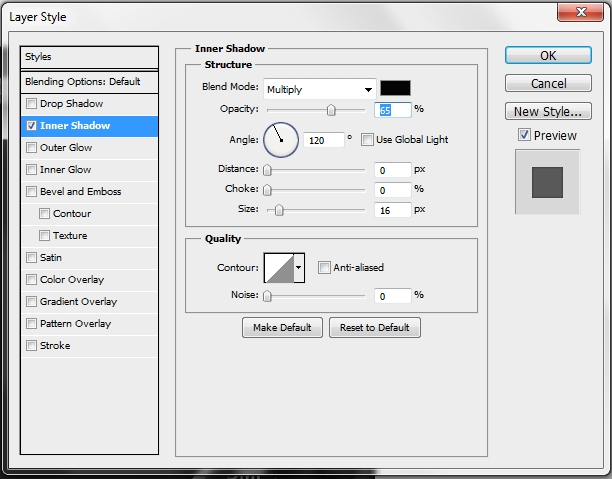
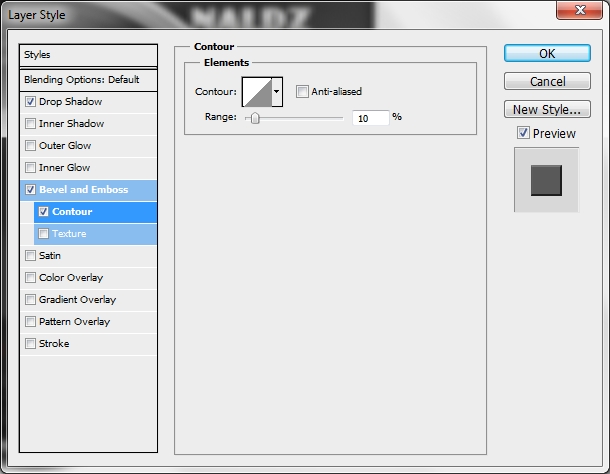
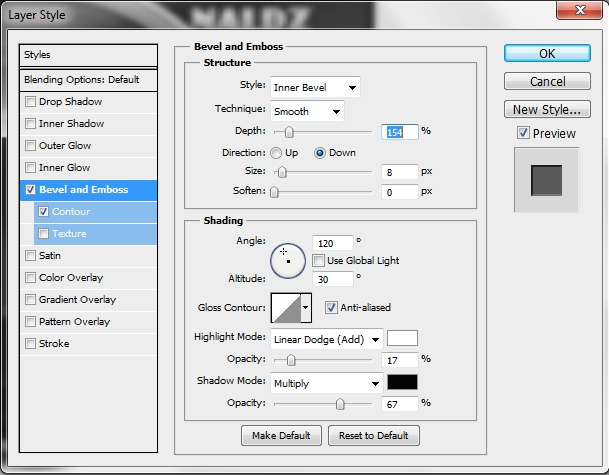
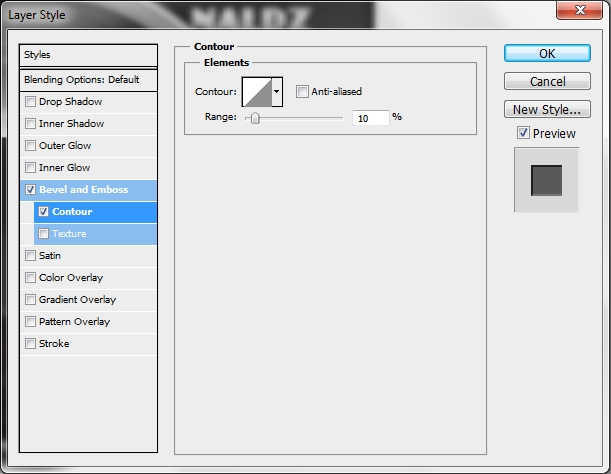
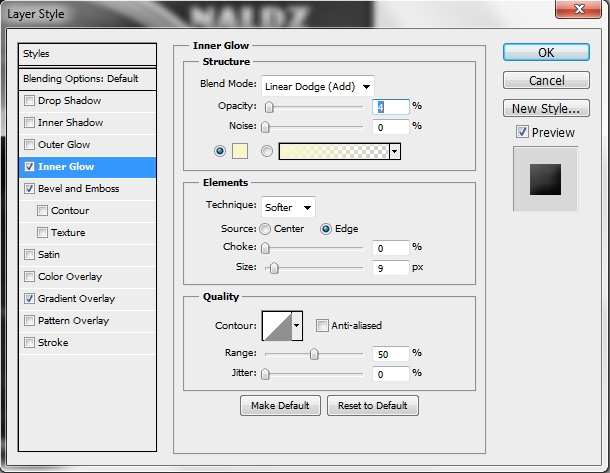
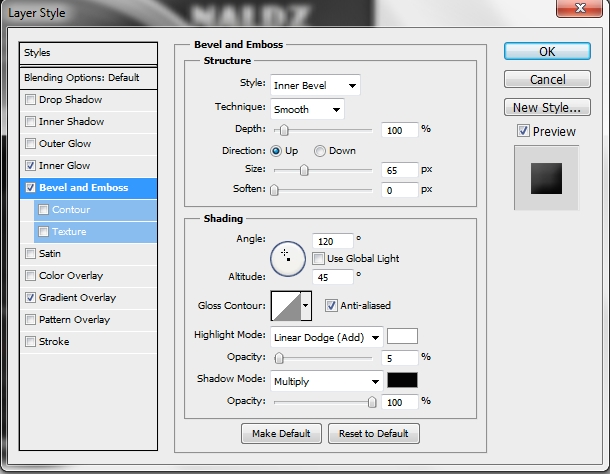
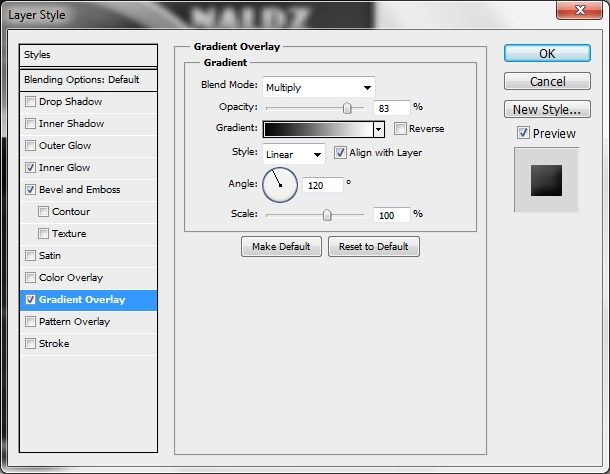
Merge all the layers you created in Steps 1-4 and name the new one whatever you want (eg. Base Outline). Create a new layer, pick the Pen Tool (P) and draw a shape like the one shown on the image below. Paint the selection once again with #a1a1a1. Then hold Alt and Left Click right between the “Base Outline” layer and the one created in this Step to turn this new layer into a Clipping Mask. Name it “Grip”.
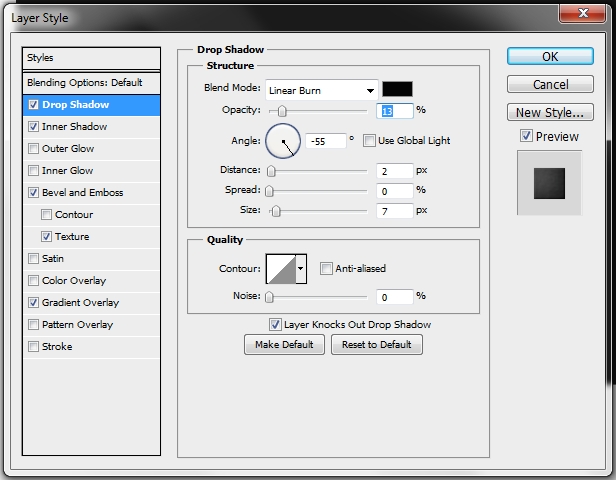
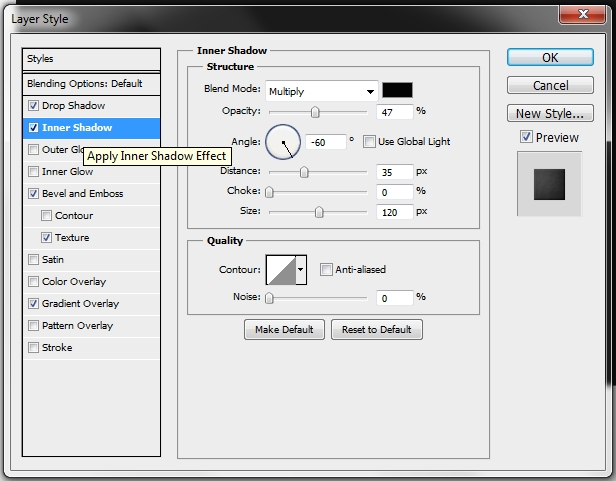
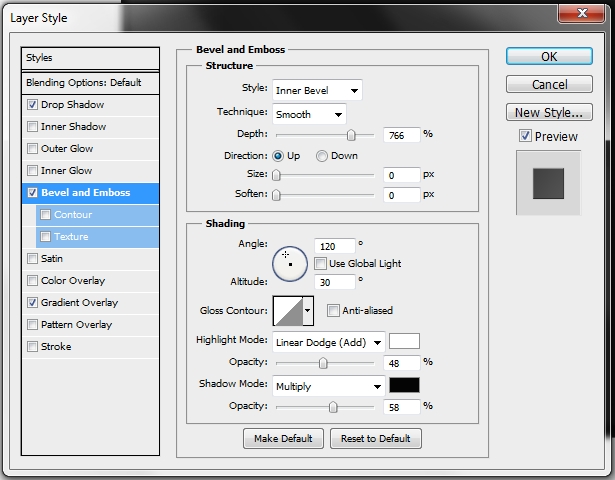
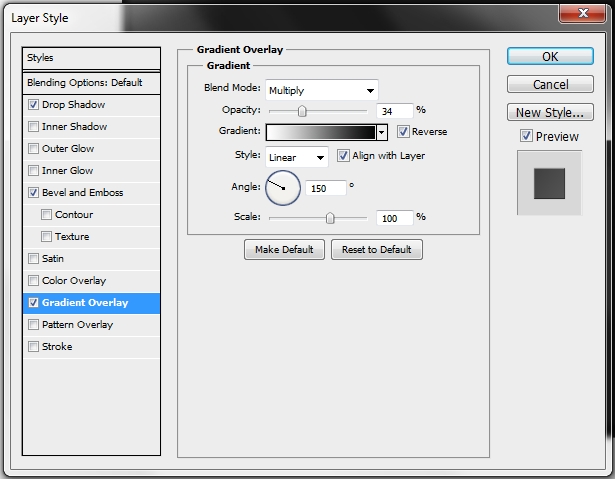
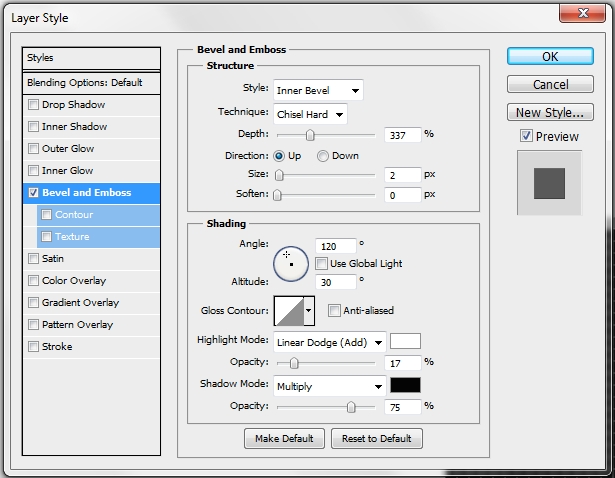
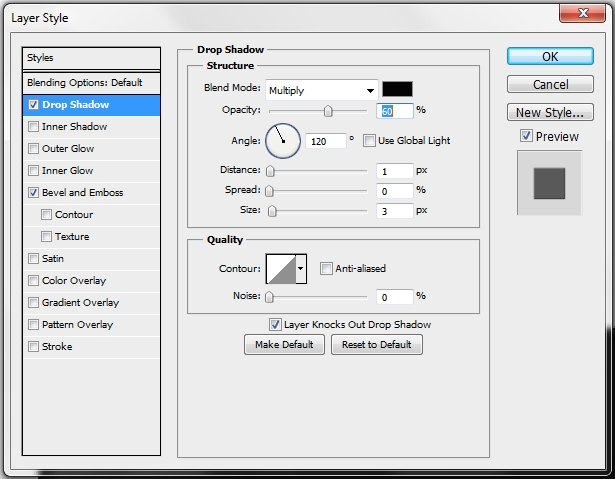
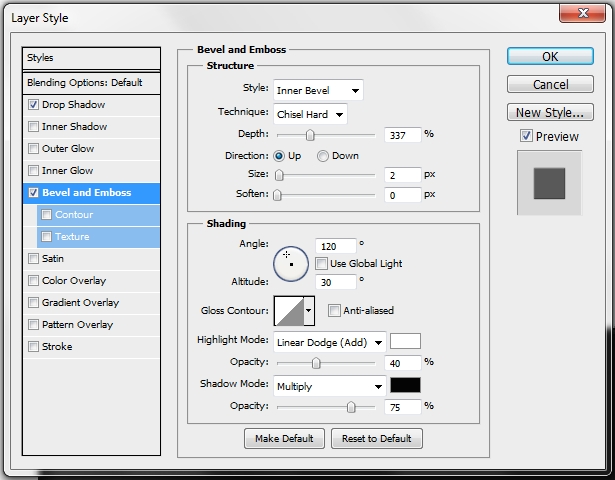
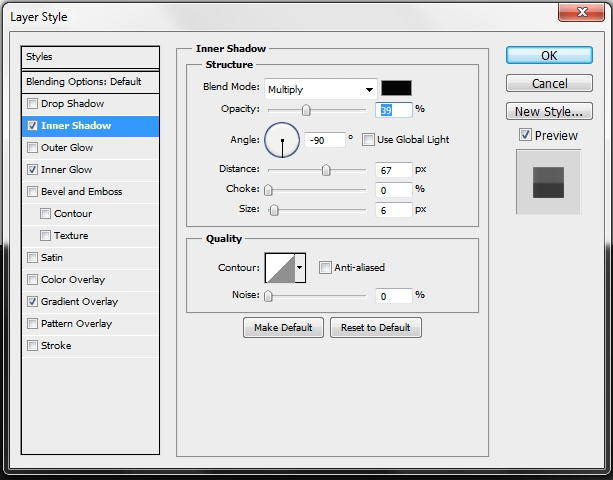
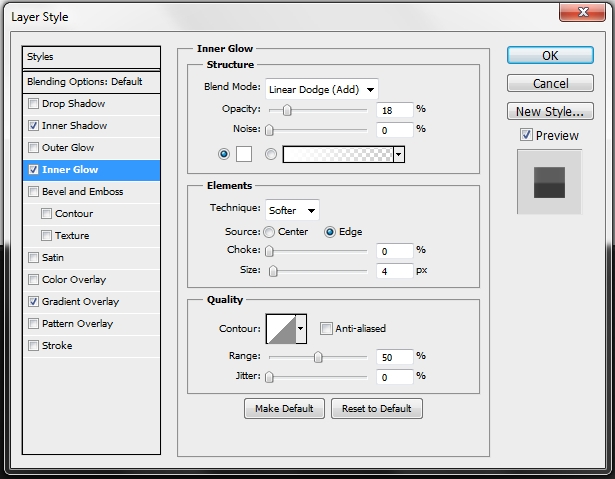
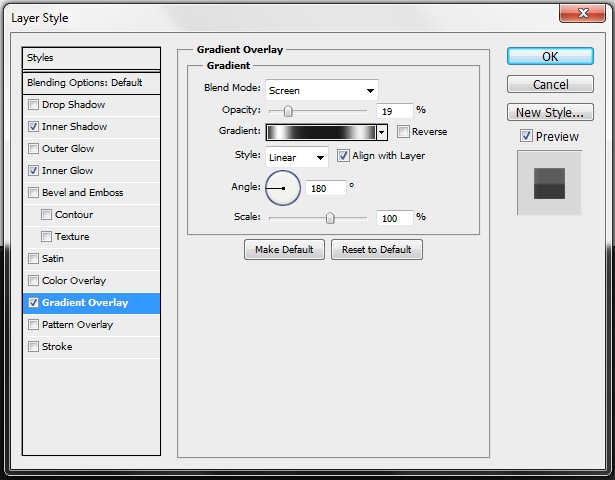
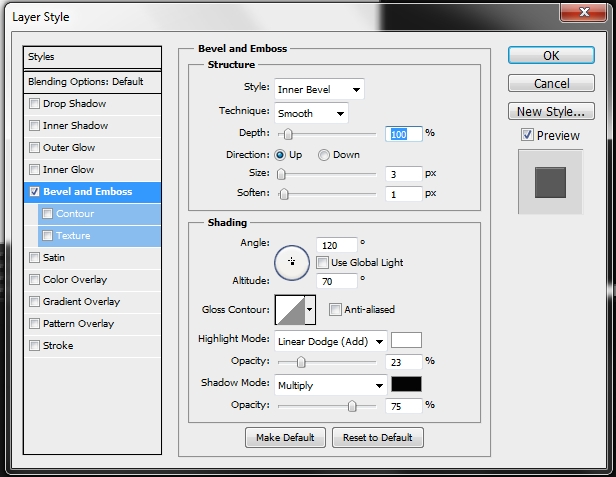
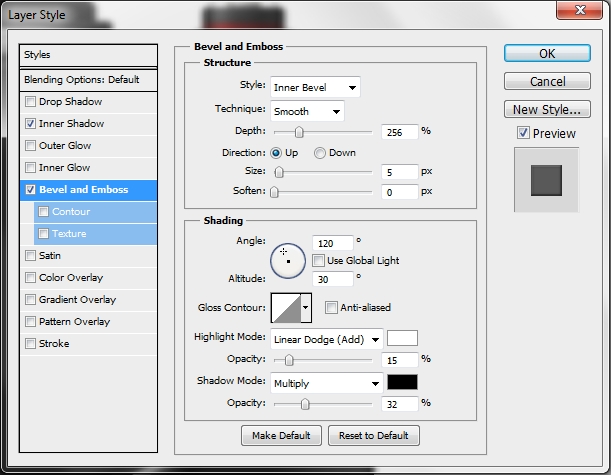
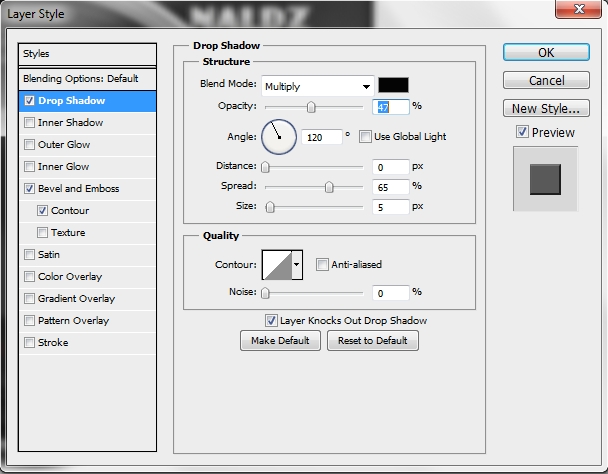
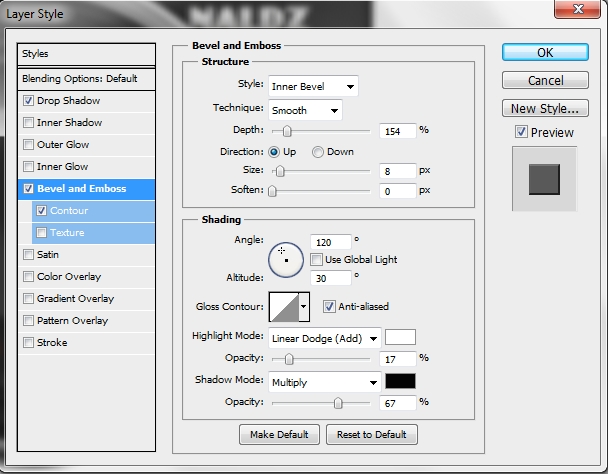
Next add the following styles
Step 6
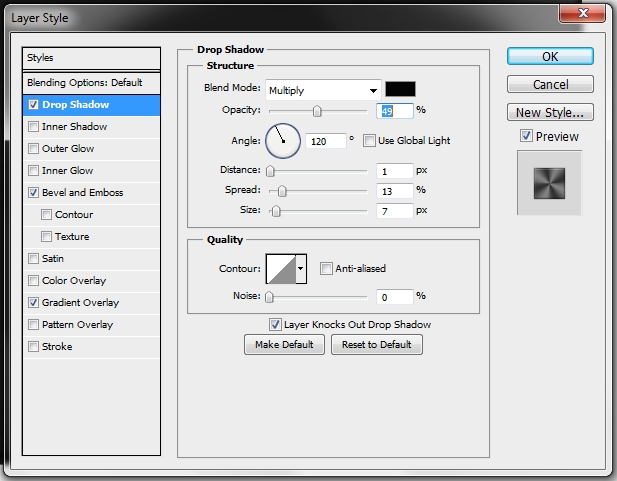
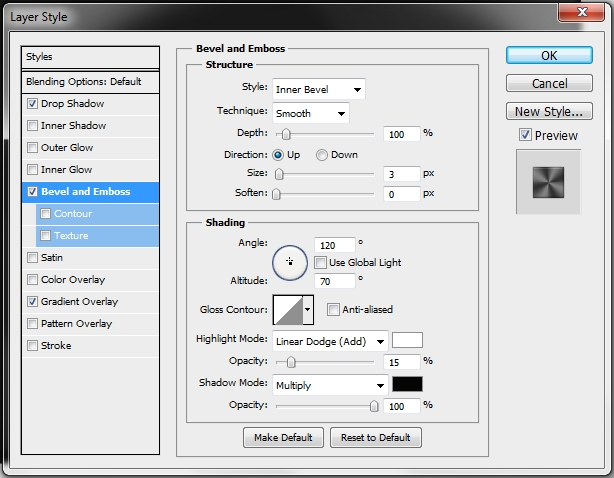
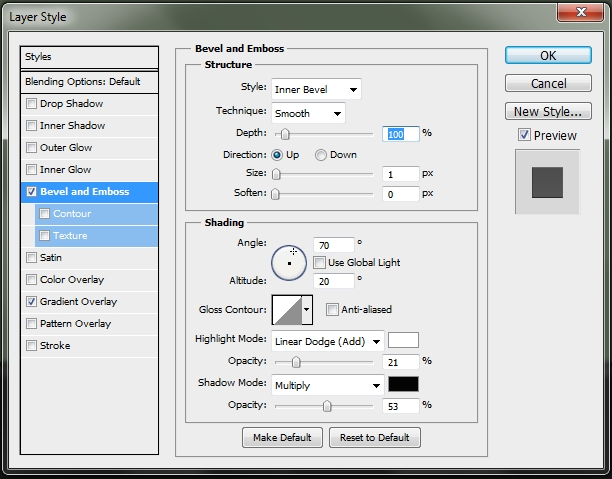
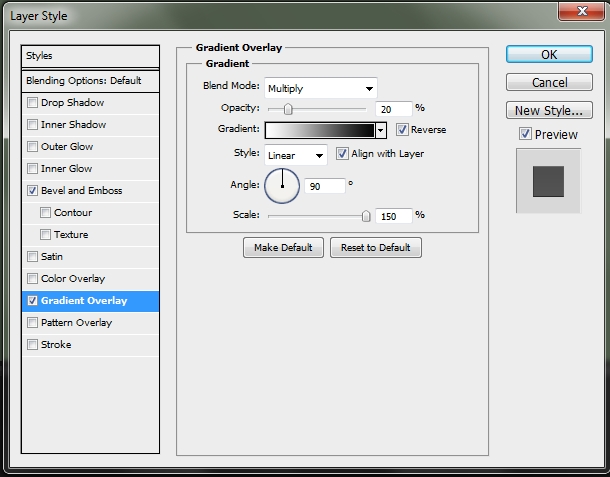
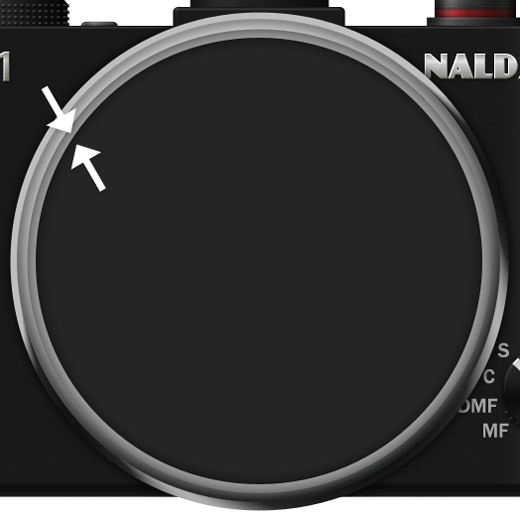
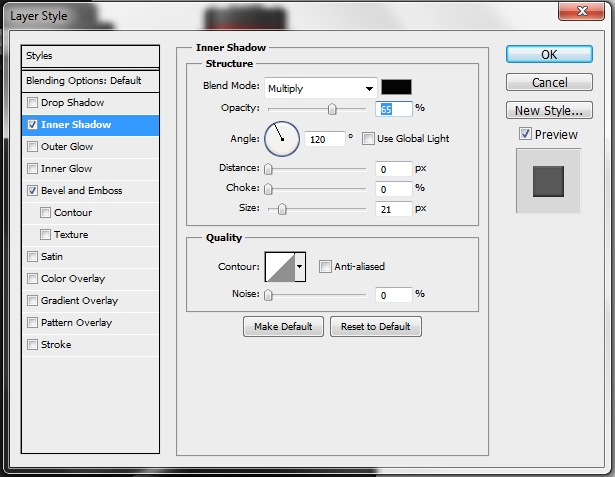
Duplicate the previously created shape and apply this style.
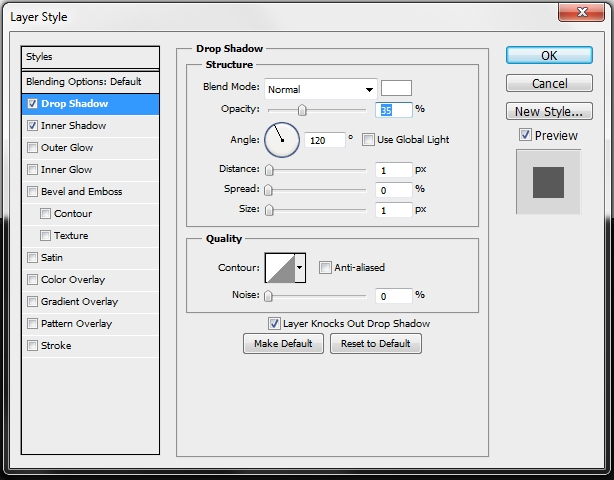
Step 7
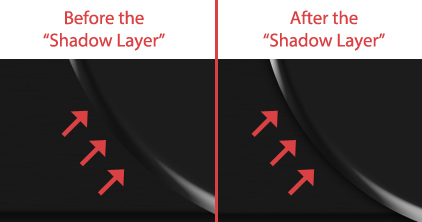
Create a new layer and using the Rectangular Marquee Tool (M) and draw a selection like the one below.
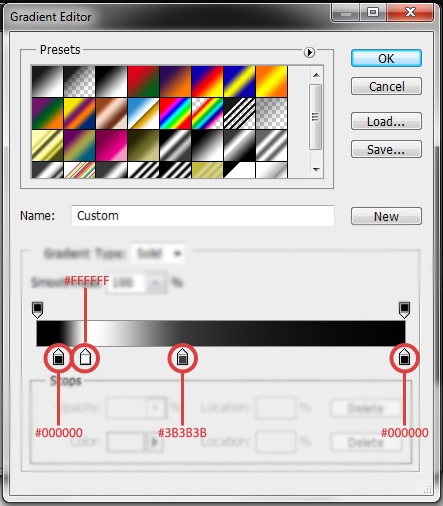
Paint it any color and turn its Fill down to 0%. Select the “Base Outline’s” pixels (Ctrl / Cmd + Left Click on the layer’s thumbnail), press Shift+Ctrl/Cmd+I and then hit Delete. Now simply apply this style.
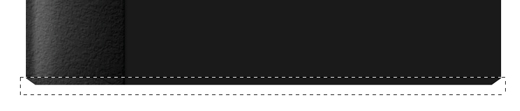
Finally, pick the Blur Tool, set Strength to something around 40-50% and “paint” over the upper edge.

Step 8
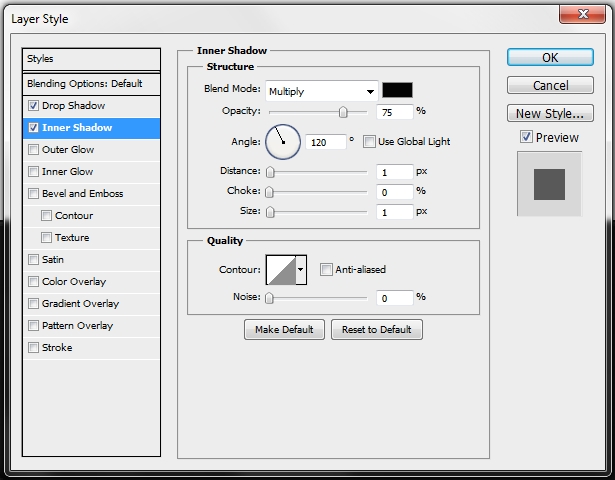
Repeat the previous Step, only this time select the other part of the “Base Outline”.
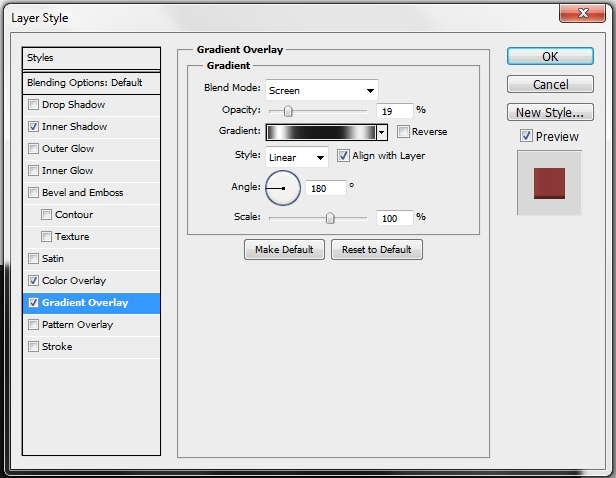
Once again paint it with a random color, change its Fill to 0% and then apply this gradient.
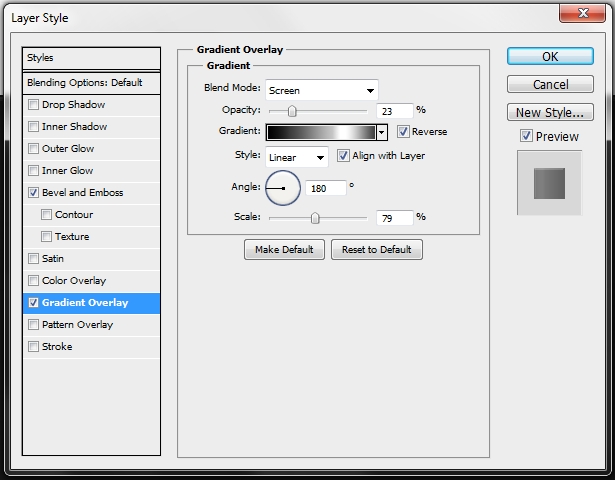
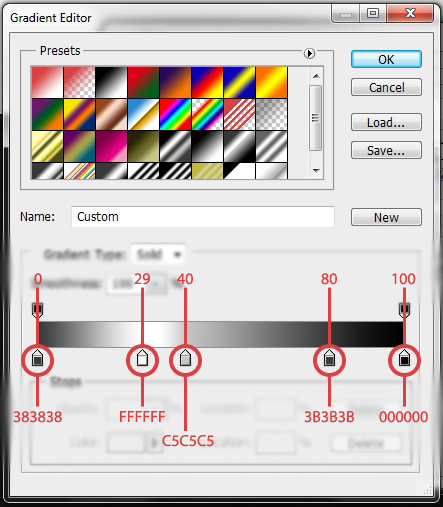
Step 9
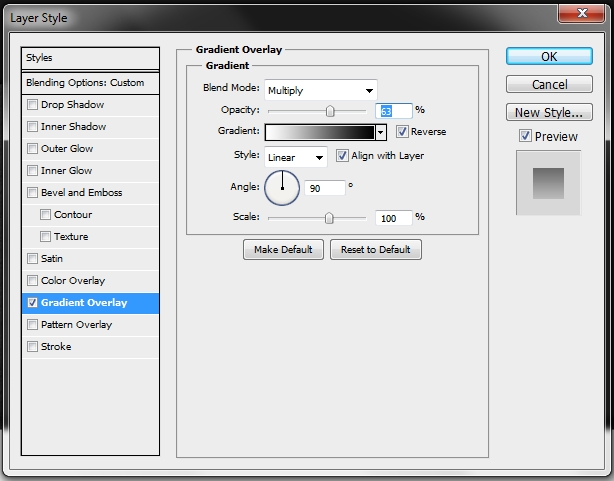
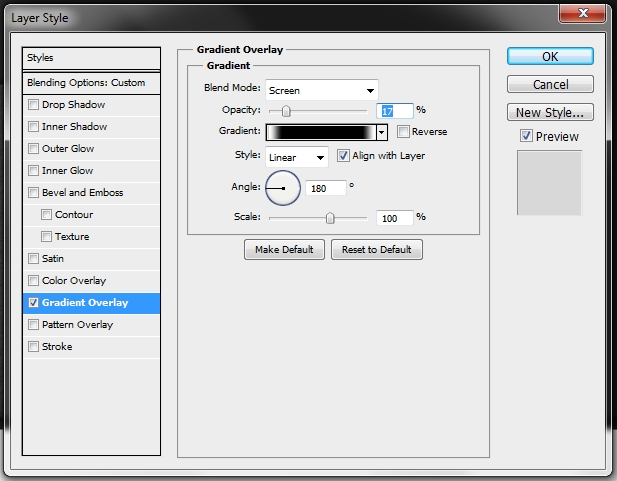
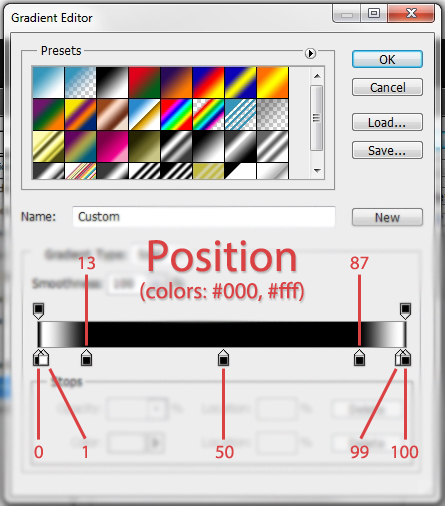
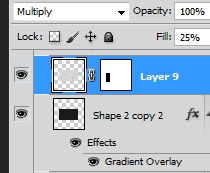
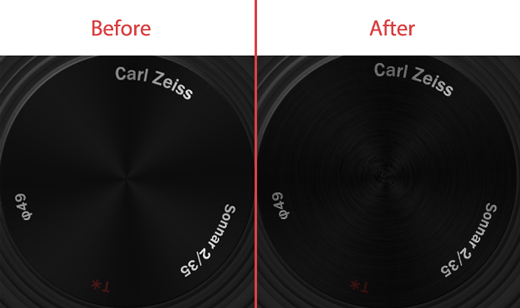
Create a new layer and select the previously created shape’s pixels (the one from Step 8). Set the foreground color to #ffffff (white) and the background color to #000000 (black). Paint the selection with white and then go Filter>Pixelate>Mezzotint. Next go Filter>Blur>Motion Blur. Set the Distance to something around 30-50 px; whatever works best for you. Change the Blend Mode to Multiply and turn down Fill to 25%. This will give a metallic look to the camera.
Click on the “Add a Layer Mask” button on the bottom of the Layers Stack and then select “Grip’s” pixels. Paint the selection black to hide it.
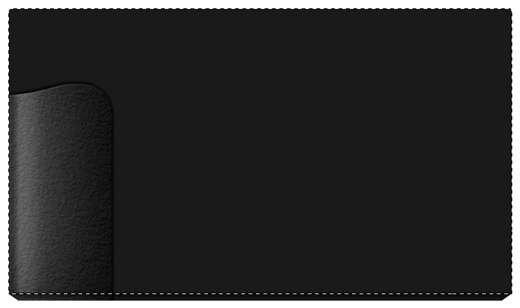
Step 10
Duplicate the shape you just created, turn its Fill to 0% and apply this style.
Group all the layer you created in Steps 1-10 and name the group “Base”.
Step 11
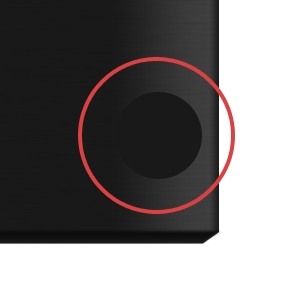
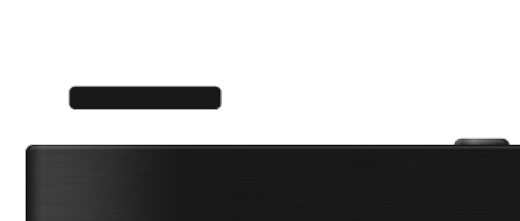
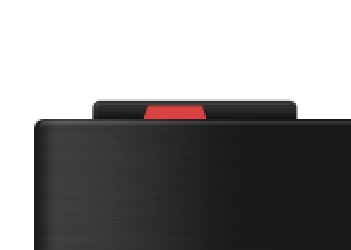
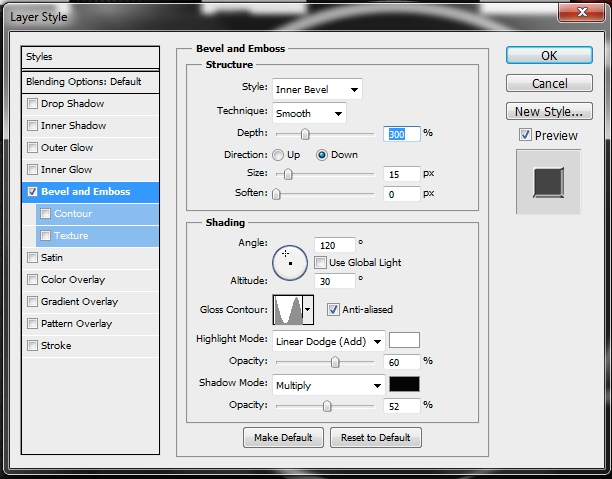
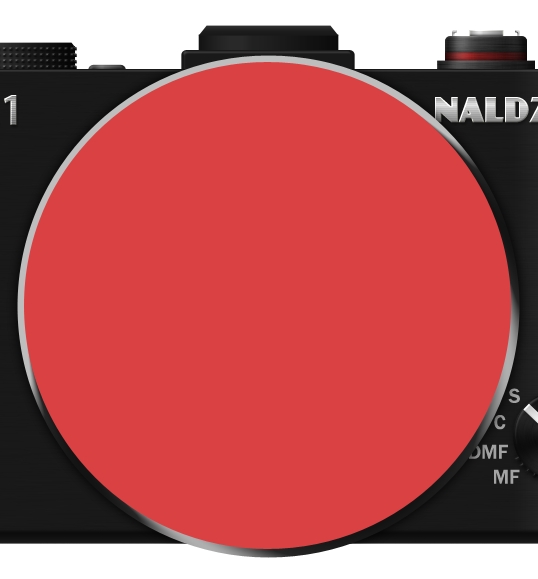
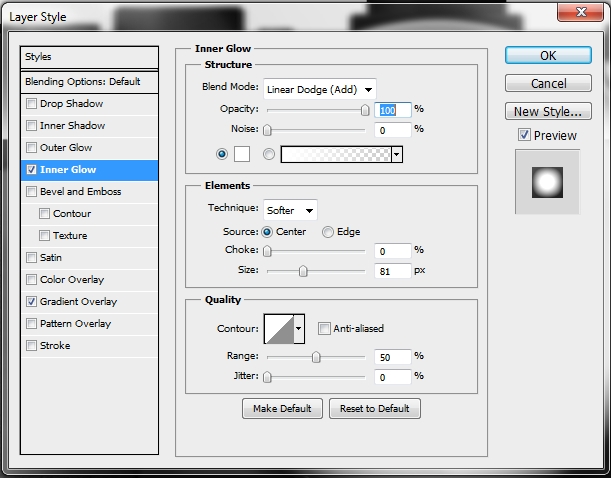
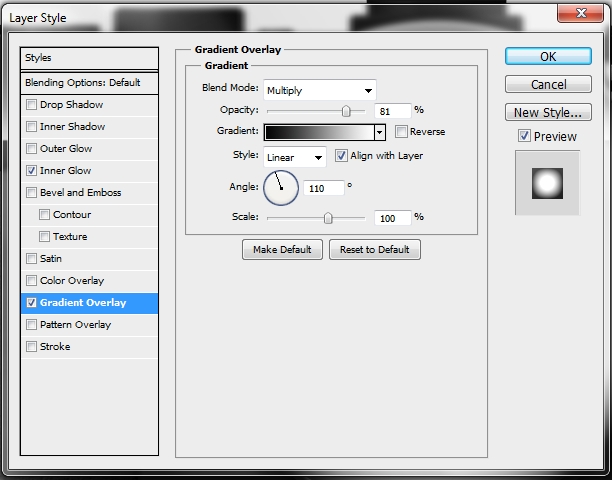
Now that you’ve created the basic shape, it’s time to decorate it with some buttons and switches. Create a new layer and pick the Ellipse Tool (U). Holding Shift draw a perfect circle. Use #191919 as your color. Place the circle near the right edge of the camera. Then apply the following styles.
Step 12
Select the Rectangle Tool (U) and draw a narrow rectangle. Change its color to #ffffff (white) and place it diagonally on your switch. Next apply these styles.
Turn this layer into a Clipping Mask.
Step 13
Create a new layer, select your switch’es (Step 11) pixels and paint it white. Make sure the background color is set to #000000 (black) and then go Filter>Pixelate>Mezzotint and next Filter>Blur>Radial Blur. Set the Amount to something around 30-40, the Method to Spin and Quality to Best. Then simply change the layer’s Blend Mode to Color Burn and the Fill to 4-10%.
Finally add some text (Type Tool; T), to decorate the switch. The font I used is Franklin Gothic Medium (size 4,5 pt), the color is #ffffff (white) and the Opacity 60%.
Step 14
Now we’ll add some details. Create a new layer, place it right before the circle you created in Step 11 in the Layers Stack and draw a very small rectangle using the Rectangle Tool (U). Use #191919 to fill the shape. Then go Edit>Transform Path>Perspective and narrow the upper edges of the rectangle so that it looks like a trapeze.
Step 15
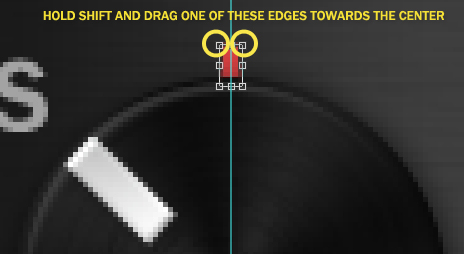
Now go Edit>Transform Path>Rotate. Hold Alt and drag the shape’s anchor point to the center of your switch (it’s a good idea to draw some guides).
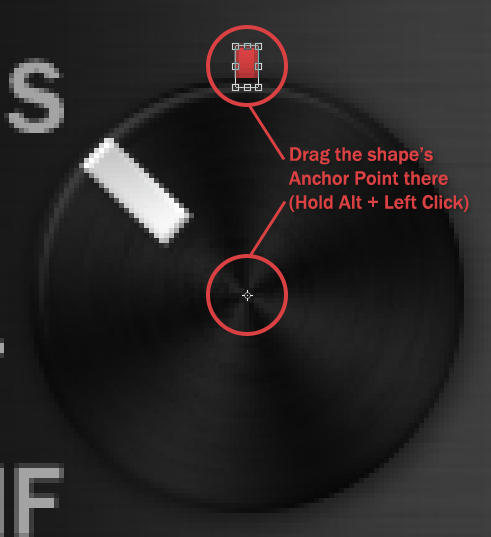
Then change the Rotation’s value to 5-10 (it depends on the size of your shape) and hit Enter.

Step 16
Duplicate the small rectangle as many times as you want but remember to press Ctrl/Cmd+Shift+T (Transform again) each time to rotate the new copy.
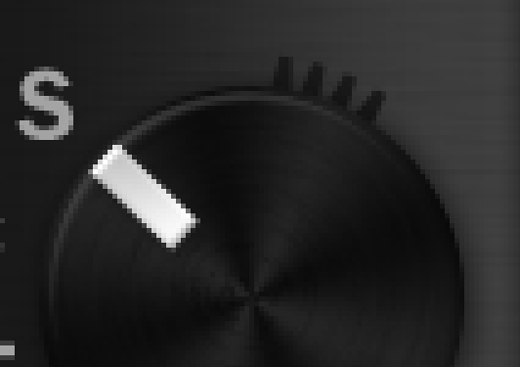
Once you’ve done it, merge all these layers created in Step 14-16 and apply these styles.
Step 17
Group all the layers created in Steps 11-16 and name it “Switch 1”. Create a new layer and place it before the “Base” group in the layers stack. Select the Rectangle Tool (U), set the Radius to 5 px, change the color to #252525 and draw a small rectangle. After doing this, apply these styles.
Then place it wherever you want.
Group this layer (Ctrl/Cmd+G) and name it “Simple button”.
Step 18
It’s time for another switch. Create a new layer and place it again before the “Base” group. Pick the Rounded Rectangle Tool (U); Radius 5 px – color #111111, and draw a much larger rectangle than the one in the previous step.
Apply these styles.
Place it accordingly to the image below.
Step 19
Draw a small rectangle (color #111111) using the Rectangle Tool (U). Then go Edit>Transform Path>Perspective and turn it into a trapeze.
Then apply these styles.
Step 20
Create a new layer, select the Brush Tool (B), pick a random hard round brush, select #9f9f9f as your foreground color, hit F5 to open the brush panel and apply these parameters.
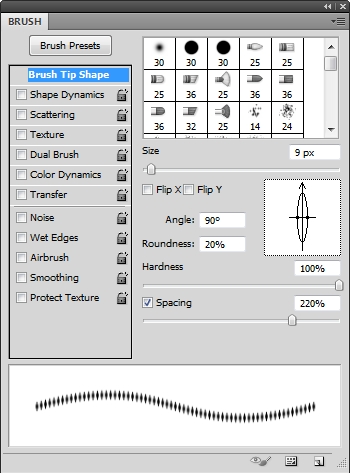
Then holding Shift draw some lines next to the trapeze that you created in Step 19.
Now simply apply these styles.
Step 21
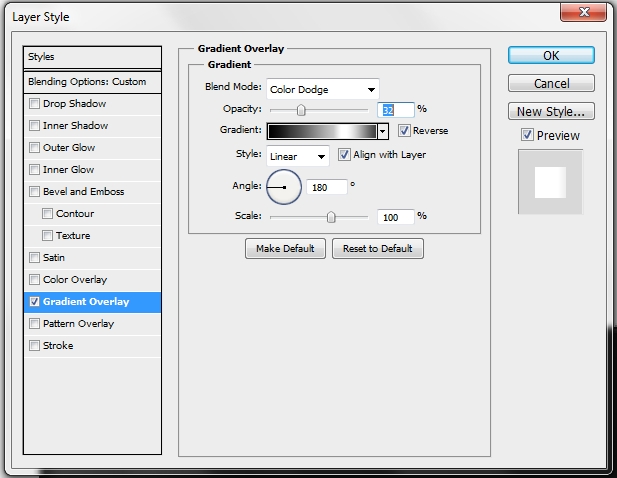
Create a new layer and select the pixels of the rounded rectangle created in Step 18. Paint the selection with a random color, turn down the Fill to 0% and apply this style.
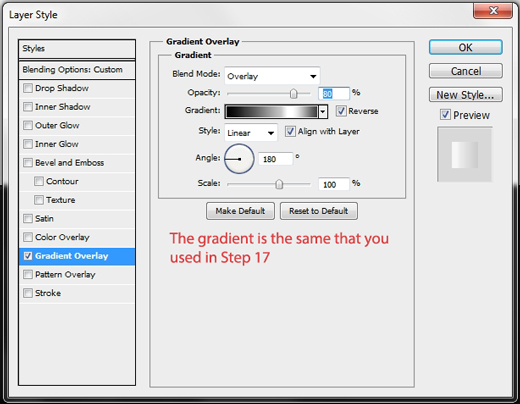
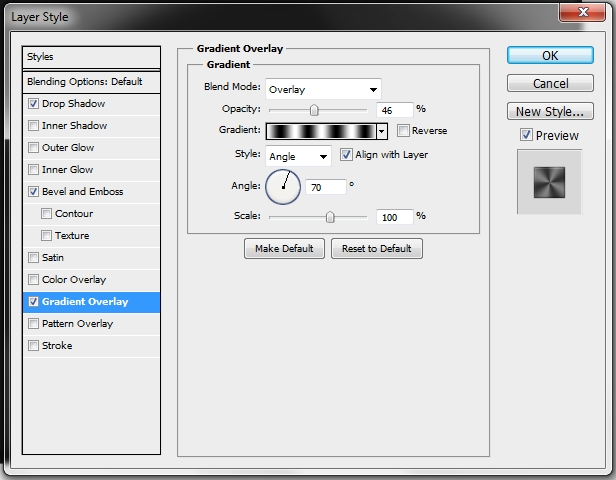
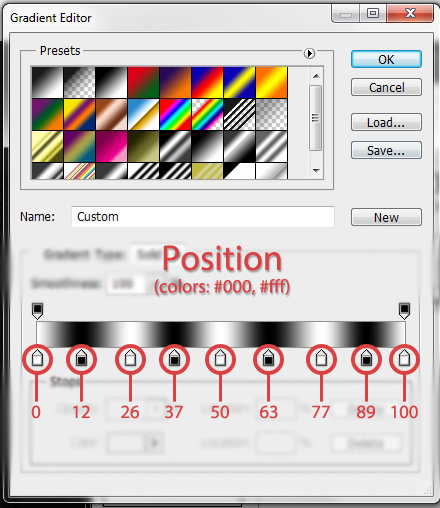
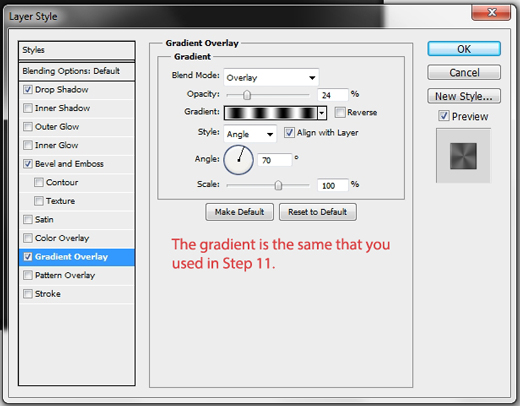
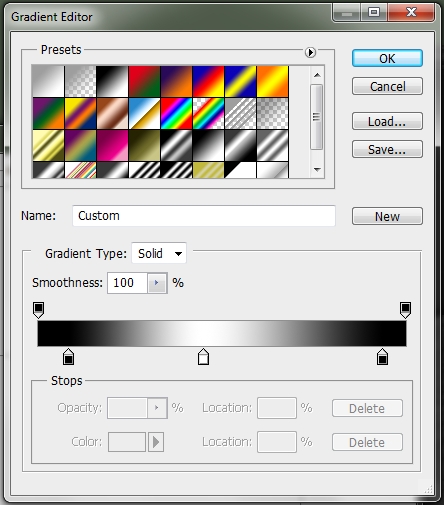
• Save this gradient as you’ll be using it quite a lot later.
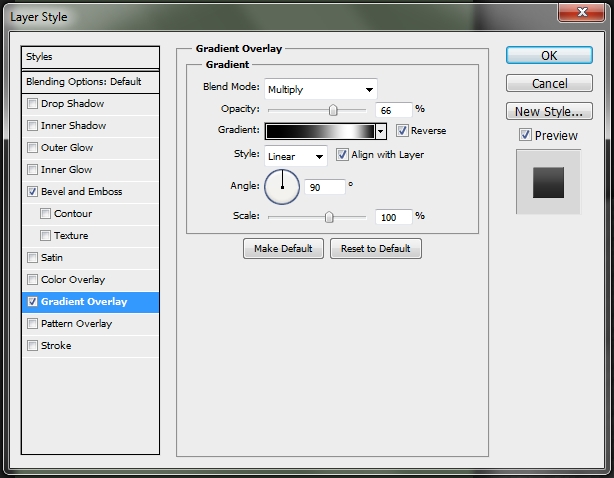
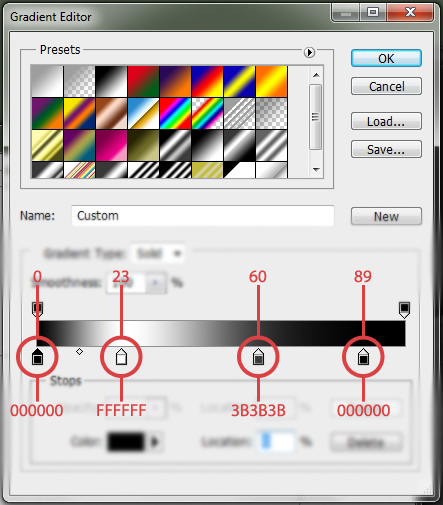
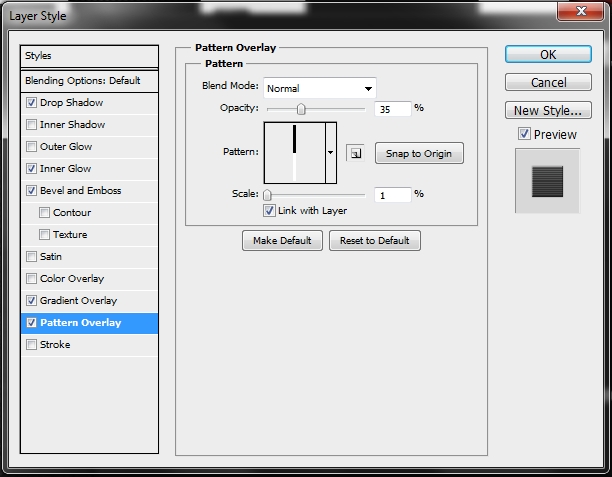
Step 22
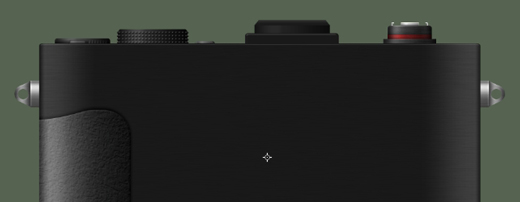
Group the layers created in Steps 18-21 and name the group “Switch 2”. At this stage, your design should look like this.
Step 23
We need to create one last switch. So, create a new layer (again under the “Base” group) and pick the Rectangle Tool (U). Draw a wide rectangle and change its color to 191919. Then apply the following style.
Step 24
Duplicate this shape and transform its height. Then go Edit>Transform Path>Perspective and turn the new rectangle into a trapeze.
Step 25
Create a new layer and using the Rectangle Tool (U) draw a tiny rectangle. Use Distort (Edit>Transform Path>Distort) to transform the upper left corner.
Apply this style.
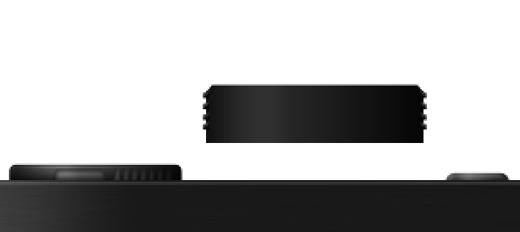
Step 26
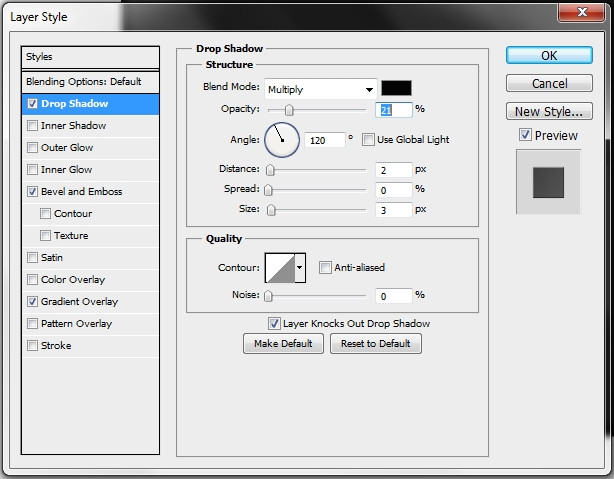
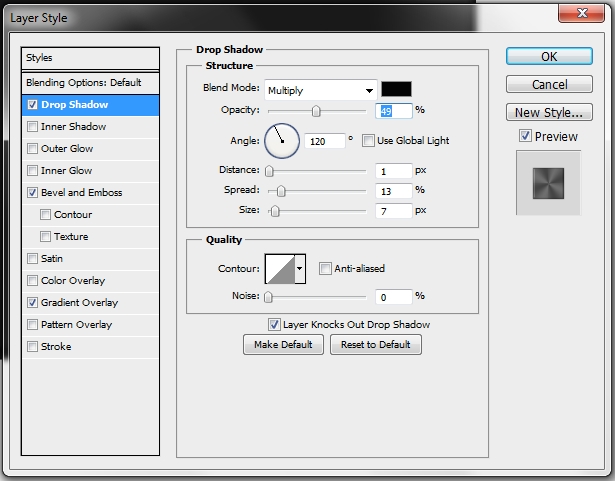
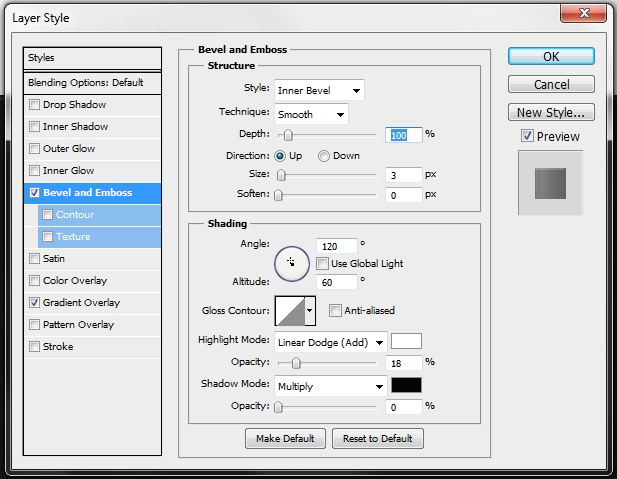
Duplicate this layer three times and move the copies downwards. Leave a small gap between the shapes. Then duplicate these four layers and go Edit>Transform Path>Flip Horizontal and move the whole selection to the right edge. Don’t forget to change the Angle in the Bevel and Emboss style from 120° to 60°.
Step 27
Create a new layer and pick the Brush Tool (U). Select a random hard round brush and hit F5 to open the brush panel. Apply these parametres.
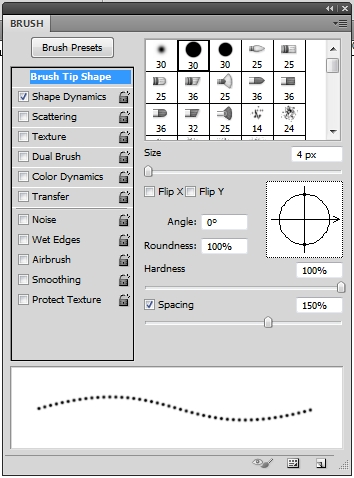
• NOTE: Ignore the Shape Dynamics; uncheck the box.
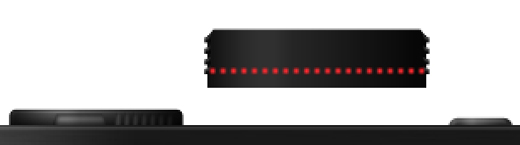
Pick #1b1b1b as your foreground color and holding Shift draw a straight line. Then apply the following styles.
Step 28
Duplicate this layer three times and move the copies upwards.
Step 29
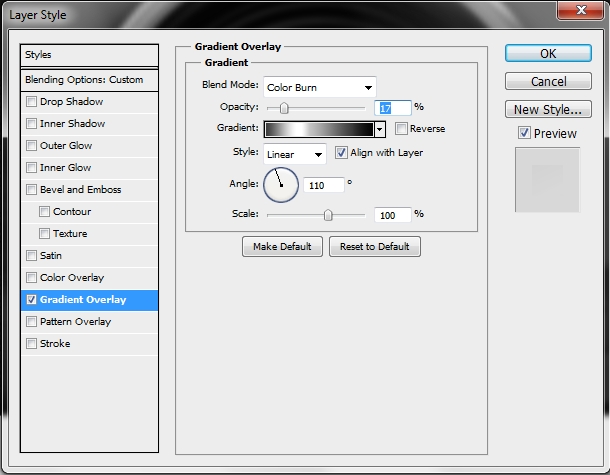
Create a new layer and select the pixels of the shapes created in Steps 23 and 24. Paint the selection with any color, turn the Fill to 0% and apply this style.
Group all the layers created in Steps 23-29 and name the group “Switch 3”.
Step 30
Create a new layer and grab the Rounded Rectangle Tool (U); Radius 5 px. Draw a rectangle, change its color to #191919 and apply the following styles.
Step 31
Create a new layer and pick the Rectangle Tool (U). Use #191919 as your color. Draw a rectangle and apply these styles.
Step 32
Create a new layer and draw a rectangle using the Rectangle Tool (U). Make it longer than the one created in Step 31. Decorate the shape with these styles.
Step 33
Create a new layer and select the pixels (Ctrl/Cmd + Left Click on layer’s thumbnail) of all the layers created in Steps 30-32. Paint the selection with white color (#ffffff) and turn the Fill to 0%. Apply this style.
Step 34
Duplicate this layer and change the Blend Mode to Soft Ligh. Set the Fill to 30%. Select this layer’s pixels and go Filter>Pixelate>Mezzotint and then Filter>Blur>Motion Blur. Set the distance from 20-40 px (whatever works good for you).
Step 35
Grab the Rectangle Tool (U) and draw a small rectangle. Set the color to #e1e1e1 and apply these styles. *Place the layer before the one created in Step 30.

Step 36
Create a new layer and select the Pen Tool (P) and draw a path like the one on the image below.
Paint the selection with #e1e1e1 and apply these styles.
Finally duplicate this layer, go Edit>Transform Path>Flip Horizontal and place it near the right edge. Group all the layers created in Steps 30-37 and name the group “Flash” (or anything you want).
Step 37
Create a new layer and place it again before the “Base” group in the layers stack. Grab the Rectangle Tool (U) and draw a rectangle like the one on the image below. Change its color to #191919.
Then apply this style.
Step 38
Draw another rectangle and place it right above the one created in the previous step. Go Edit>Transform Path>Perspective and turn it into a trapeze. Next, apply the following gradient (white to transparent).

Step 39
Pick the Rounded Rectangle Tool (U), set the Radius to 5 px and draw a rectangle bigger than the ones created before.
Apply this style.
Finally group the layers created in Steps 37-39.
Step 40
Create a new layer and place it before the “Base” group (it’s the last one I promise). To create the next shape there are two techniques; either use the Pen Tool (P) or draw a circle (Ellipse Tool – U) and a rectangle (Rectangle Tool – U). Distort the Rectangle’s right edges (Edit>Transform Path>Perspective) and merge the two shapes. Select #9e9e9e as the color of the shape.
Then apply the following styles.
Click on the Add Layer Mask and draw a circle inside the shape using the Elliptical Marquee Tool (M). Paint the selection black to hide it.
Step 41
Create a new layer and pick the Rectangle Tool (U). Select #e1e1e1 as the foreground color, draw a rectangle and place it next to the one created in the previous step.
Then apply these styles.
Step 42
Duplicate those two layers and place them on the right side.
Group all these layers and name the group “Side metal shapes” or something.
Step 43
Create a new file and choose the following parametres.
Draw a rectangle using the Rectangle Tool (U). Make it half the size of your canvas. Merge the layers (background + rectangle) and then go Edit>Define Pattern.
Step 44
Pick the Type Tool (T) and write anything you want. The font I used is DayPosterBlack (7 pt). Then apply these styles.

Add some more text to decorate the camera. Use the same styles.
Group the text layers and name the group “Metallic texts” or anything else you want.
Step 45
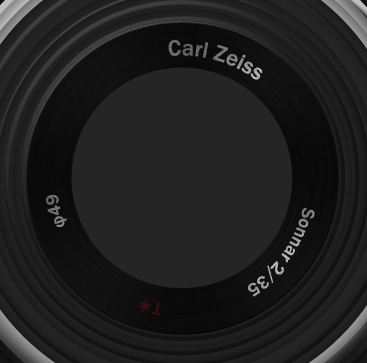
There’s one last thing to create. The lens. Select #252525 as your foreground color and grab the Ellipse Tool (U). Hold Shift and draw a big circle.
Then apply this style.
Step 46
Duplicate this layer and go Filter>Blur>Gaussian Blur and set the Radius to 3-4 px. The idea is to create the shadow of the lens. Place this layer under the one created in the previous step.
Step 47
Create a new layer and using the Ellipse Tool (U), draw a circle that fits perfectly inside the one created in Step 45.
Change its color to #959595 and apply these styles.
Step 48
Duplicate this layer and clear its styles (right click on the layer>Clear Layer Style). Then scale it down a little (remember to hold Shift).
Then simply add this style.
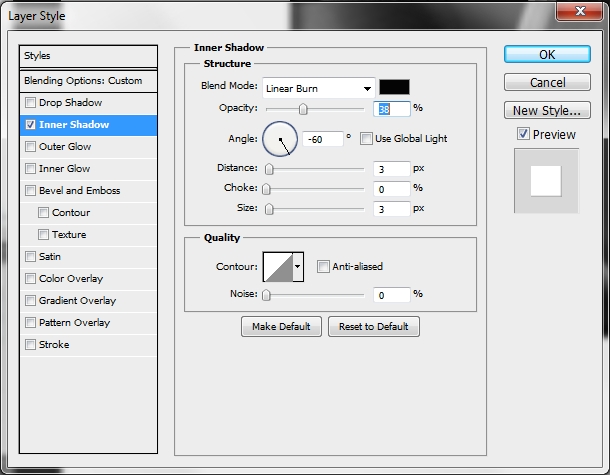
Step 49
Repeat the previous step, but change the new shape’s color to #252525. Keep the same layer style (Inner Shadow).
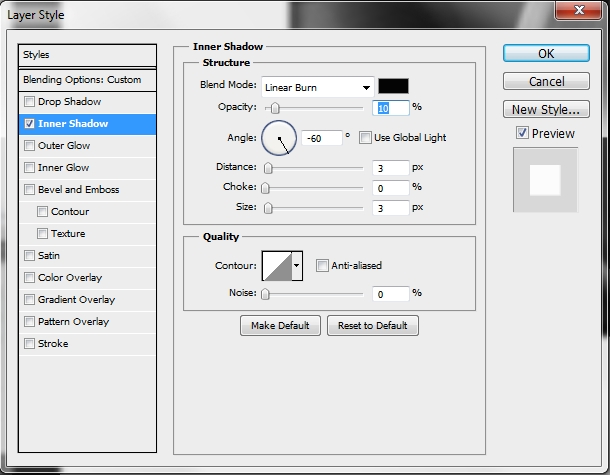
Step 50
Duplicate the shape created in the previous step and once again scale it down a bit. Then apply the following styles.

Step 51
Duplicate both the layers created in steps 49 and 50 and scale them down.
Repeat the same process twice; each time scale down the copies.
Step 52
Create a new layer and using the Ellipse Tool (U) draw a circle. Change its color to #111111.
Then apply these styles.
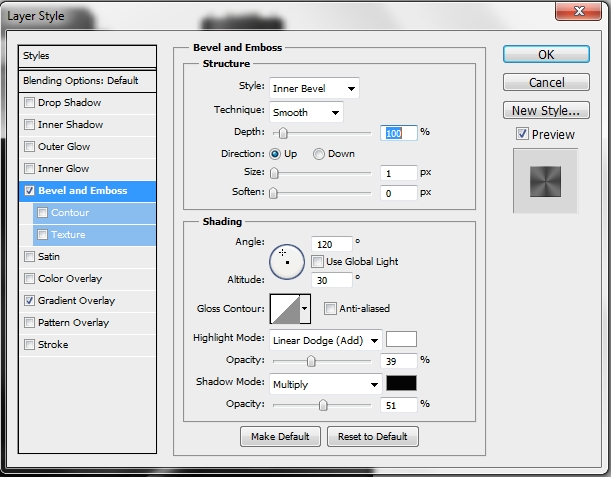
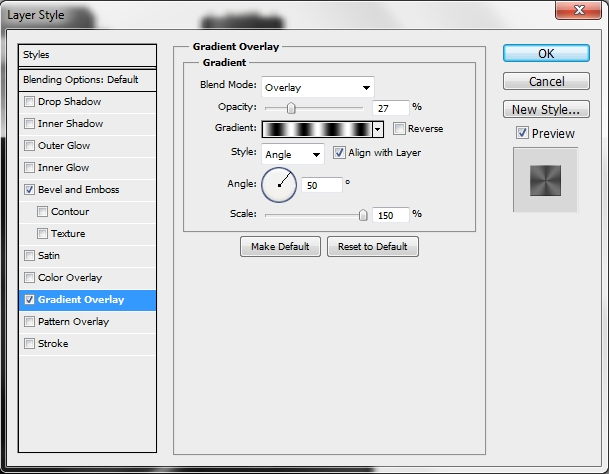
Step 53
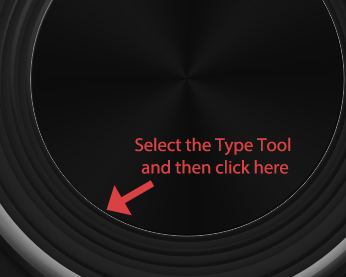
Add some text to decorate the lens. Select the layer that you created in the previous step and click on the Vector Mask thumbnail (this will show its path). Then select the Type Tool (T) and click on the very edge of the path.
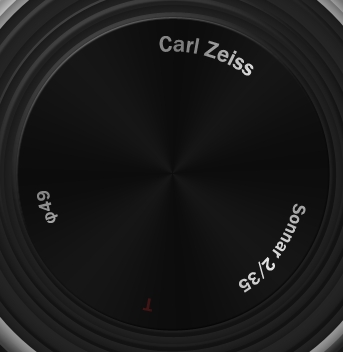
Change the Blend Mode to Color Dodge and the Fill to 90%.
Step 54
Create a new layer, select the pixels of the circle that you created in Step 52 and paint the selection white (#ffffff). Then go Filter>Pixelate>Mezzotint and after that Filter>Blur>Radial Blur. Experiment with the Amount to see what works best for you. Change the Blend Mode to Multiply and the Opacity to 70%.
Step 55
Create a new layer and grab the Ellipse Tool (U). Draw a small circle and change its color to #252525. Then simply add the following styles.
Step 56
Duplicate this layer, uncheck the Drop Shadow style and modify the Bevel and Emboss. Scale it down a little bit.
Step 57
Duplicate the previously created shape and scale it down a little bit. Then apply this gradient.

Step 58
Duplicate this shape and scale it down.
Step 59
Repeat the previous step. Modify the gradient style.

Step 60
Repeat the previous step one last time and apply the following styles.
Step 61
Create a new layer and pick the Brush Tool (B). Set your foreground color to #ffffff, select a soft round pressure brush and draw a couple of dots.
Change the Blend Mode to Color Dodge and the Opacity to 85-90%.
Step 62
Create a new layer and using the same brush and draw a bigger dot. Erase any unwanted parts.
Change the Blend Mode to Color Dodge and turn down the Opacity to 45-50%.
Step 63
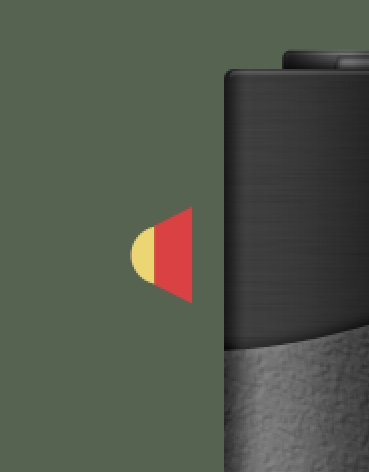
Create a new layer and pick the Custom Shape Tool (U). Select the triangle from the list. Draw a simple triangle and distort its edges (Edit>Transform Path>Distort).
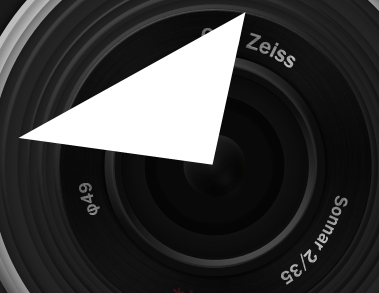
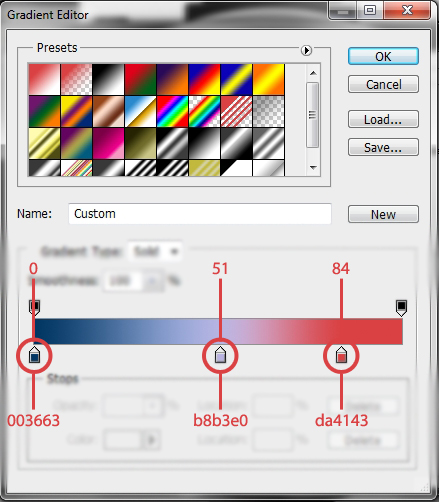
Turn Fill down to 0% and apply this gradient.
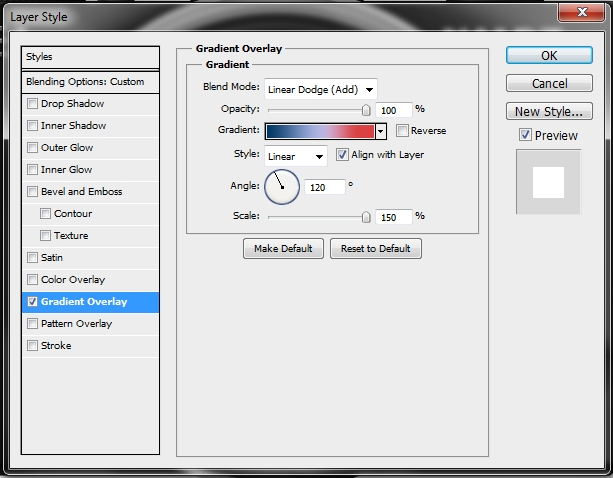
Then go Filter>Blur>Gaussian Blur and set the Radius somewhere between 6-8 px. Next, select the pixels of the shape created in Step 55, press Shift+Ctrl/Cmd+I and delete the unwanted parts.
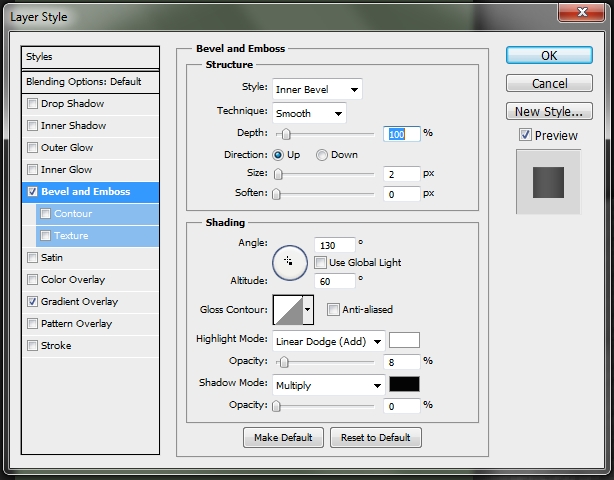
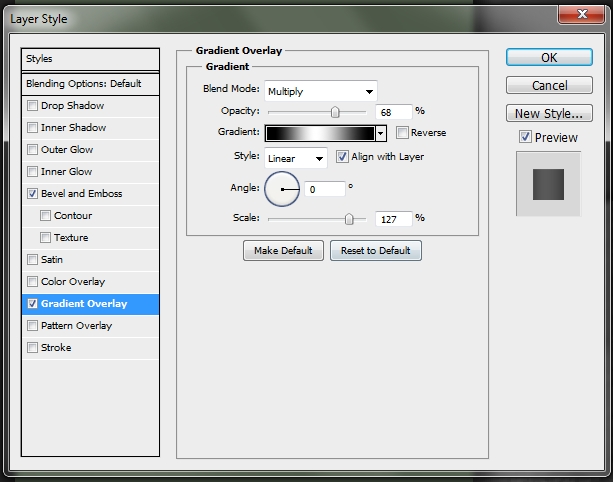
Step 64
Create a new layer and merge it with the triangle you created before. Then apply this style.
Duplicate this layer and scale it down a bit. Modify the Inner Shadow’s parametres.
Step 65
Create a new layer and select the pixels of the shape created in Step 47. Fill it with a random color and set Fill to 0%. Then apply this gradient.
Group all those layers and name the group “Lens”.
Conclusion
That’s it. You’ve just created a realistic and detailed camera icon. Feel free to modify it, add some effects etc. to make it look even better. I hope you learnt something new from this tutorial.


