
In this article we’ll show you how to create a gingerbread cookie in Photoshop from scratch.
Tutorial Details
- Program: Adobe Photoshop
- Version: CS5
- Difficulty: Beginner
- Estimated Completion Time: 30-45 minutes
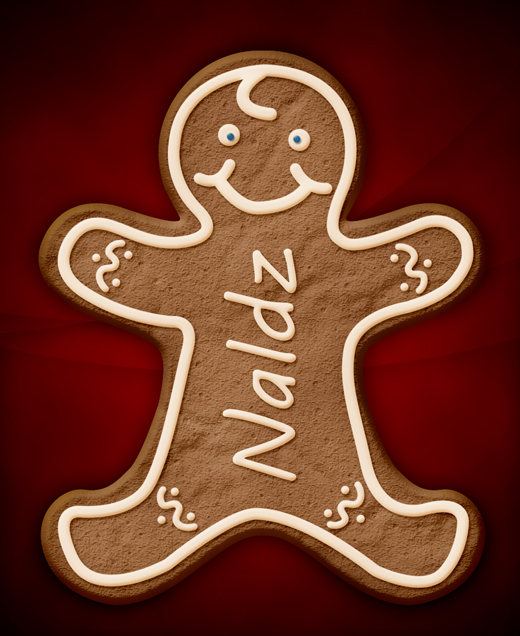
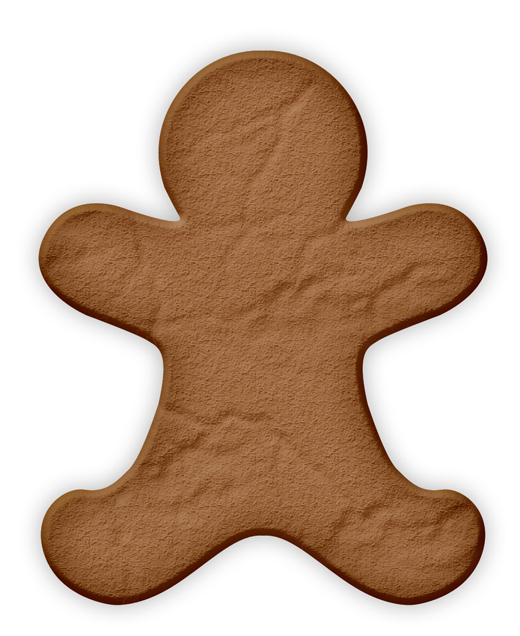
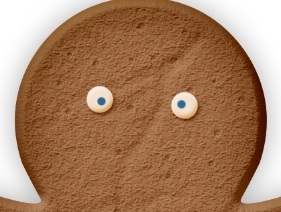
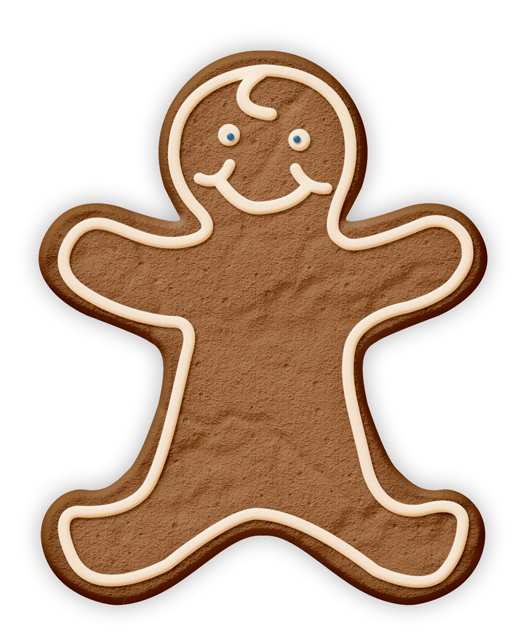
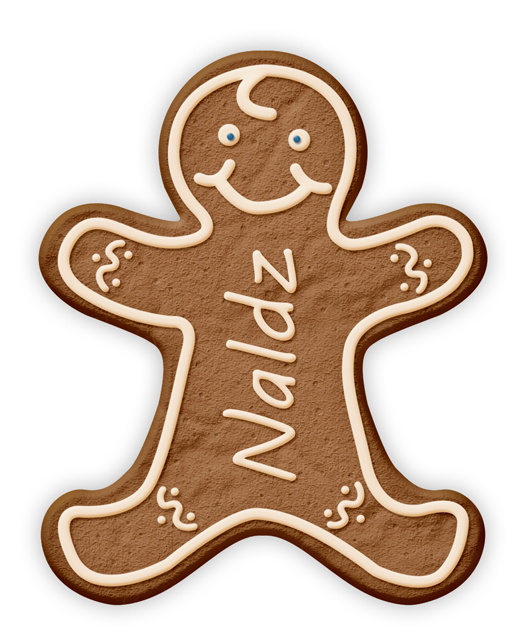
Final Result
Step 1
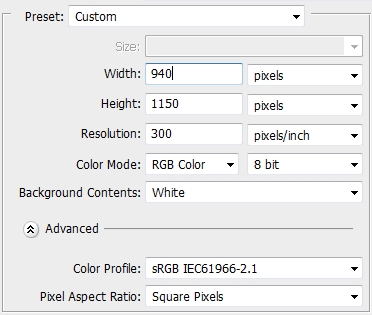
Create a new document in Photoshop.
Step 2
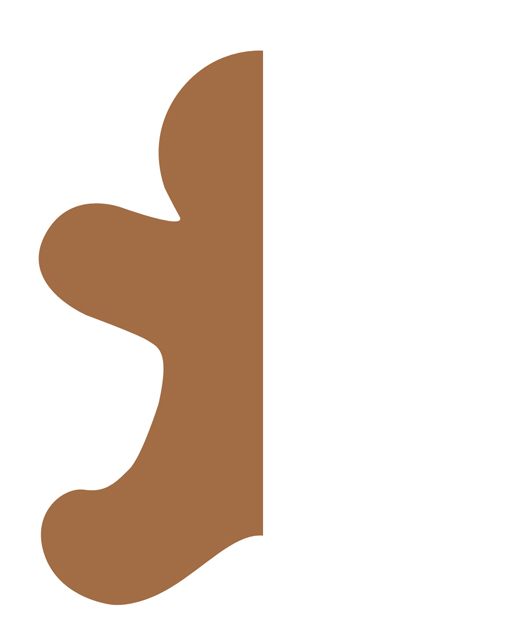
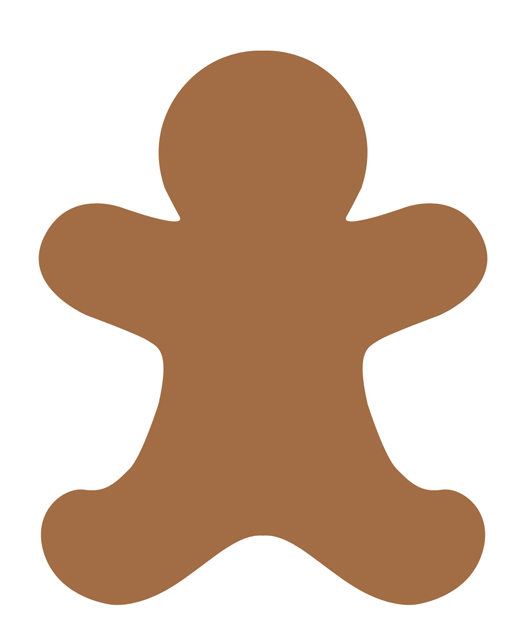
Grab the Pen Tool (P) and draw the shape of the cookie. Use an image as a reference if you want. Draw only the one half and then duplicate it and flip it horizontally. Fill the “cookie” with #a26d45 and apply the following style.
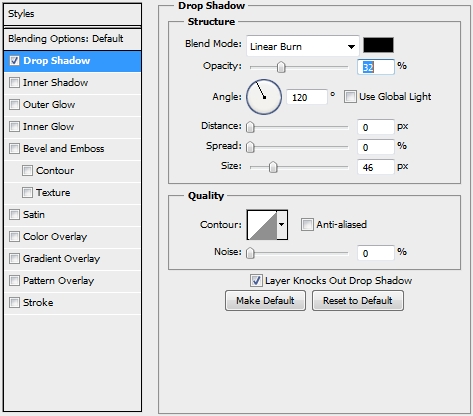
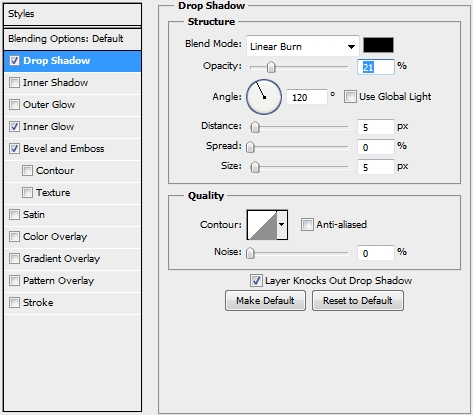
Step 3
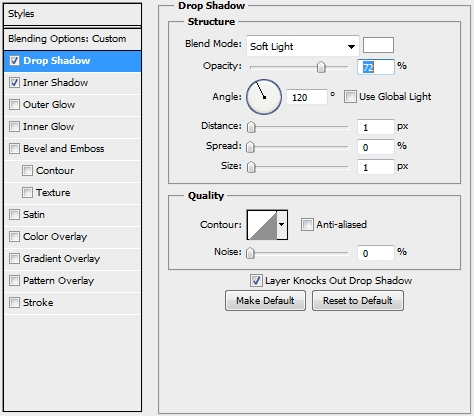
Duplicate your cookie shape and replace the Drop Shadow style with these.
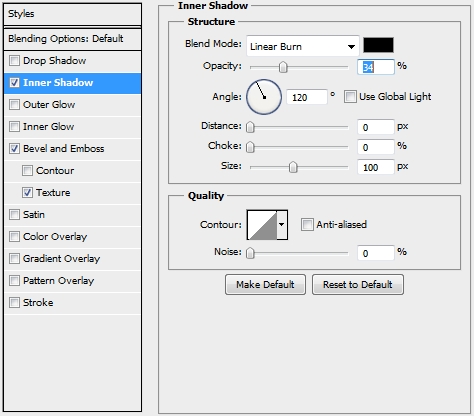
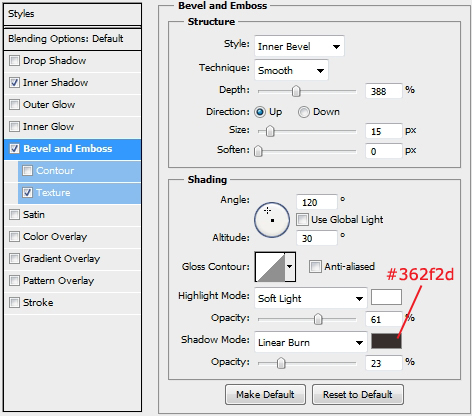
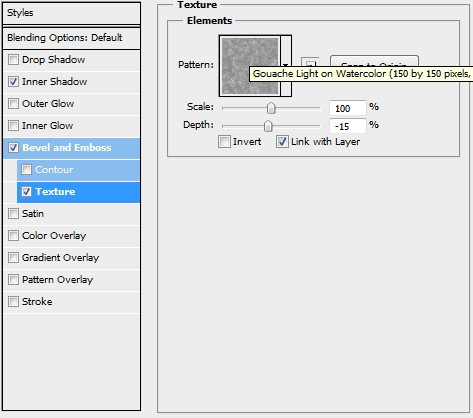
Step 4
Add a layer mask and draw some cracks using a soft round brush.
Step 5
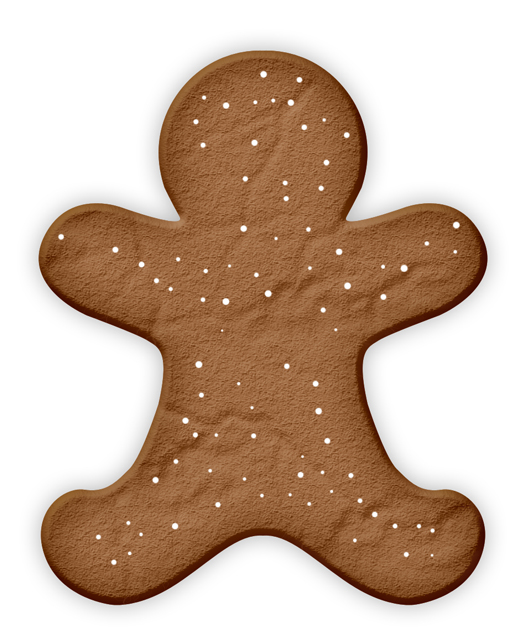
Create a new layer and pick the Brush Tool (B). Select a hard round brush and add some dots. Turn Fill to 0% and apply these styles.

Step 6
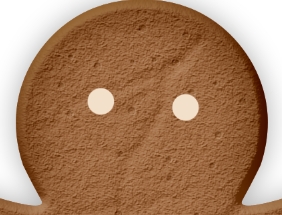
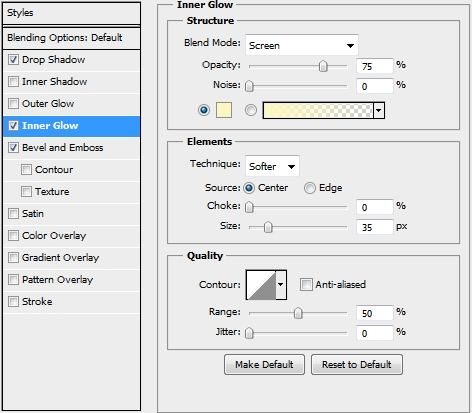
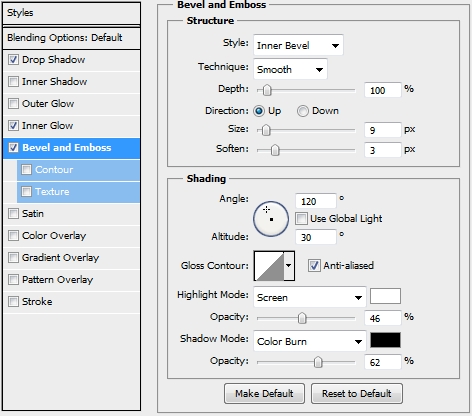
Create a new layer and once again select a hard round brush. Add two dots for the eyes (color: #f2e0cb) and apply the following styles; copy these styles, as you’ll need to apply them later.
Step 7
On a new layer add two smaller dots (color: #2c6992). Add these styles.


Step 8
Create a new layer and draw the mouth (stroke path technique). Fill it with #f2e0cb and apply the styles you copied before.

Step 9
Create a new layer and draw some more frosting. Again apply the same styles (color: #f2e0cb).
Step 10
Decorate more the cookie.
Step 11
Group all the layers created so far (except from the background) and duplicate the group. Merge this new group, set #000000 as your foreground color and #ffffff as your background color and go Filter>Sketch>Photocopy.
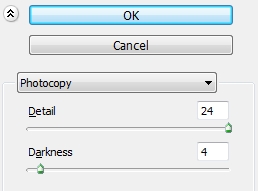
Change the Blend Mode to Linear Burn and lower Fill to 15%.
Conclusion
That’s it. Your gingerbread cookie is ready! Add any effects you want to make it look even better.


very nice tutorial and step by step Guide i learned making cookie easily thanks for sharing..
Couldn’t compete it. I didn’t have the texture mentioned in step 4. Also, didn’t go into enough detail on how to make the cracks in step 5. I added a layer mask and tried to paint them on it, and nothing appeared. Please go into more detail next time. Let people know what size brush to use, and what color, as well as the layer to paint them on (the mask or the layer itself. Othere than that it looks like a decent tutorial. Too bad I can’t use it.