In this tutorial, I’ll try to show you how to create easily and in no time a very realistic pen from scratch.
Tutorial Details
- Program: Adobe Photoshop
- Version: CS5
- Difficulty: Beginner
- Estimated Completion Time: 30 minutes
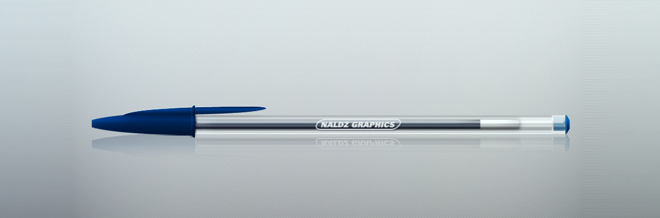
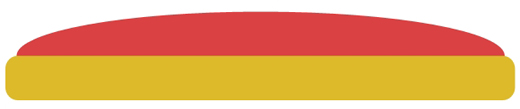
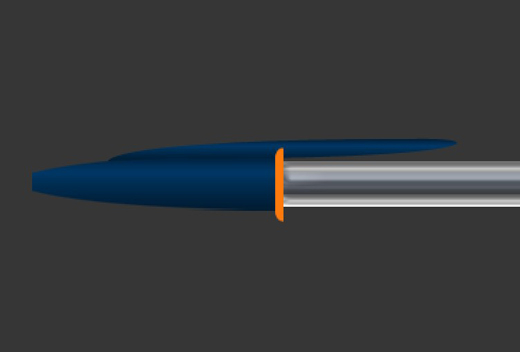
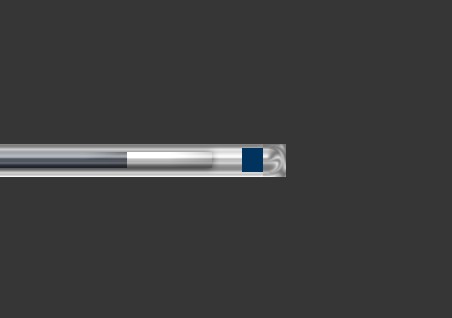
Final Result
Step 1
Create a new document in Photoshop. I used 1240×530 px, 300 dpi and RGB color 8 bit.
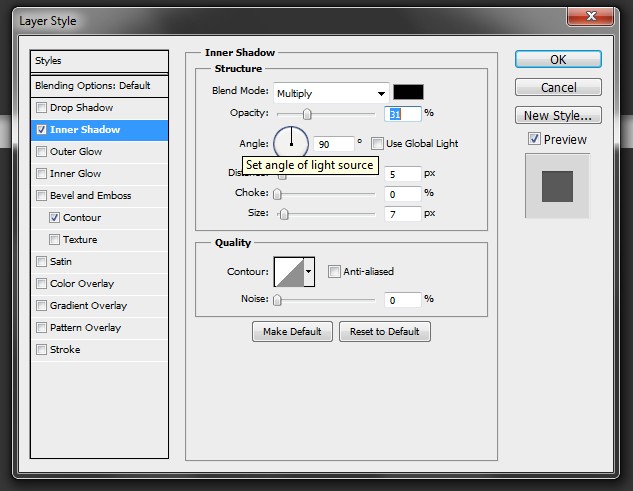
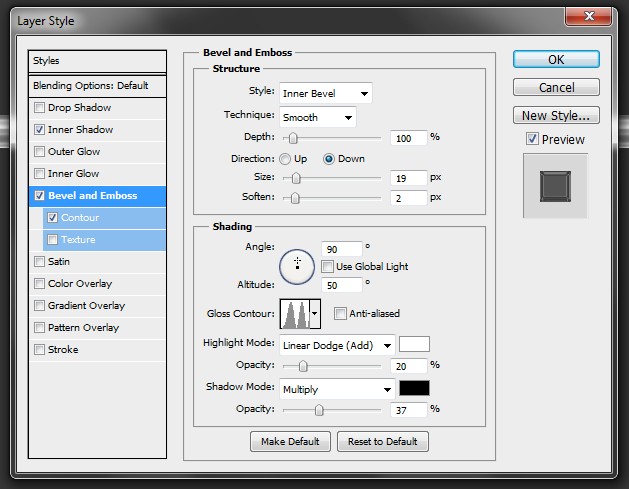
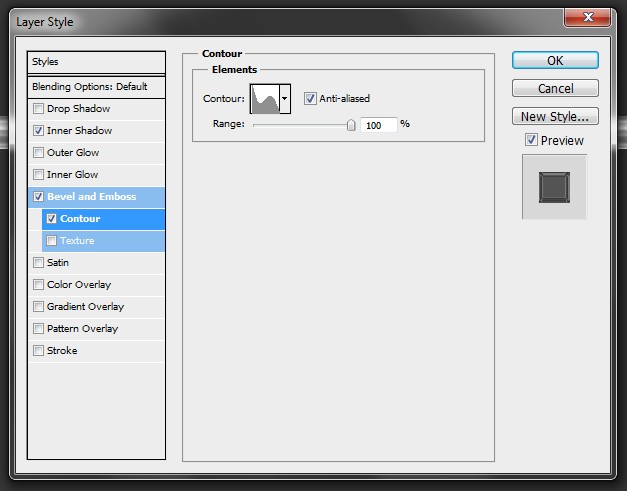
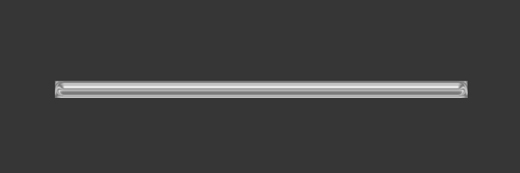
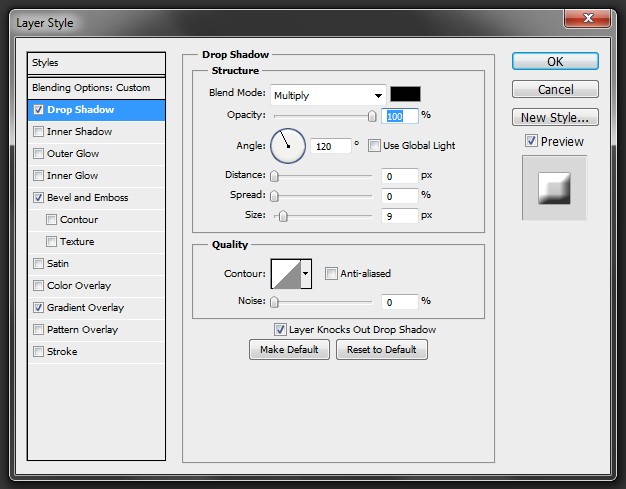
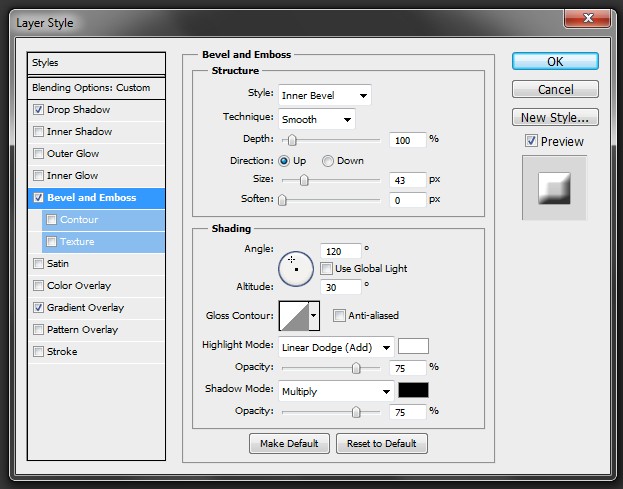
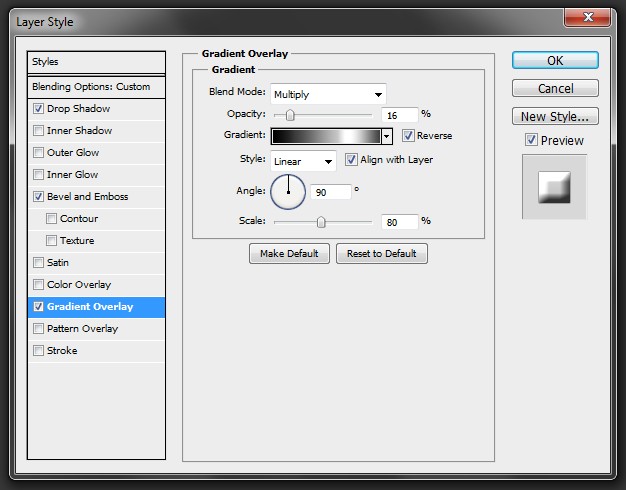
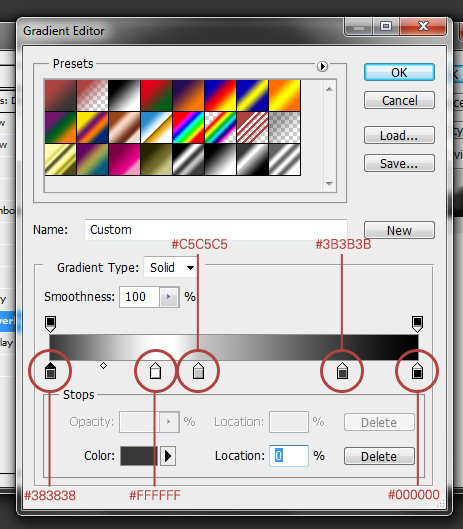
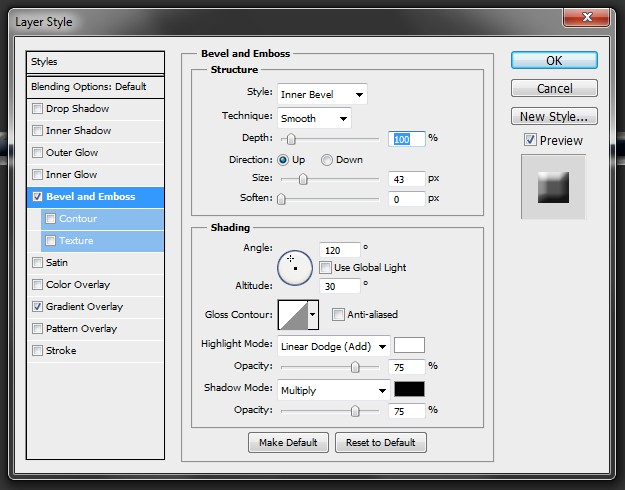
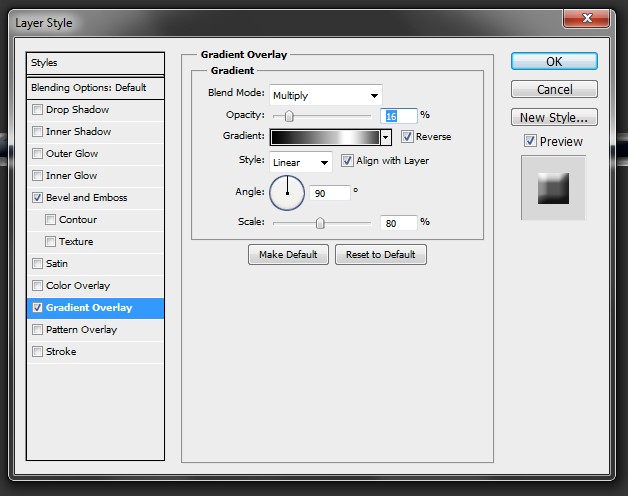
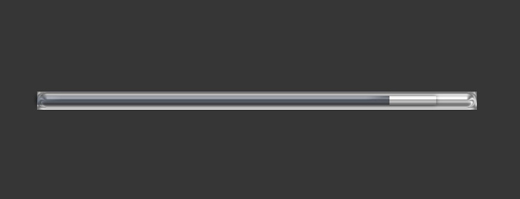
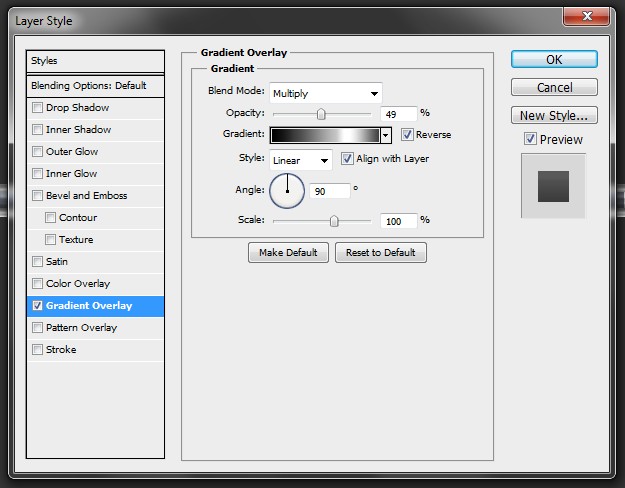
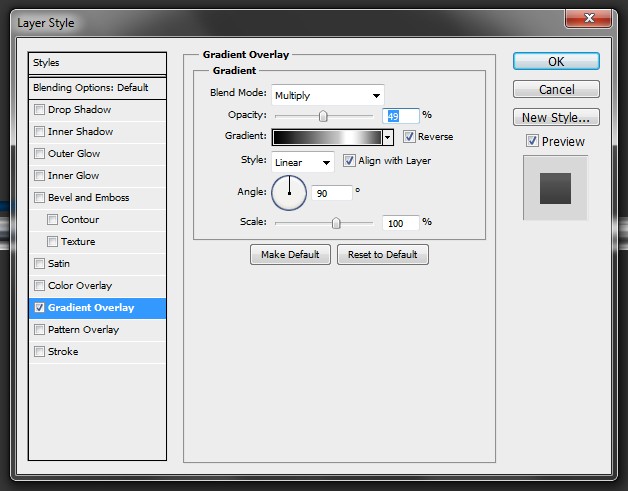
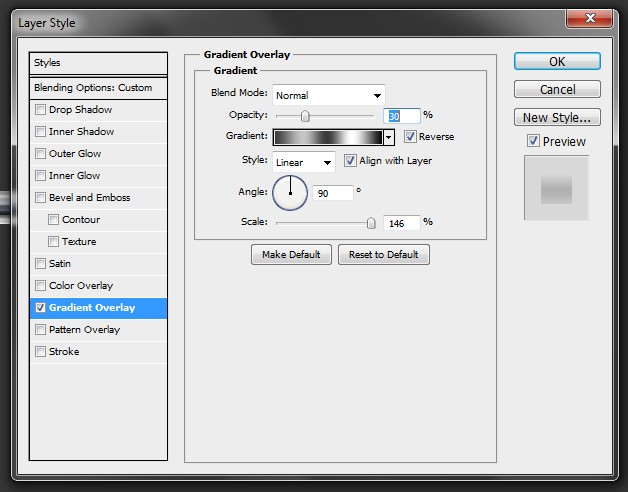
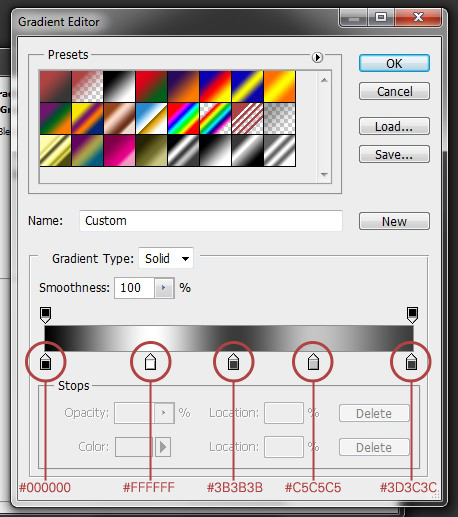
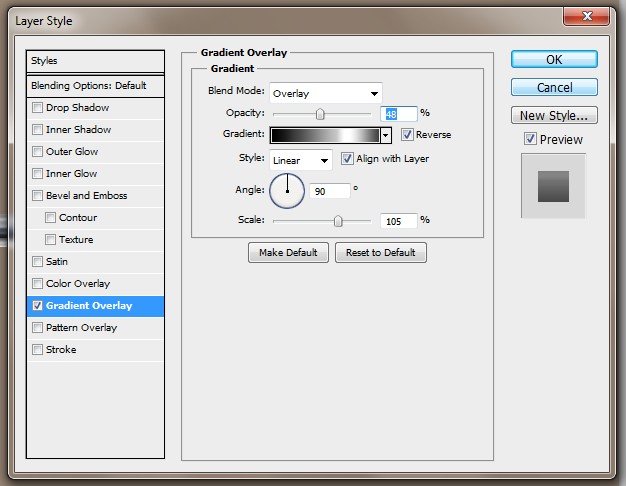
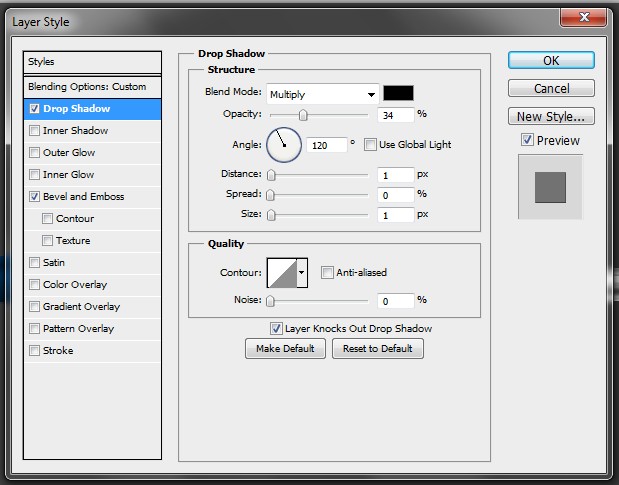
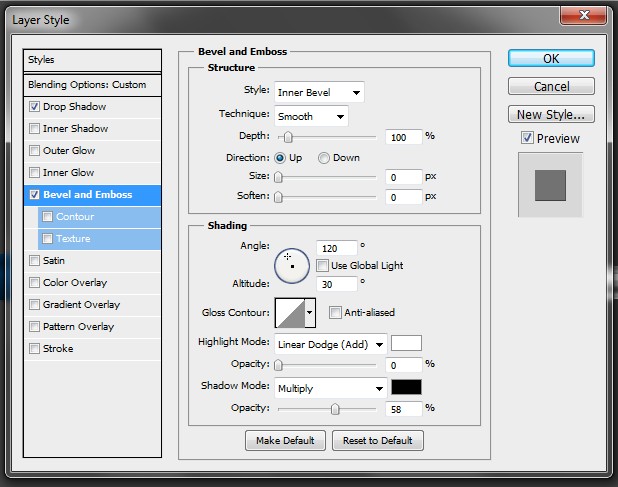
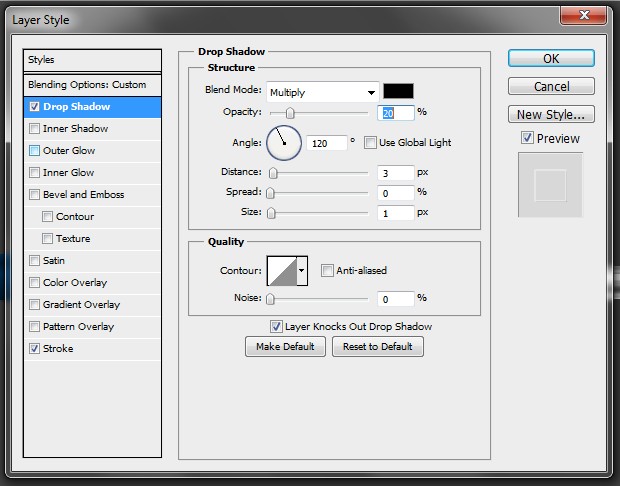
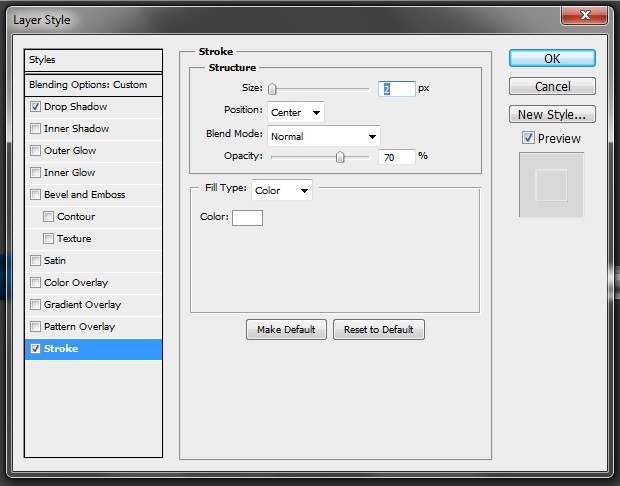
Paint your background layer with a dark color. This will prevent you from getting confused when designing the pen. Now, create a new layer and grab the Rectangle Tool (U). Pick #c2c2c2 as a colour and draw a rectangle like the one below. If you make it too long, don’t worry as you can always delete any unwanted parts in the end. Once you create the shape which we’ll call “Original Pen” from now on, apply the following styles.
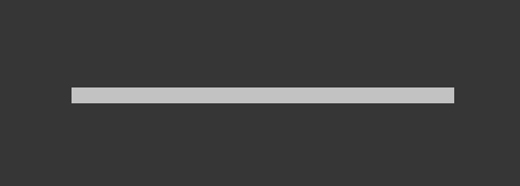
Your shape should then look like this
Step 2
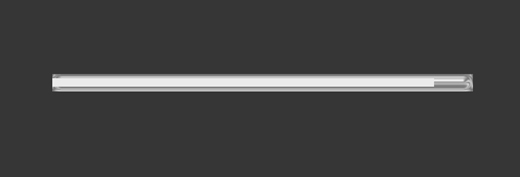
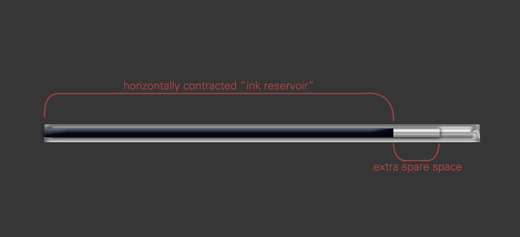
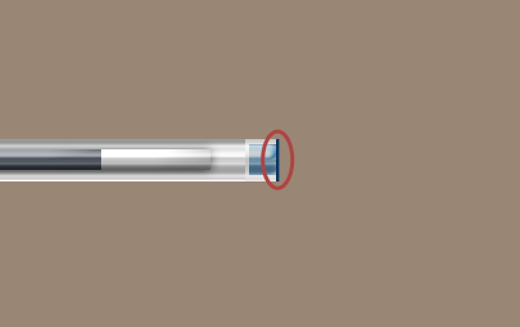
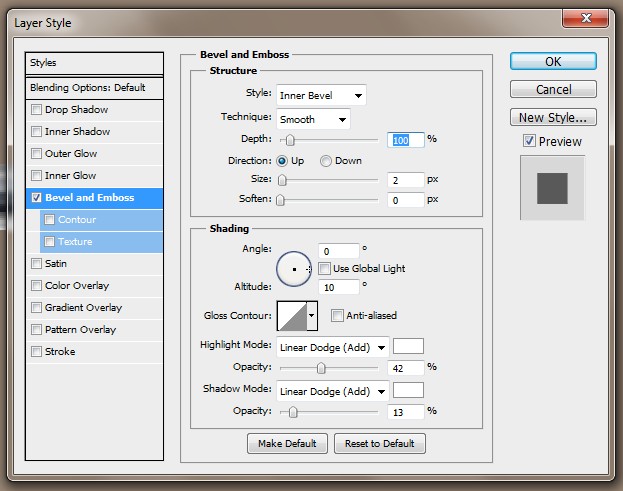
Create a new layer and once again using the Rectangle Tool (U) draw a rectangle that will “fit” inside your “Original Pen” and turn the Fill down to 0%. This will be the ink reservoir. The image below explains everything better. Don’t forget to leave some spare space on the right side. After doing this, simply apply these styles.
Step 3
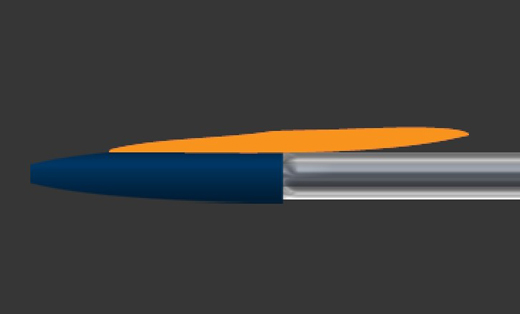
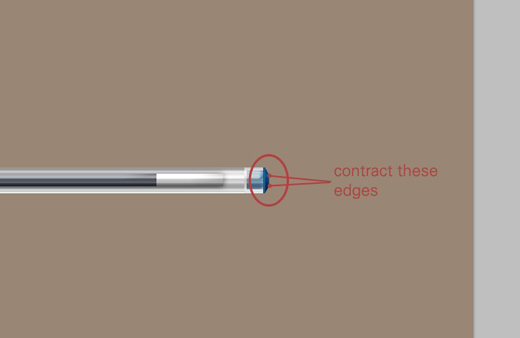
Now we’re going to fill the ink reservoir with some …ink. To do this, you need to duplicate the shape created in the previous step. Change its color to #020b1b and contract it horizontally. Use the image below as a guide. Then simply add the following styles.
Step 4
Duplicate the “Original Pen” layer and place it on top of the layers stack. Change the Blend Mode to Hard Light and the Opacity to 70%.
Step 5
Now that you’ve created the “body” of the pen, it’s time for the cap. Pick the #020b1b from the colours palette, grab the Pen Tool (P) and draw a shape like the one below.
Now, right click on the path and chose Fill Path (with foreground color). Duplicate it, flip it vertically (Edit > Transform Path > Flip Vertical) and place it right under the previous shape. Merge those two layers and apply this style (the gradient is the same that you used in the previous steps).
Step 6
Create a new layer, grab the Pen Tool (P) and with the same color selected, create a shape like the one below; I’ve changed the color to make it more distinguishable. Once you’ve done this, apply the following gradient.
Step 7
Create a new layer. Keep the color you’ve used in the last two steps, grab the Pen Tool (P) and create a shape like this one.
Then add these styles.
Step 8
Duplicate the shape you’ve just created. Place the copy right under the original shape, in the layers stack. Then move it a bit upwards. Use the image below as a guide.
Step 9
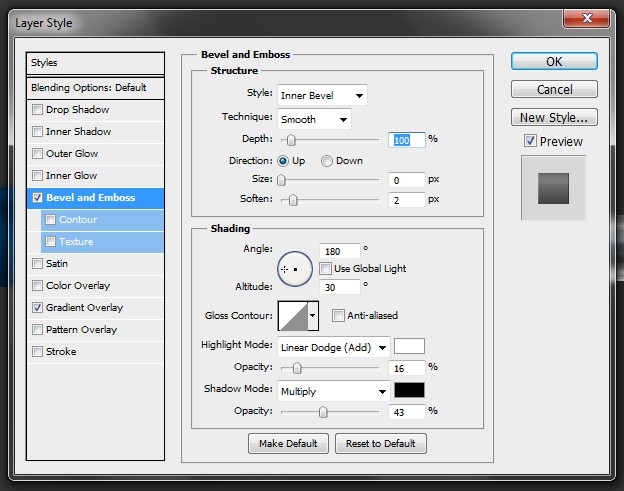
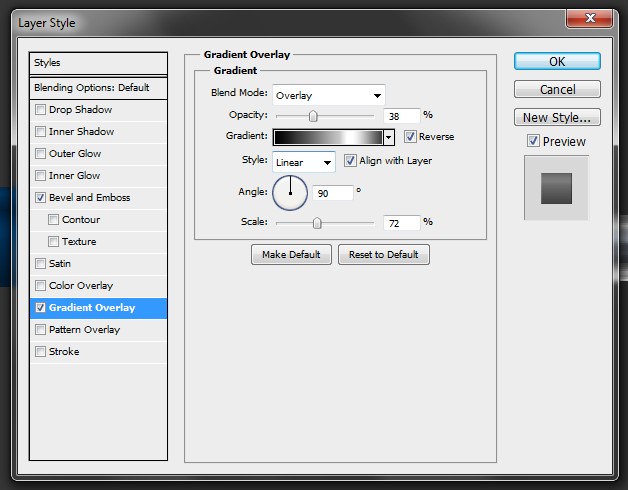
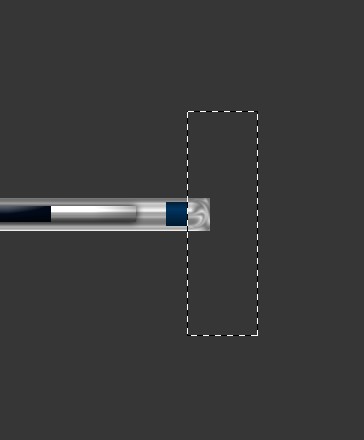
Group the layers created in Steps 5-8 and name the group “Cap”. Create a new layer (make sure you’ve still selected the #020b1b as a foreground colour) and using the Rectangle Tool (U), draw a small rectangle. Use the image below as a guide. Then simply apply the style shown in the second image.
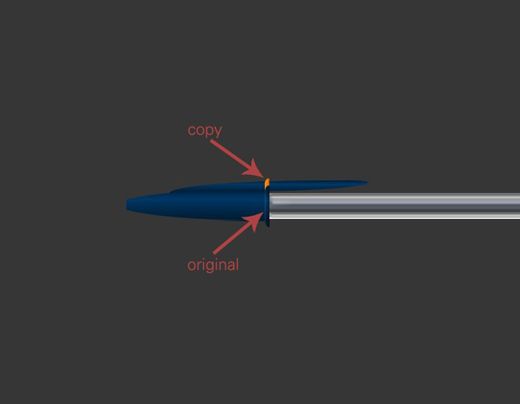
Now drag this layer and place it right above the “Original Pen” shape that you’ve created in Step 1.
Step 10
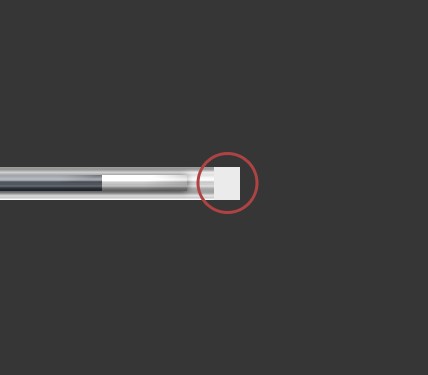
From the layers stack, select the “Original Pen” layer and rasterize it. Then create a new layer above it and merge those two layers. Do the same with the shape created in Step 4. Once you’ve done this, grab the Rectangular Marquee Tool (M) and erase the parts that extend outside the shape you created in Step 9, in both layers. Use the image below as a guide.
Step 11
Create a new layer and place it on top of your layers stack. Pick the #ebebeb from the colors palette and draw a rectangle using the Rectangle Tool (U). It should touch your pen’s sides. Once again use the image below as a guide.
Change the Blend Mode to Overlay and the Opacity to 70%. Then apply this style.
Step 12
Create a new layer and pick #020b1b from the colors palette. Draw a very thin rectangle using the Rectangle Tool (U) and apply the following style.
Step 13
Create a new layer and place it under the one created in Step 12. Draw a thin rectangle (at least twice larger than the previous one) using the Rectangle Tool (U) and then go Edit > Transform Path> Perspective and turn it into a trapeze. Then apply the following style.
Step 14
Create a new layer and press T to select the Type Tool. Write anything you want. The font I used is Univers LT 85 ExtraBlack.If you don’t have it, pick Arial Black and select the Faux Italics in the Character Panel (Window > Character). Set the size to something around 3 pt (I’m using 3,18), place it somewhere near the center of your pen and apply these styles.
Step 15
Create a new layer and grab the Rounded Rectangle Tool (U). Draw a rectangle just a little bit larger than your text, turn Fill down to 0% and apply these styles.
Then go Edit > Transform Path> Skew. Use one of the center points to adjust the skew horizontally.

You can now group all the layers and groups, duplicate the group and merge the copy. Next, duplicate the merged layer and add a soft Gaussian Blur (1,5px) to the copy. Change its Blend Mode to Soft Light and the Opacity to something around 30-45%. Add shadows and highlights using the Dodge and Burn Tools (O).
Conclusion
Your pen is now ready. Add any effects you want to make it look even better. I hope you enjoyed this tutorial.


Great tutorial, creating my own pen now.
Wow!!!
Great!!! ^^