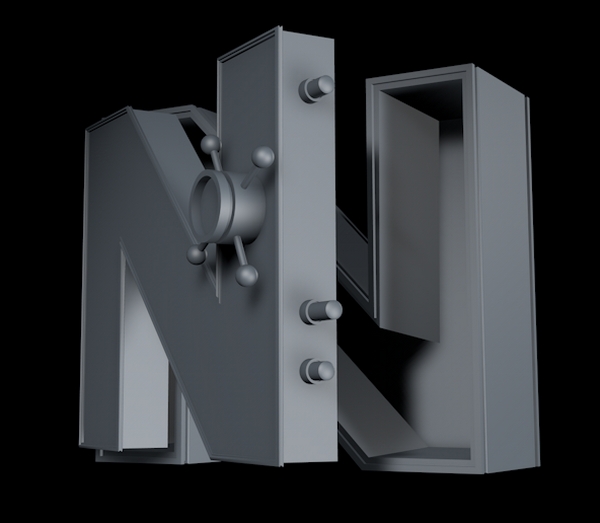
In this tutorial we’ re going to create an interesting safe typo effect using the Cinema 4D. The first part will describe the modeling of all the elements and applying textures. In the second part, we’ll show you how to create the coins and make them pop out of the text.
Tutorial Details
- Program: Maxon Cinema 4D
- Version: R14
- Difficulty: Advanced
- Estimated Completion Time: 5-6 Hours
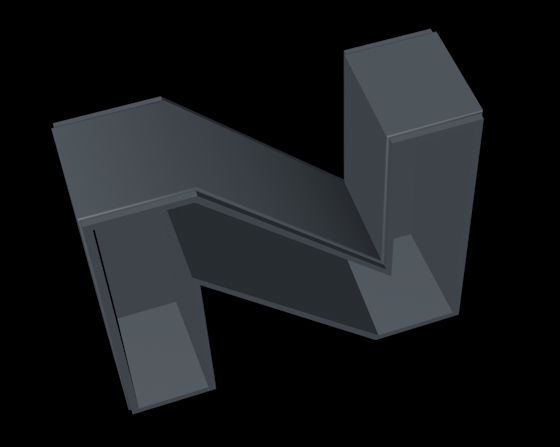
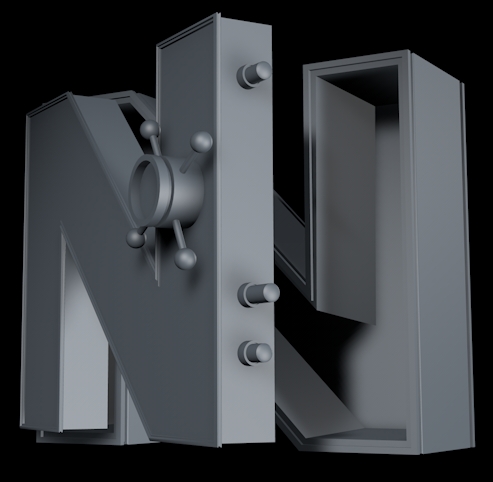
Final Result

Part 1
Step 1
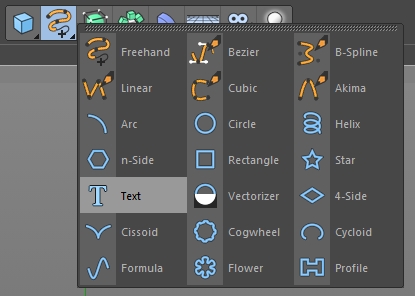
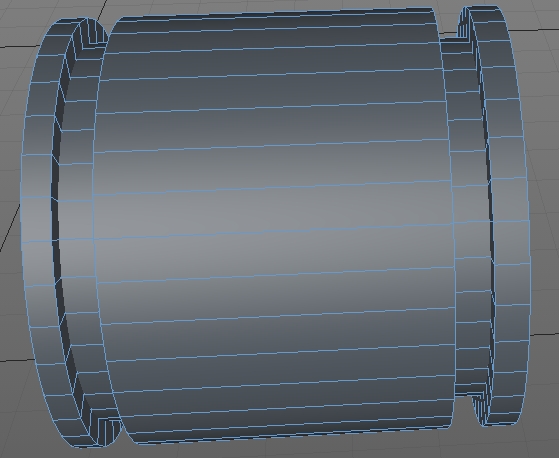
Open Cinema 4D and create a new project. Ok, the first thing is to create a text object. Now write anything you want and pick the font you like (we chose Spy Agency, Height: 200cm). *If you don’t have a super computer, stick to one-two letters.
Step 2
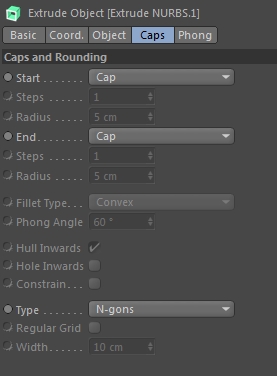
Next add an Extrude NURBS and clip the text spline to it (make it a child). Set the depth to 50 cm (Movement: 0, 0, 50) and adjust the Caps according to the image below.

Step 3
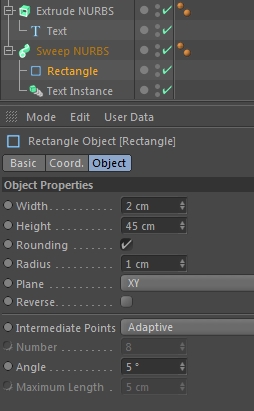
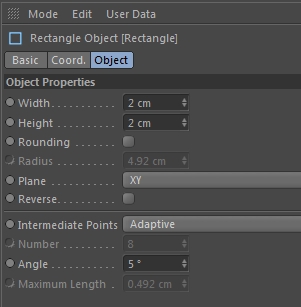
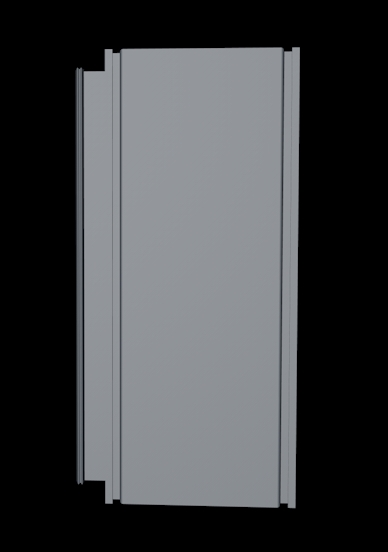
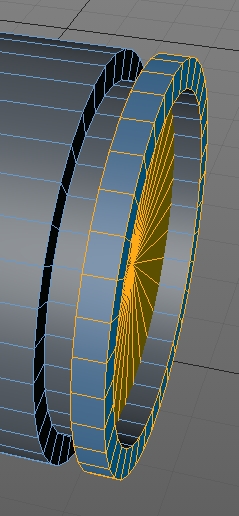
Click on the text spline and go Array->Instance. Add a Sweep NURBS and clip the Text Instance to it. Select the Rectangle from the splines and make it a child of the Sweep NURBS too. Rename the Sweep NURBS to Front Edge Sweep NURBS. Your text should look like this.
Step 4
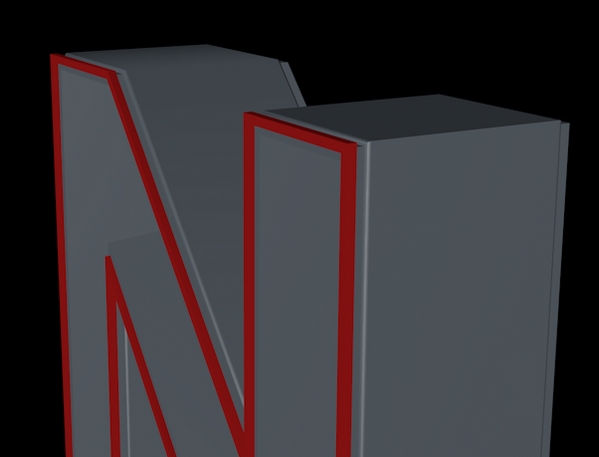
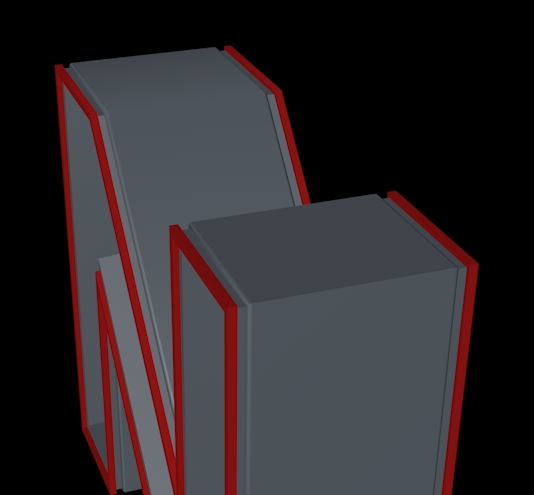
Next copy (Ctrl+Drag) the Sweep NURBS and change the Rectangle’s parametres. Move it on the Z axis (depth) and place it right on the edge of the text (image 2; the rectangle is coloured red). Rename it to Rear Edge Sweep NURBS.
Step 5
Now duplicate this Sweep NURBS and move it back.
Step 6
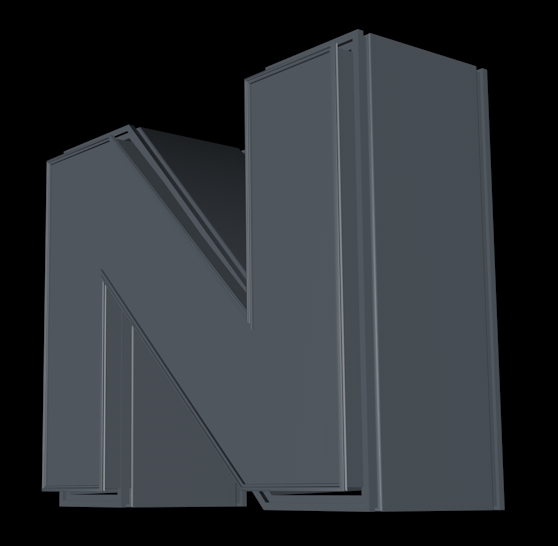
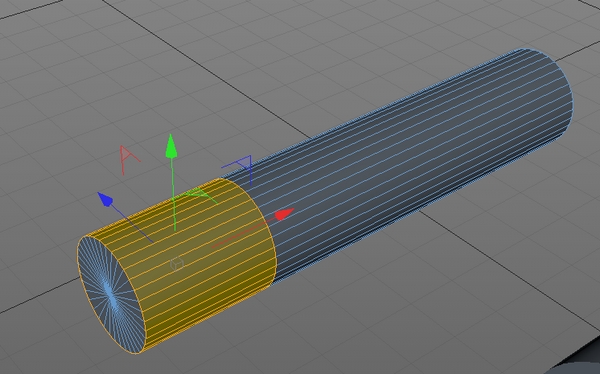
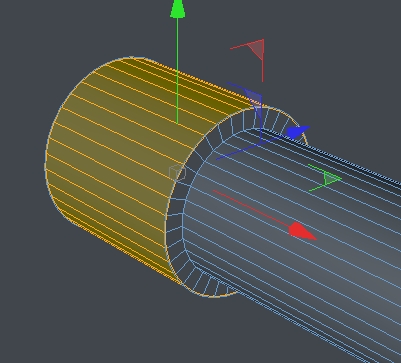
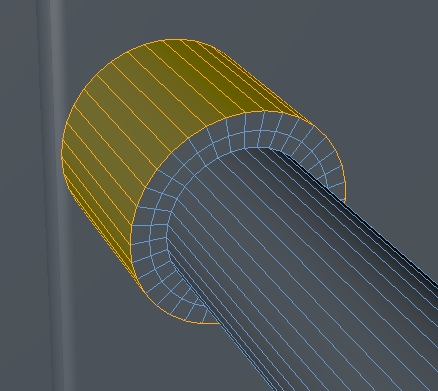
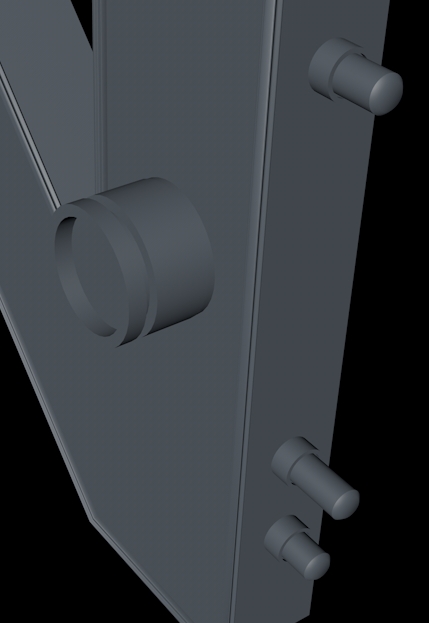
Group all the objects created so far (Ctrl+G) and rename the Null object to Main Safe. The next thing is to create the Open Door. So, go back to the Main Safe group and copy the Extrude NURBS (Step 1) and the Front Edge Sweep NURBS. Click on the copied Extrude NURBS and change the Caps.
Step 7
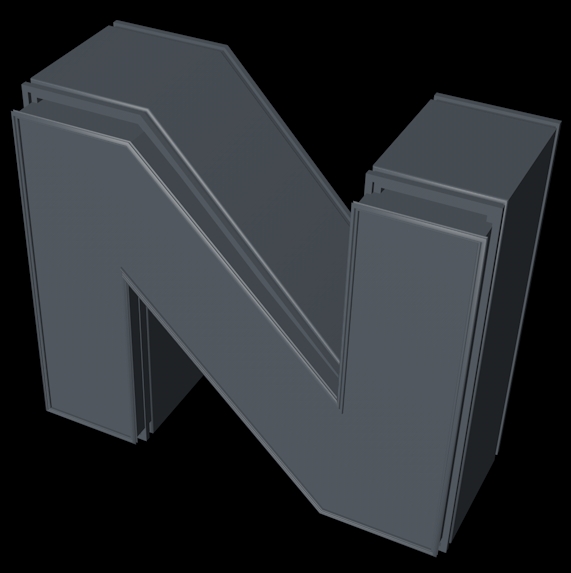
Now, make both the Extrude NURBS copy and Front Edge Sweep NURBS copy editable by pressing C. Scale them down (R, E) a bit, so that the Extrude NURBS fits inside the Main Safe. It doesn’t have to be perfect or actually fit, since the door will be open anyway. Use the images below as a guide.
Step 8
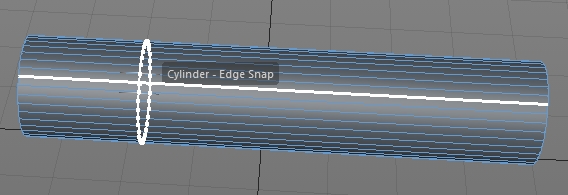
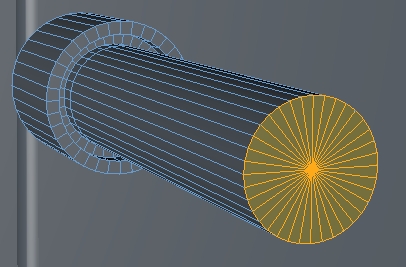
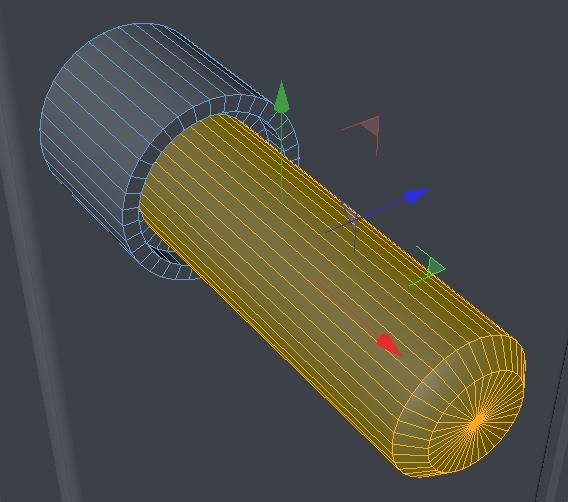
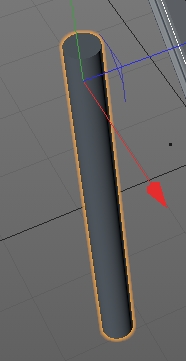
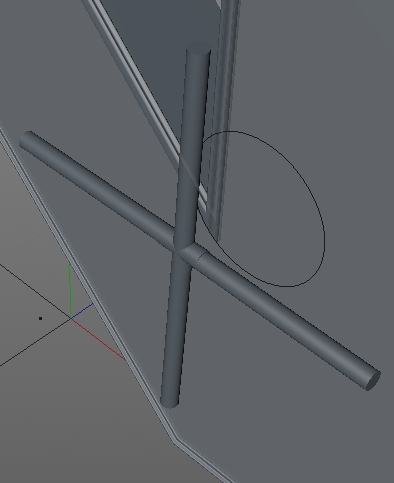
Now we need to create the lock bars. Create a Cylinder and set its Radius to 3cm, Height: 20cm and increase the Rotation Segments to something around 35. Finally set the Orientation to -X. We’re ready now to “sculpt” the lock bar. The first thing is to make the cylinder editable (C). Select the Polygons Mode and pick the Knife Tool by pressing K. Change its Mode to Loop. Add a “cut” using the image below as a guide.
Step 9
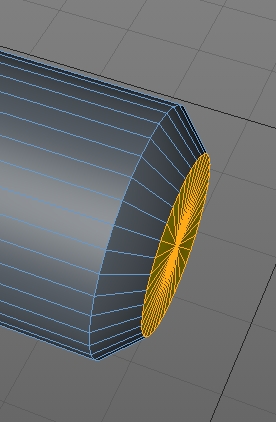
Now press U and then L. Select the segments behind the cut (image 1). Then go Mesh->Create Tools->Extrude and drag the selection upwards (image 2).
Step 10
Now extrude the selection even more. The reason we’re doing this is to add more segments (you can do this using the Knife too, but this way it’s faster).
Step 11
Now press U and then L and select the segments created by the first extrusion (image 1). Select the Extrude tool again and move it backwards on the X axis to create a small gap.
Step 12
Select the “front face” segments (image 1) and go Mesh->Create Tools->Bevel.
Step 13
Now if the cylinder is too long for you, simply press U, then L and select the main segments AND the “beveled” ones (remember to hold Shift when adding segments to the selection). Then using the Move Tool (E) you can adjust the length.
Step 14
Ok now that the lock bar is ready, simply copy it as many times as you want and use the Y axis to move them upwards or downwards.

Step 15
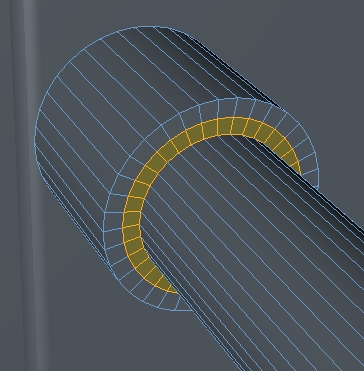
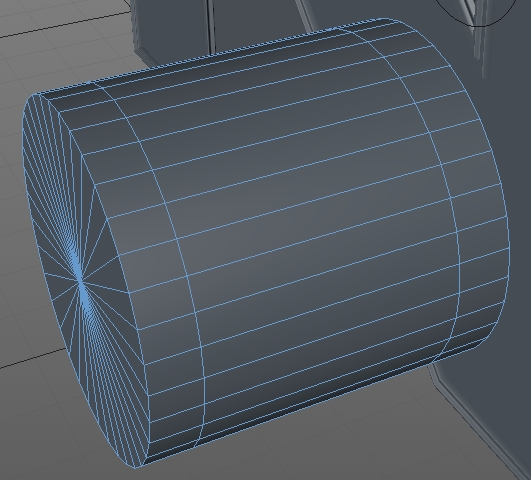
Next, we need to create the mechanism on the front. Again, create a cylinder and set its Radius to 10cm and the Height to 20 cm (Rot. Seg.: 35). Hit C to make the cylinder editable, switch to Polygons mode and pick the Knife Tool (K). “Cut” the cylinder using the image below as a guide.
Step 16
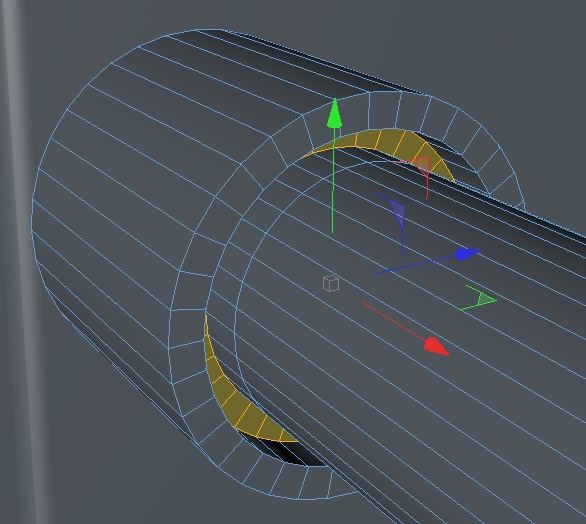
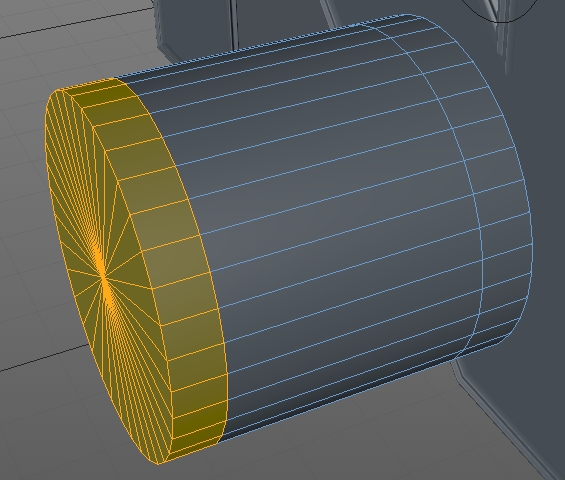
Press U, then L and select the segments shown on the first image. Go Mesh->Create Tools->Smooth Shift and “push” the mesh towards the center (image 2).
Step 17
Repeat Step 16 for the rear side.
Step 18
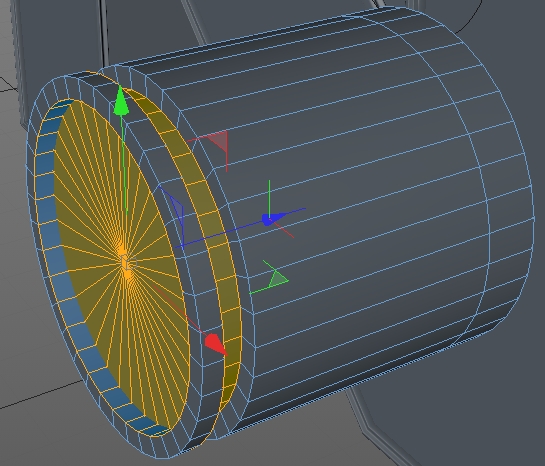
Again press U then L and select the segments shown below. Hit Delete to delete them (you can skip this and simply move the mechanism “inside” the door to hide it) and move the mechanism on the Z axis so that it touches the door.

Step 19
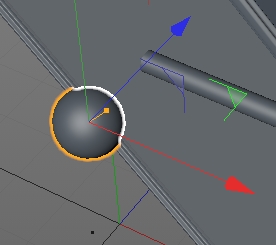
Next, we’ll create the let’s say hadle that opens the door. Once again, create a cylinder and set the radius to 1cm and the height to something around 25. Copy it three times and place the copies accordingly to the second image (create a cross).
Step 20
Create a sphere and scale it down (radius: 3). Again, copy it three times and place the copies accordingly to the secone image.

Step 21
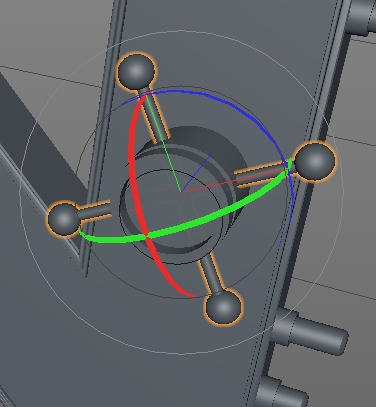
Group all the objects created in Steps 19-20 and select this new Null object. Hit R to select the Rotation Tool and rotate the handle by 45-60 degrees.
Step 22
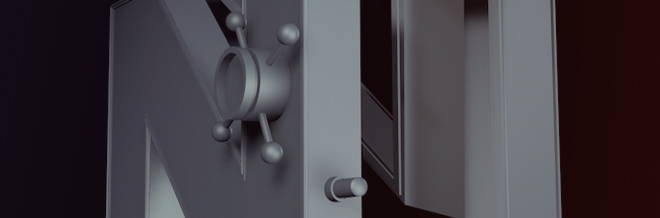
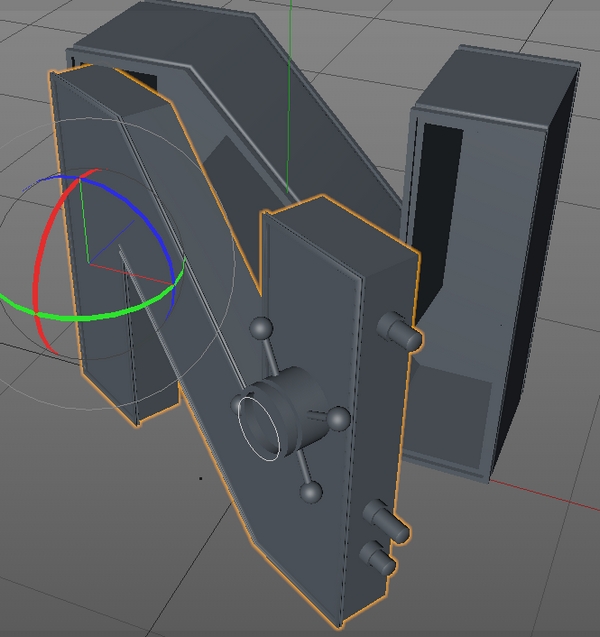
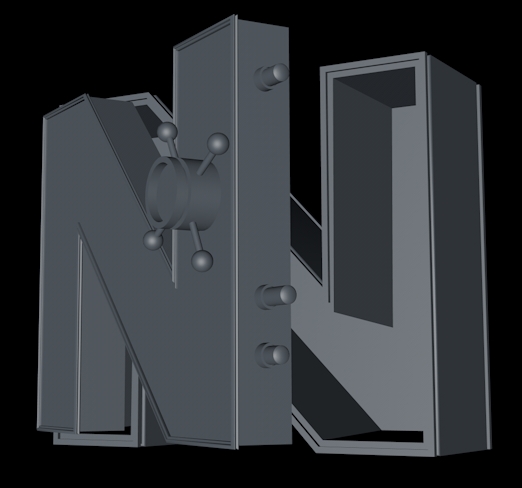
Now group all the objects created in Steps 6-20 and name this new Null object “Open Door” (you now have two major groups; Main Safe and Open Door). Select the Open Door group and press R. Rotate the group on the X axis by 30 degrees. Experiment with moving it until it looks good. Since we’re creating a static image and the camera position that we chose focuses on the right 3/4 front view (image 2), there’s no need to create the hinges on the left side of the open door.
Step 23
Add some lights to illuminate the object.
Conclusion
That’s the end of the first part. Don’t forget to come back in a couple of days for the second part where we’ll apply textures, create the coins and make some final tweaks in Photoshop.


Ohh!!that’s it..it is not yet finish.It’s great that I read the conclusion..:)
It needs more time working on this tutorial and it motivates me to do this.
Hope to be successful and I’m looking forward for the next step.