Today, we are pleased to share with you an exclusive Photoshop Tutorial to start learning things by. From scratch, let’s try following the steps in creating a realistic Coca-Cola Can with the use of Adobe Photoshop.
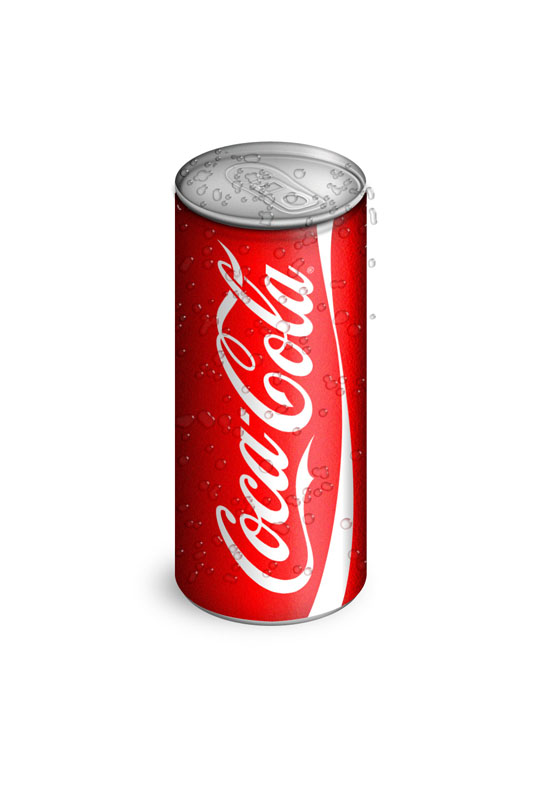
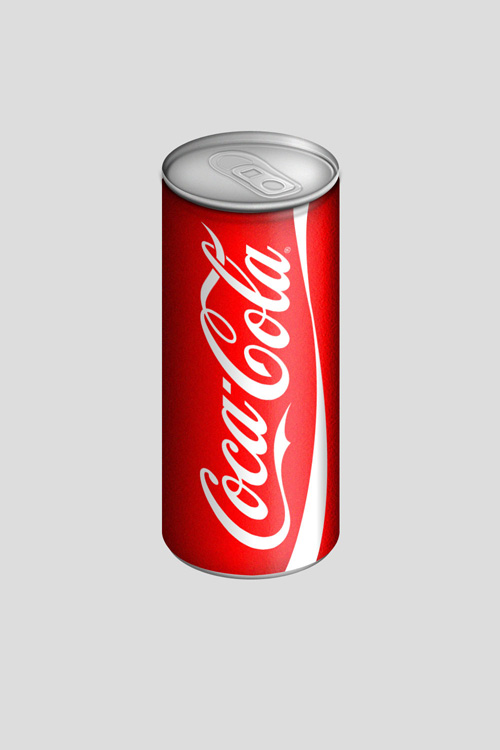
In this tutorial, it will teach you how to use features like smart filters, smart objects and shape to design the can to make it resizable. Below is the final result on what we are going to come up later on. So, let’s get started.
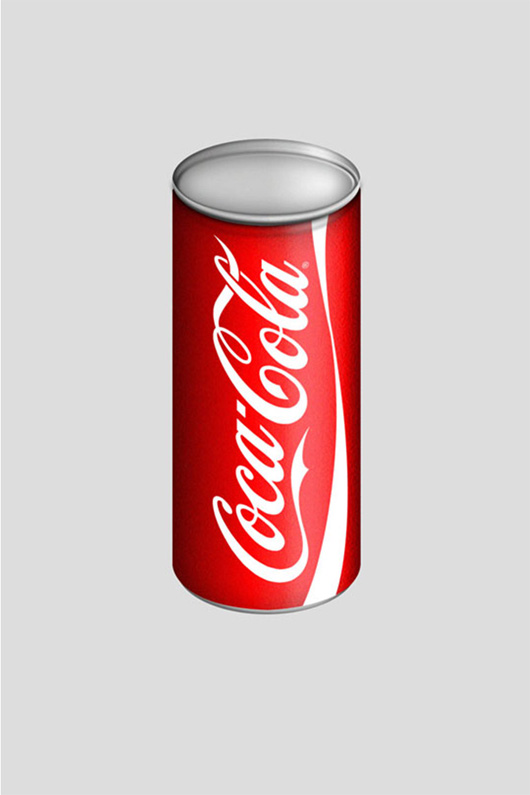
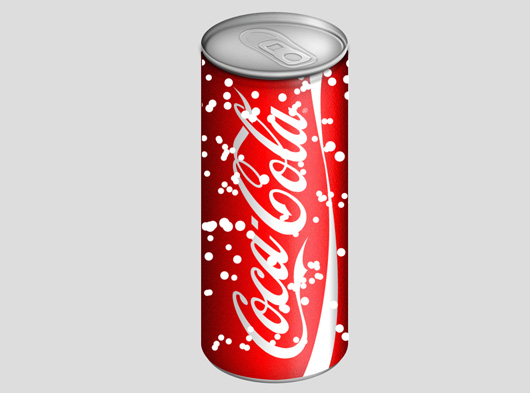
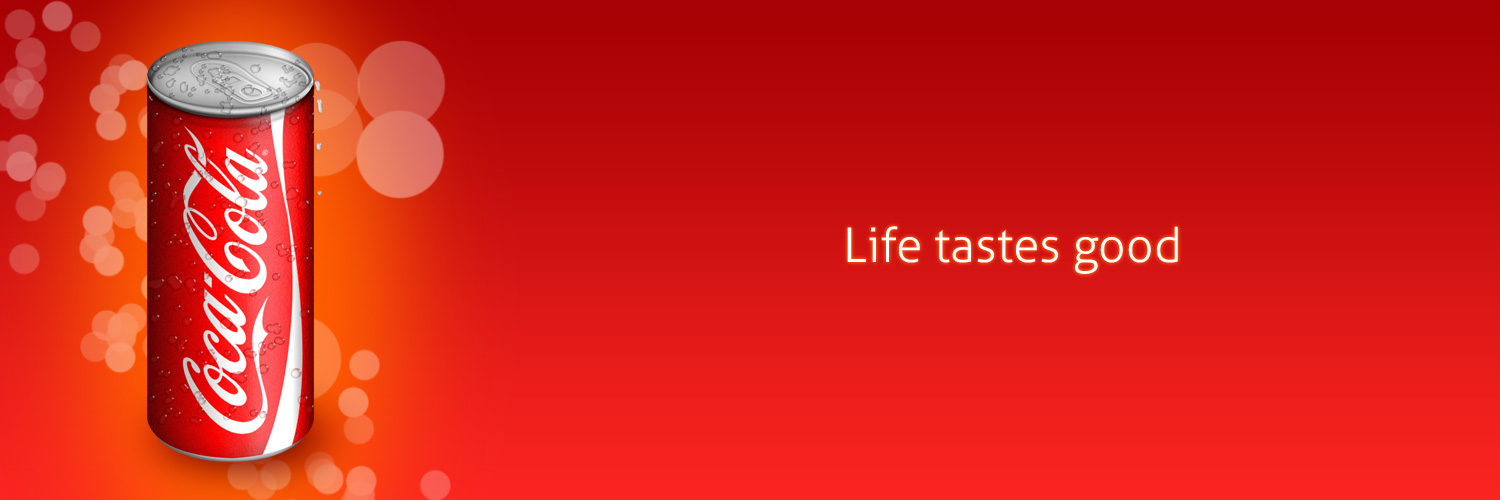
Final Result
Before starting our tutorial, first we need a high resolution Coco-cola logo.
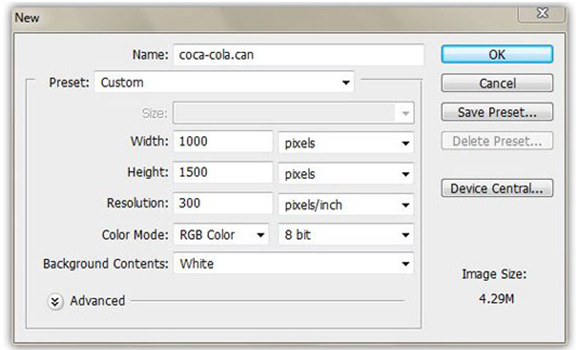
Step 1
Create a new file (Cmd/Ctrl + N) with size of 1000x1500px.
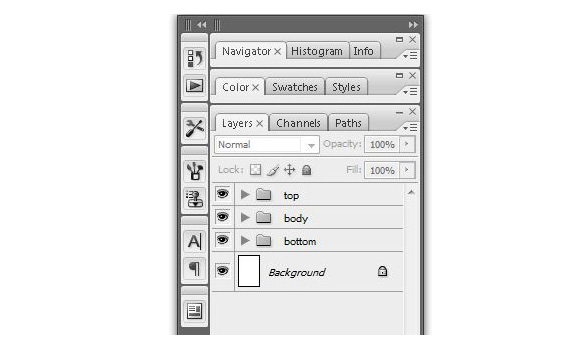
Next, fill the background with grey color (#dddddd) and create 3 main groups that we’ll be using to organize layers.
Step 2
We start by drawing the can main body with Pen Tool (P) under the body group. To help you draw the main body, you can create some guidelines but you don’t have to be 100% precise, just drawing it comfortably.
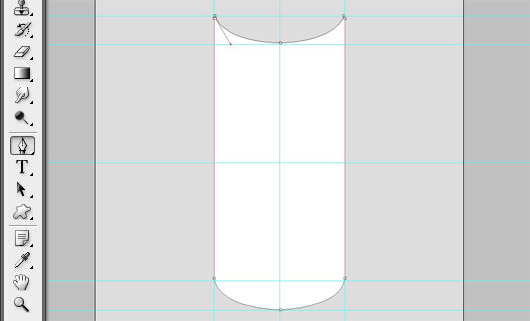
After finishing the path, rename it to “main body”, change the color into red (#ff0000).
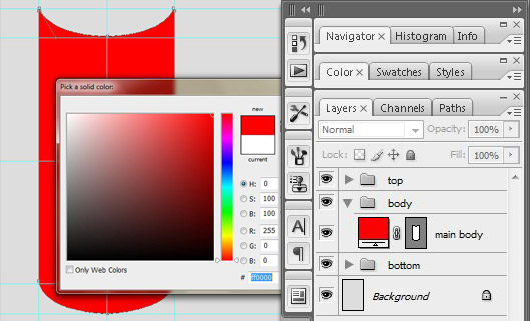
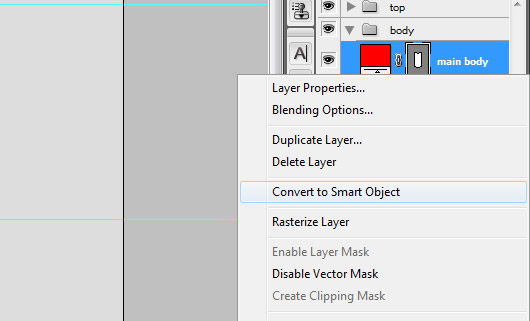
And convert the shape into Smart Objects by right clicking the “main body” layer then select Convert to Smart Objects, so later we can add some effects and details without altering its initial form. You can also convert to Smart Objects by going to Layer > Smart Objects > Convert to Smart Objects menu.
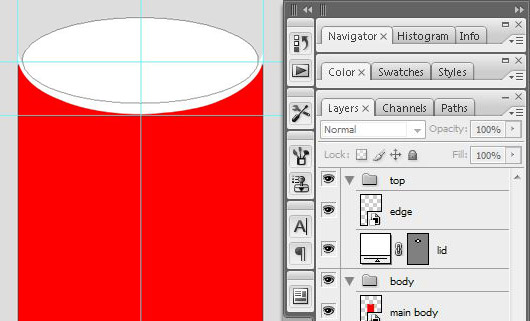
Step 3
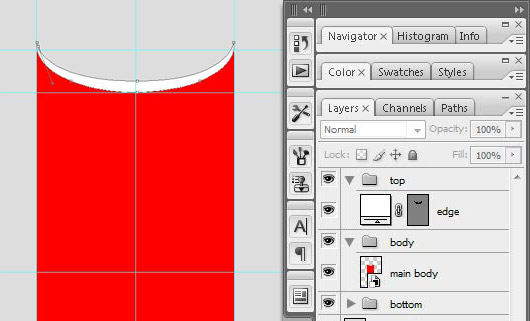
Using Pen Tool (P), draw a crescent shape as seen on the following screenshot, rename the shape to “edge” and convert it into Smart Objects.
Step 4
Now create a can lid under the top group using Ellipse tool (U), place it above the main body and below the edge layer then rename the shape to “lid”. Again, convert this shape into Smart Objects as well.
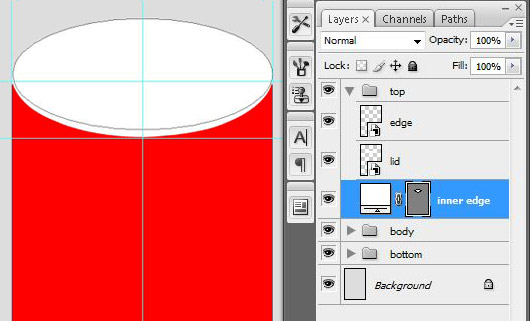
Step 5
For the can’s inner edge, create another ellipse shape, make it slightly bigger from the previous one, don’t forget to convert it into smart objects (Again).
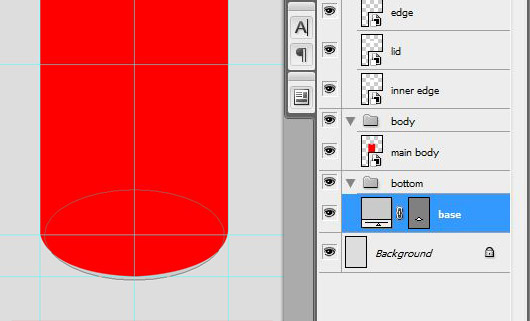
Step 6
Create another ellipse shape and place it under the bottom group, rename the shape into “base”. And change the color to grey (#cacaca). Keep the shape as is and no need to convert it to Smart Objects as we won’t add any Filters on it.
Step 7
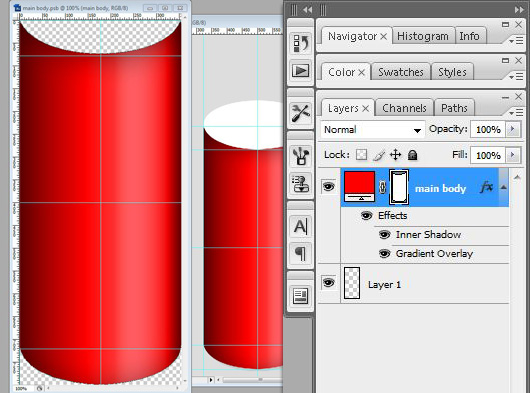
From this step we’re going to make the shapes more realistic. Right-click on the “main body” layer and choose Edit Content then you’ll be redirected to a new .psb window.
Start by adding gradients and inner shadow layer style on the “main body” shape. Then, save (Cmd/Ctrl+S) to update the original Smart Object. Close .psb window and back to our project file.

Step 8
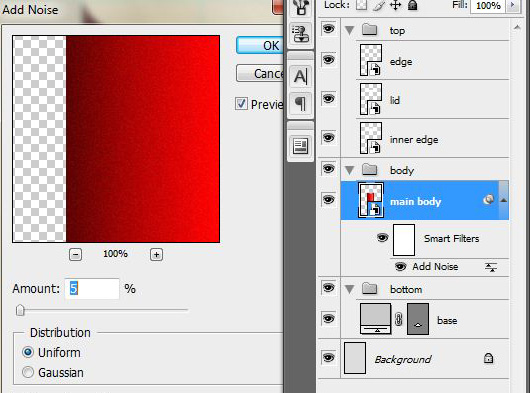
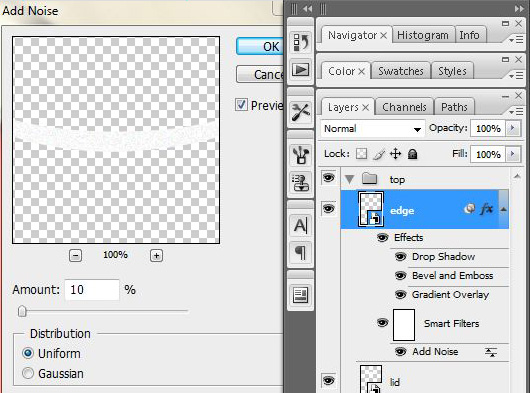
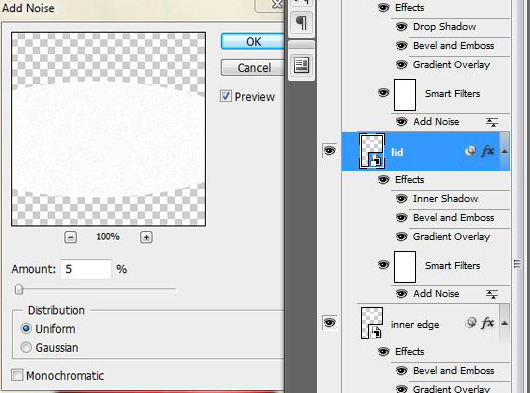
Add noise to “main body” layer which we’ve previously in step 2 Convert it to Smart Objects, so it’ll look sharper and doesn’t feel too gloss. You can go to Filter > Noise > Add Noise.
Step 9
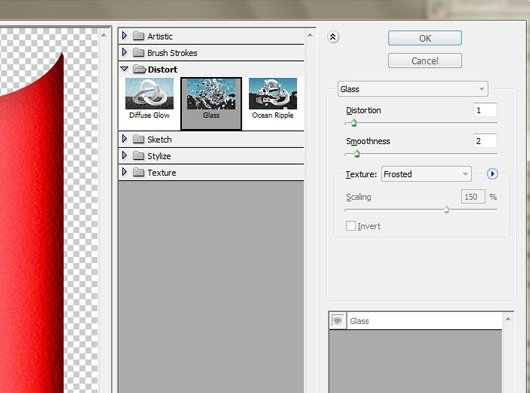
Here, I want to make the can feels a bit chilled or frosted. To add such effect go to Filter > Distort > Glass menu.
Step 10
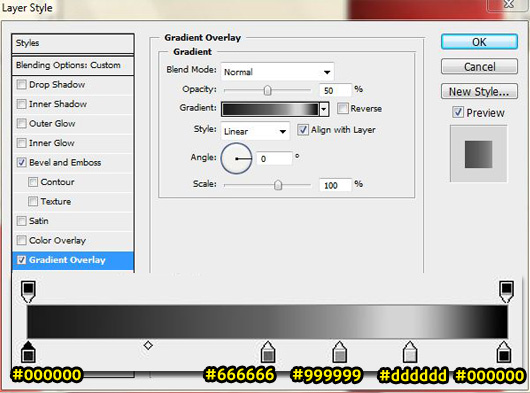
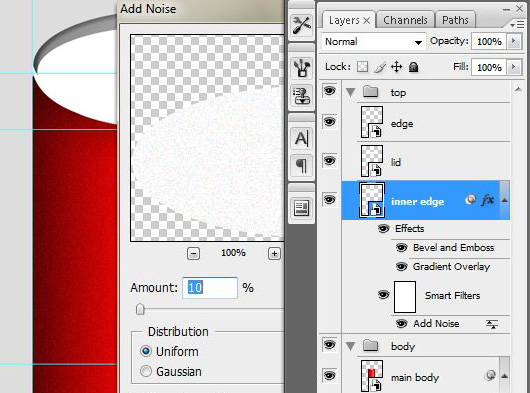
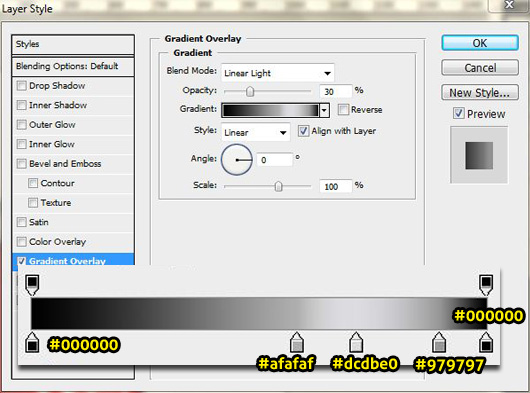
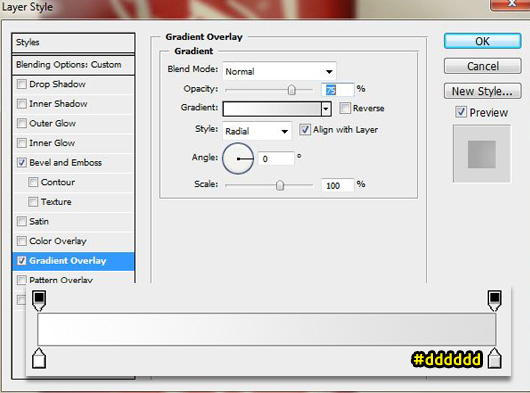
Next, make another part look more realistic. Start by adding Bevel and Emboss and Gradient Overlay style on “inner edge” layer.

Then, add Noise Filter on it. Go to Filter > Noise > Add Noise menu.
Step 11
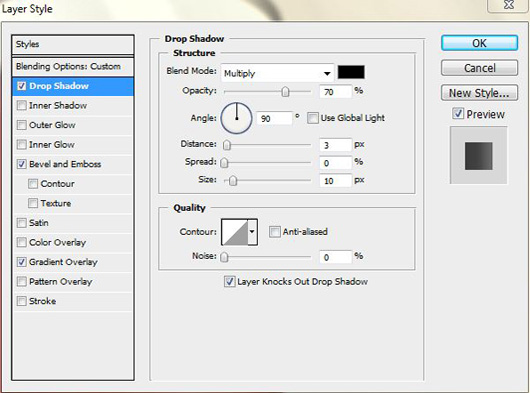
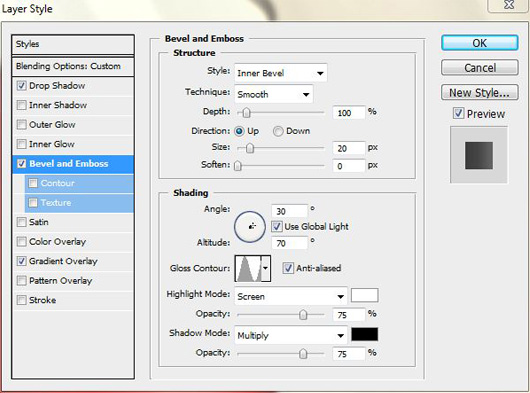
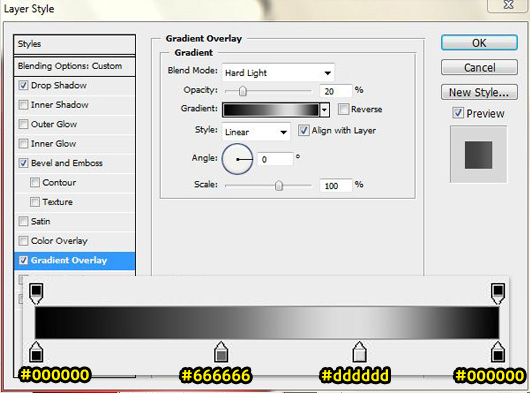
On the “edge” layer, apply Bevel & Emboss layers style, Gradient Overlay, Drop Shadow and Noise filter.
Step 12
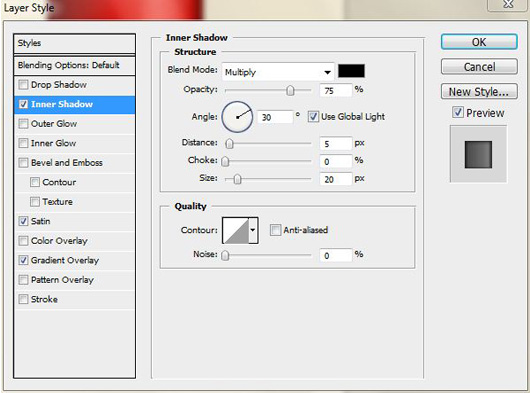
For the “lid” layer add the following Layer Styles and Filters:
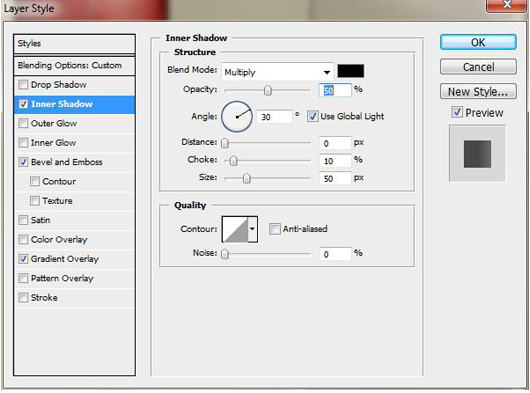
- Inner Shadow
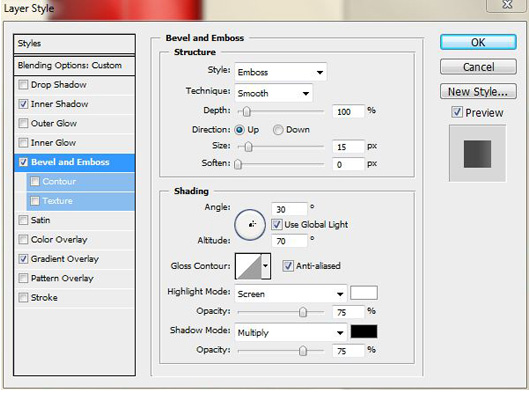
- Bevel and Emboss
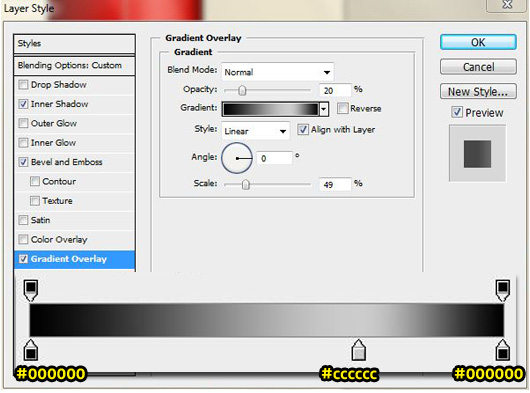
- Gradient Overlay
- Noise Filter
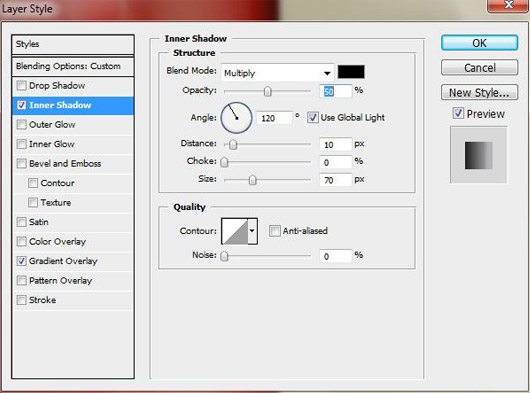
Step 13
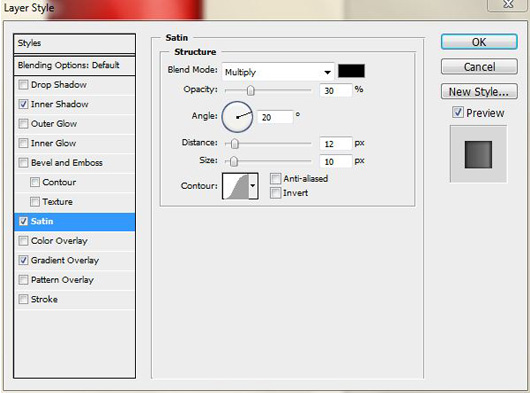
For the bottom part add the following Layer Styles to “base” layer:
- Inner Shadow
- Gradient Overlay
- Satin

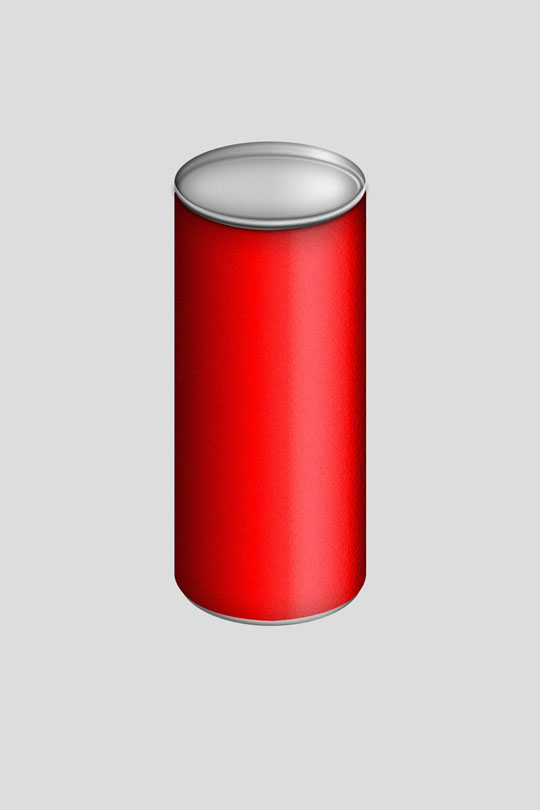
Well after adding a bunch of Styles and Filters, so far this is our can look like:
Step 14
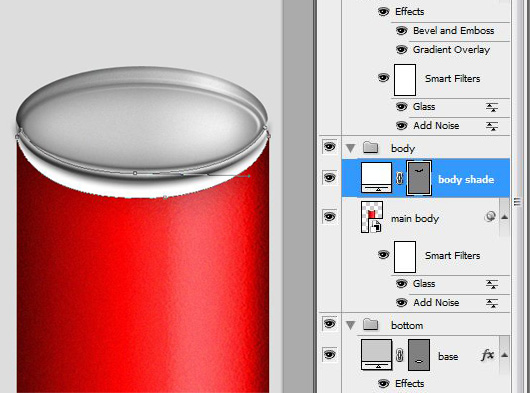
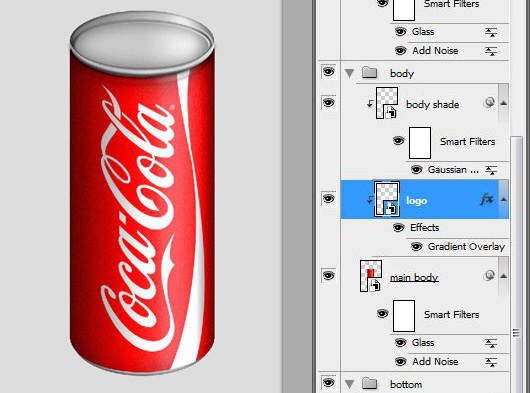
As we all know, a can usually has a neck curve right below the lid so this part should be a bit darker. So create this “main body” details by drawing another shape using Pen Tool (P) rename it to “body shade”. Then put the shape under “body” group.
Step 15
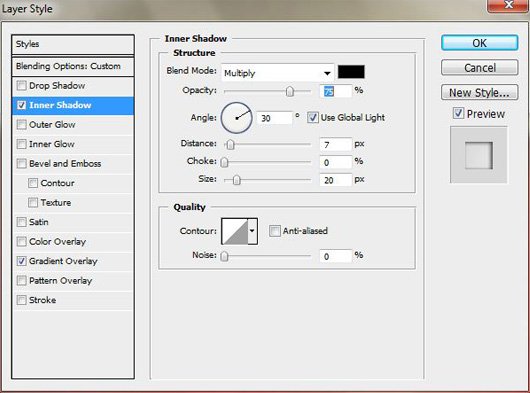
Then add the following Layer Style on the shape.
- Inner Shadow
- Gradient Overlay

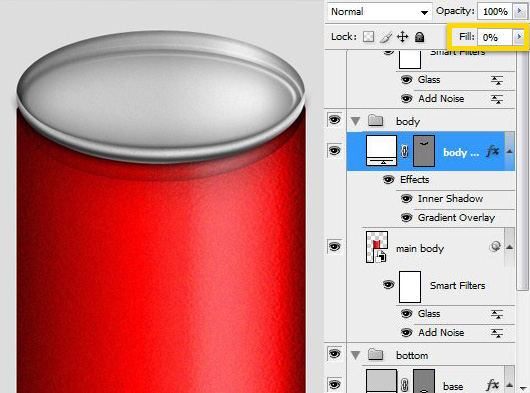
Set Fill value to 0% to hide the shape color and convert it into Smart Objects.
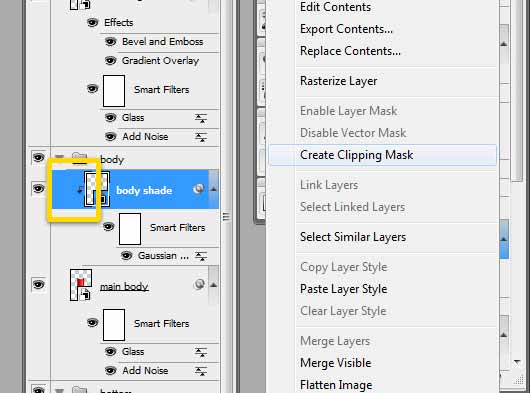
Step 16
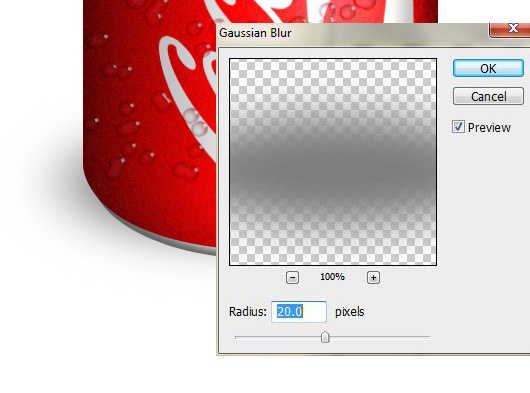
However the shade’s edge still looks too sharp. So, let’s soften the edge, go to Filter > Blur > Gaussian Blur.
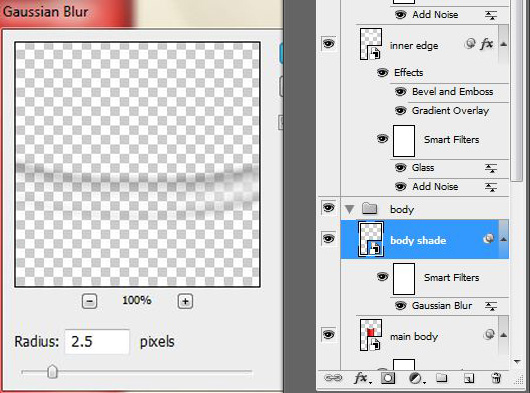
Then apply clipping mask, so it is unified in the “main body”.
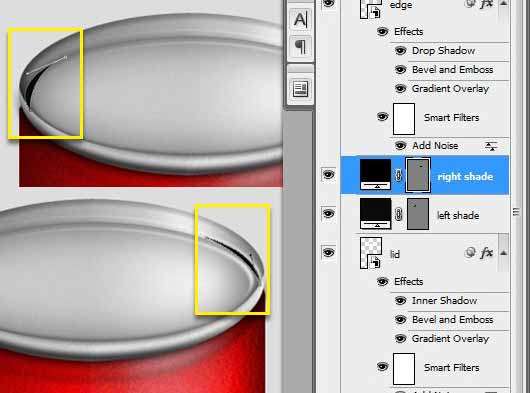
Step 17
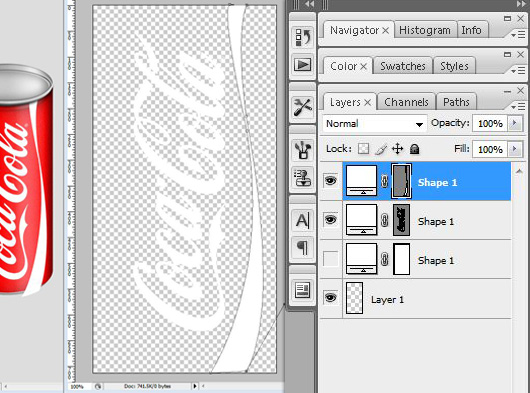
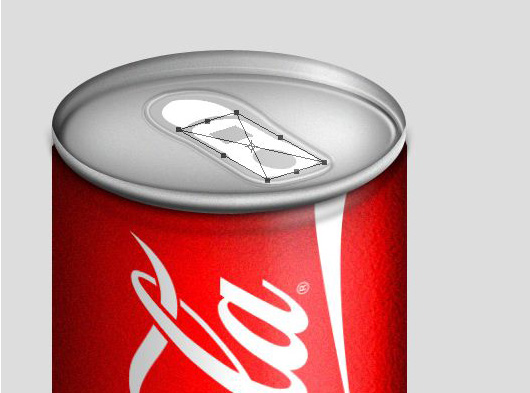
Using the Pen Tool (P), create two shapes as shown in the screenshot below. Put each of the shape in the right and left side of lid. After that, change it to Smart Object.
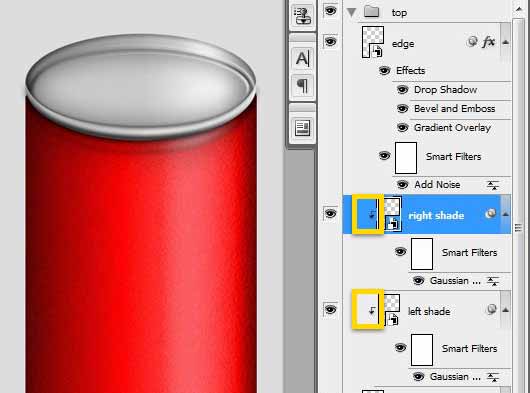
Step 18
Add Gaussian Blur effect on each of the Shape, from Filter > Blur > Gaussian Blur menu.

Again, apply clipping mask on each of the shapes, so it is unified with the “lid”.
Step 19
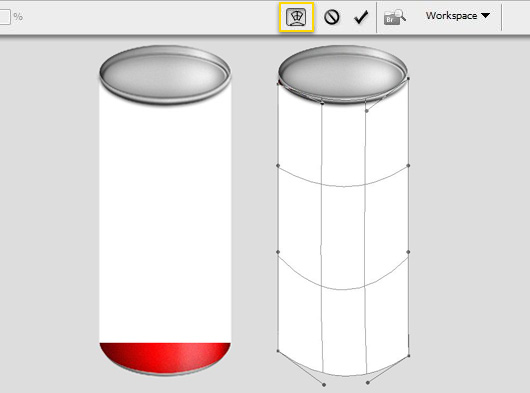
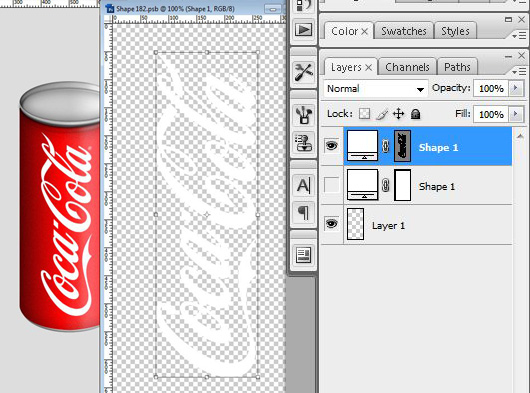
In this step, we will make special layer for the can logo or label. First, create Rectangle Shape that is almost as big as the “main body”, and again convert it to Smart object.
Hit the Ctrl/Cmd + T to free transform the layer and switch to Wrap Mode. Then trying make the layer to look like this.
Step 20
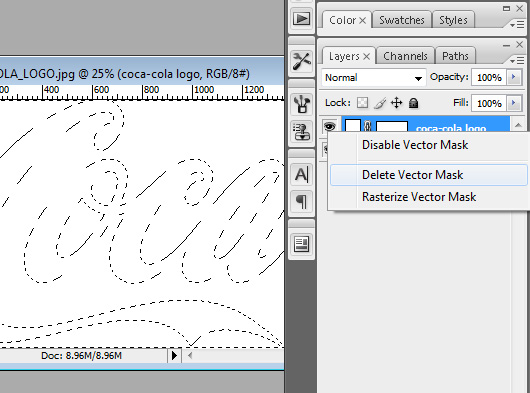
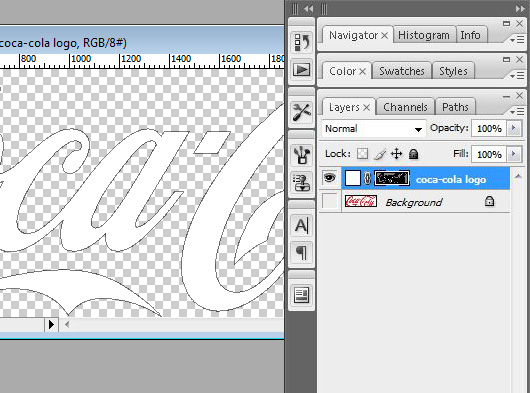
Now, we are going to prepare the Coca-Cola logo. Open the Coca-Cola logo file we have prepared before in Photoshop. Note that we need the logo to be resizable, so first we have to transform the logo into a shape.
Create a rectangular shape that is as wide as the logo. And then disable its vector mask. Using the Magic Wand select all the red area in Coca-Cola logo.
Step 21
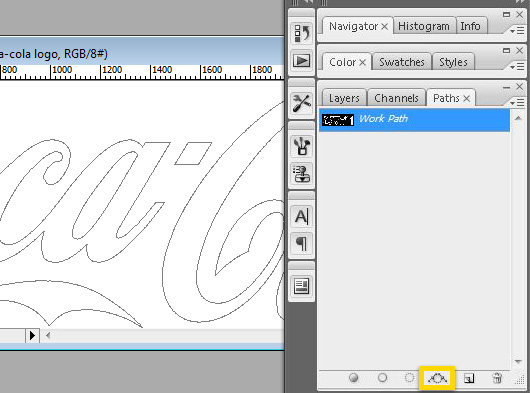
Open Paths tab which by default is in the right side of Channel Tab. Now look at the bottom there is an icon which I’ve marked with a yellow rectangle. Click on it to make a work path from selection.
Go to Layer > Vector Mask > Current Path.
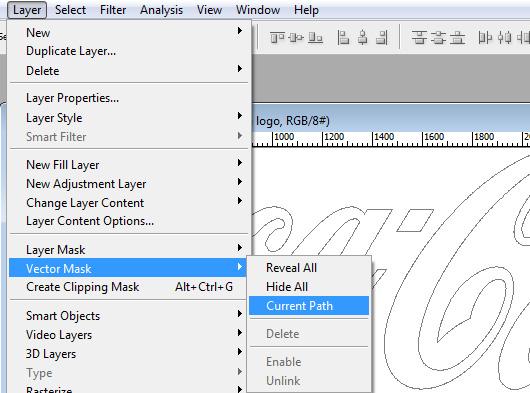
So, our previous rectangle shape is now formed a Coca-Cola logo.
Step 22
We back to our project file. Right click the “logo” layer and select Edit Content. This will open a new .psb file. Put in our Coca-Cola logo.
Rotate the logo 90 degree Counter Clock Wise. You can apply by hitting Ctrl/Cmd + T and rotate it manually with your mouse or go to menu Edit > Transform > Rotate 90o CCW. And save the file so the original Smart Object in our project file is updated.
Step 23
We are still in the .psb file. Create a wavy shape a-la Coca-Cola using Pen Tool. Then save it to update the Smart Object.
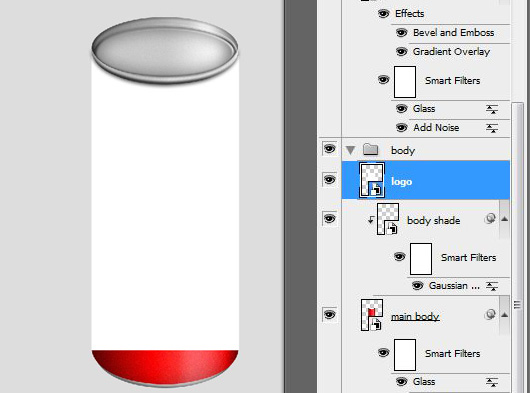
Step 24
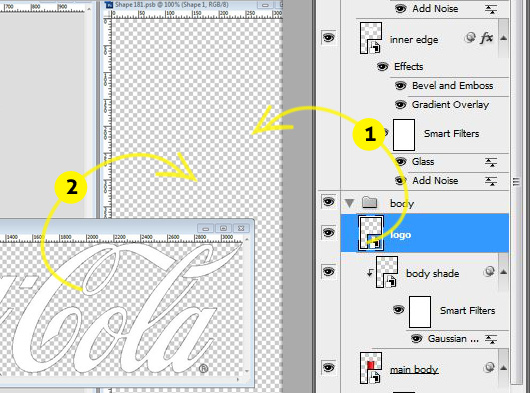
As we see on the screenshot below, our logo or label is passing over the “main body”. So we need to move the logo layer below.
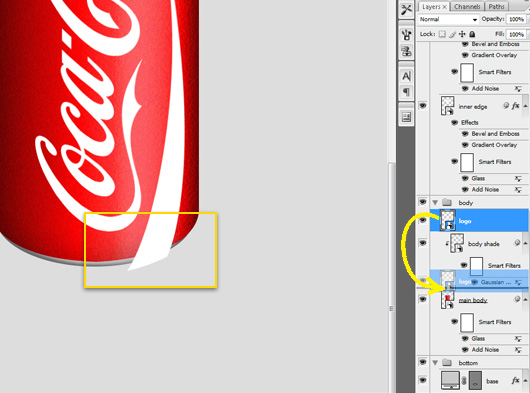
This will automatically “clip” masked the layer.
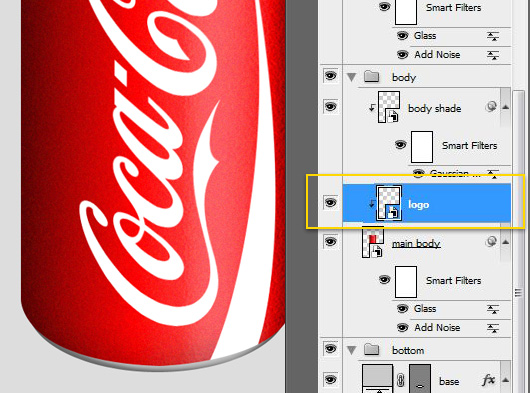
Ok, so far this is our can is look like.
Step 25
Do you think that this is still a bit unrealistic? Of course. Because, the “main body” has shade and lighting so we should also apply it on the logo.
It is very easy, as the “logo” layer is positioned the same as “main body”, you can just copying Layer Style from it or you can create it manually.
Step 26
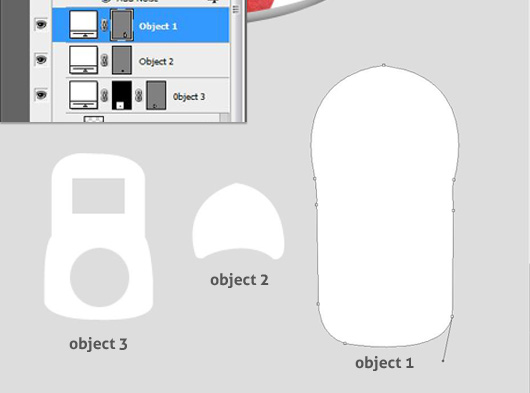
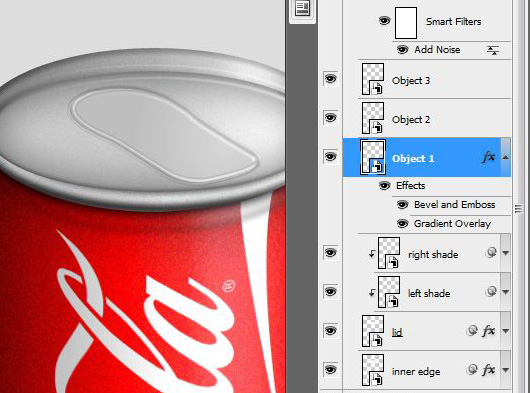
Can usually has an opener which we can easily pull it and enjoy the drink. So create three new objects as shown below using Pen Tool. And as I don’t really know the name, let’s just call just call them Object 1, object 2 and Object 3.
Convert the shape into Smart Object separately.
Step 27
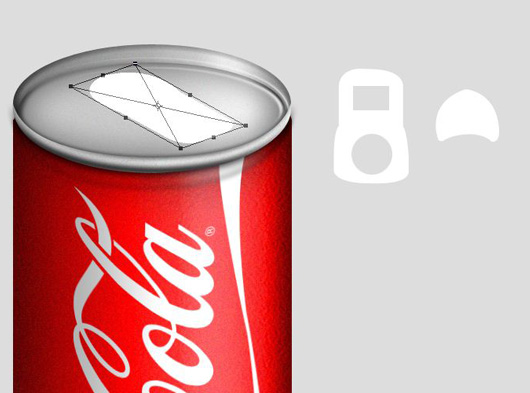
Hit Ctrl/Cmd + T to free transform Object 1. Try to make it skew like this.
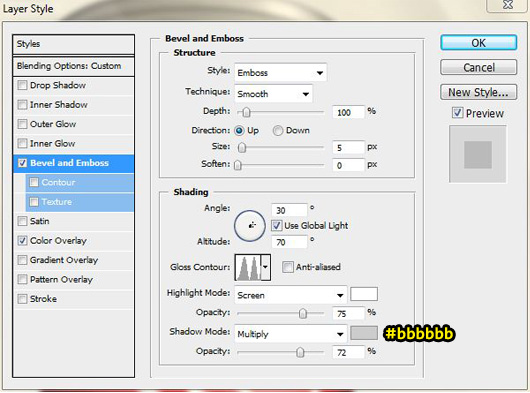
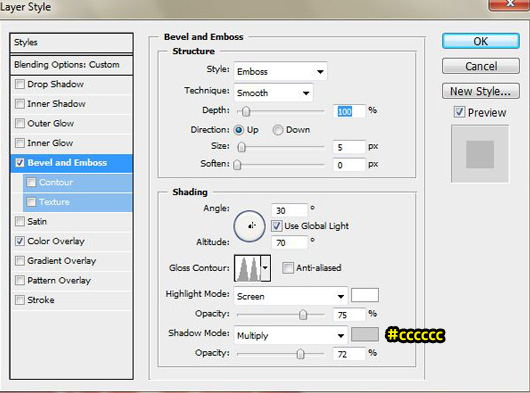
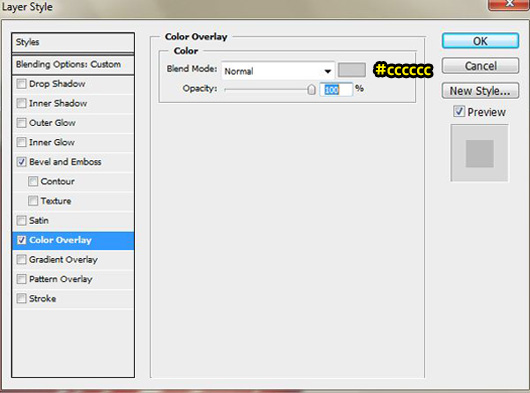
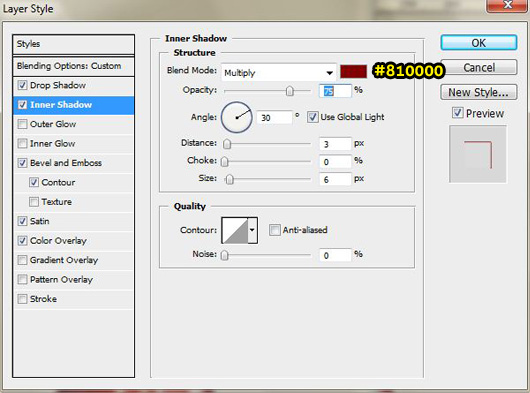
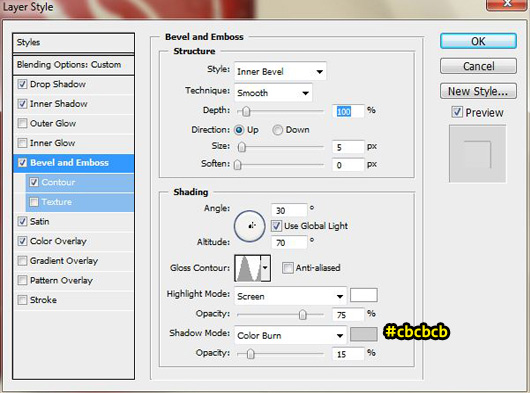
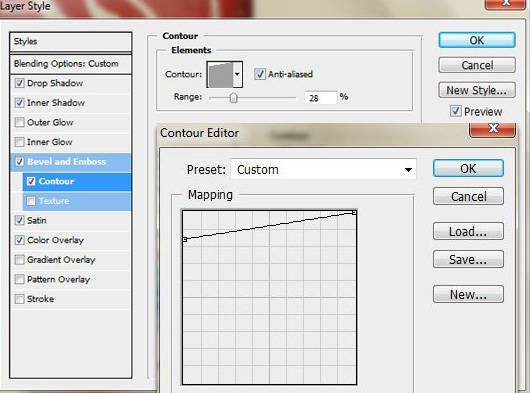
After that, add the following Layer Styles:
- Bevel an Emboss
- Color Overlay
Step 28
Do the same step to the rest of 2 objects.
Add the following Layer Style on Object 2:
- Bevel and Emboss
- Color Overlay
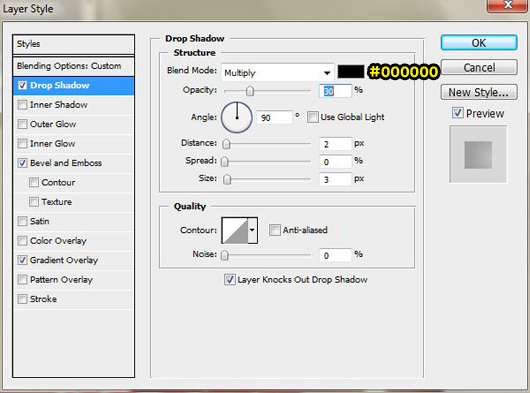
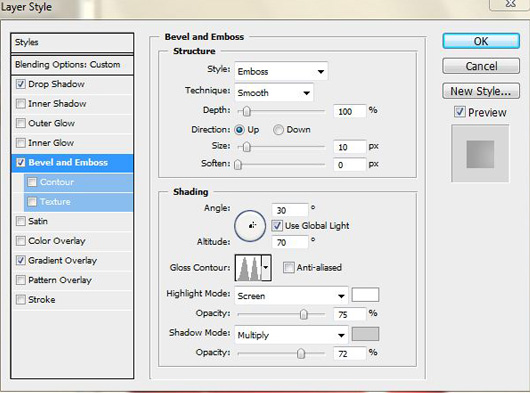
And add these Layer Styles to Object 3:
- Drop Shadow
- Bevel & Emboss
- Gradient Overlay

Let’s take a look the result for a while.
Step 29
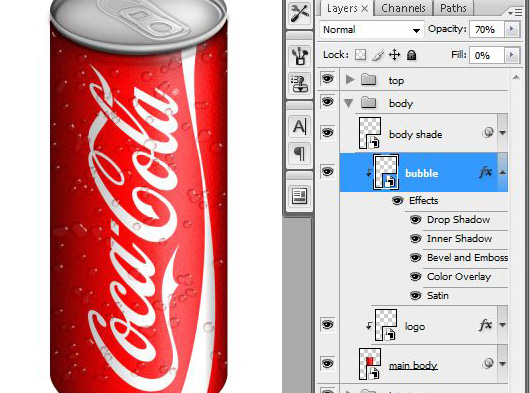
Now, create a new layer under “body” group, rename it to “bubble”. Using Brush (B) with 100% hardness, start brushing on the layer. You can adjust brush diameter by hitting “[” or “]”. We are going to make water drops.
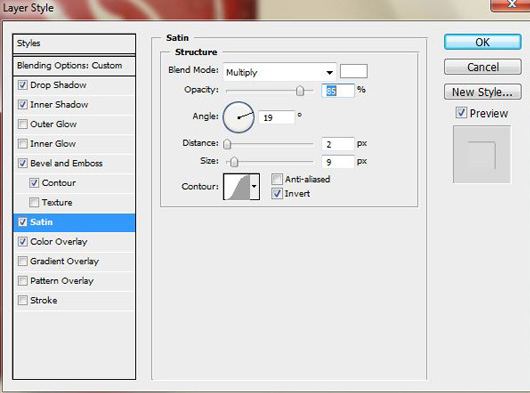
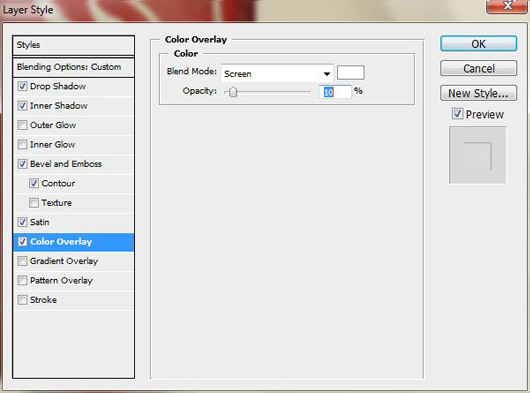
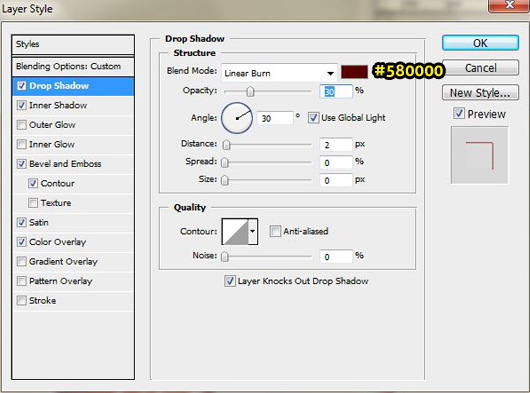
Step 30
Then, apply all these Layer Styles:
- Drop Shadow
- Inner Shadow
- Bevel and Emboss
- Contour
- Satin
- Color Overlay
Move the “bubble” layer below “body shade” layer. It will automatically clip masked the layer. You may also apply the same step and technique to make water drops in “top” group.
Step 31
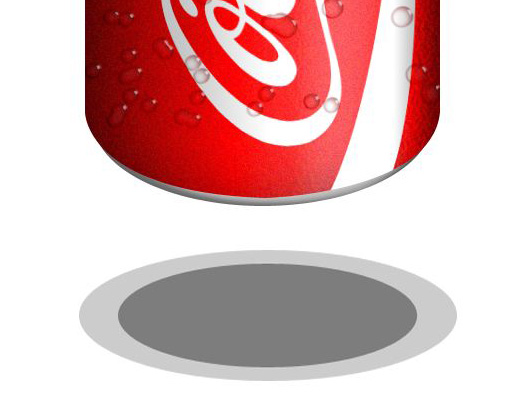
For the final touch, we will create a shadow for the can. Create double Ellipse shape, convert both into Smart Object. Add Gaussian Blur from Filter > Blur > Gaussian Blur.
Conclusion
This is it, our final Coca-Cola Can product.
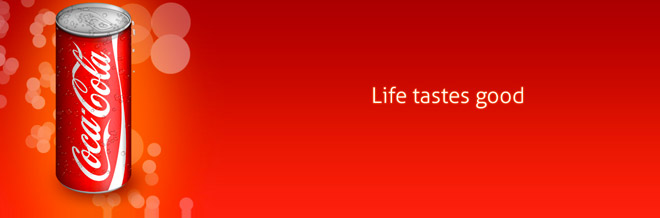
But not limited to Coca-Cola, you can also change as you like. If you’d like to change it to Pepsi can just change the “main body” to Pepsi blue and replace the Coca-Cola logo with Pepsi logo, etc. or you can make this can into something like Coca-Cola banner ads.
Download Source Files
- Coca_Cola_Can (2.57MB)
We’re just starting and there’d be more tutorials to look forward to in the next couple of days. Well, is there anything on photoshop you’d want to learn in particular? Any feedback and comments in today’s tutorial? Let us know and we’ll try our best to address the need.


wow, appreciate your hard work.
like the way you thinking
This is great. Especially if “realistic” means “not realistic at all”!
Thank you.
Hi, brent
thank you for your feedback. I really appreciate it.
Nice tutorial. I like it!
Cool tutorial dude!
I was actually debating on learning this craft… i guess i’ll give it a try! Thank you for the share!
wow! looks so easy but it ain’t!
great tutorial Thor 🙂 we will expect more tutorial from you lol
Great tutorial and I learned a lot from it. Thanks Thor 🙂
Hi
It’s great idea .I learned a new idea . Thanks for it