
In this article we’re going to create a nice sports team badge using both Photoshop and Illustrator. The design is inspired from the NBA/NFL/NHL team logos, yet it doesn’t follow their style. Although it looks complicated it’s extremely easy and you don’t need to have any drawing skills at all (I don’t either). So, let’s start.
Tutorial Details
- Program: Adobe Photoshop / Adobe Illustrator
- Version: CS6 / CS5
- Difficulty: Intermediate
- Estimated Completion Time: 2 hours
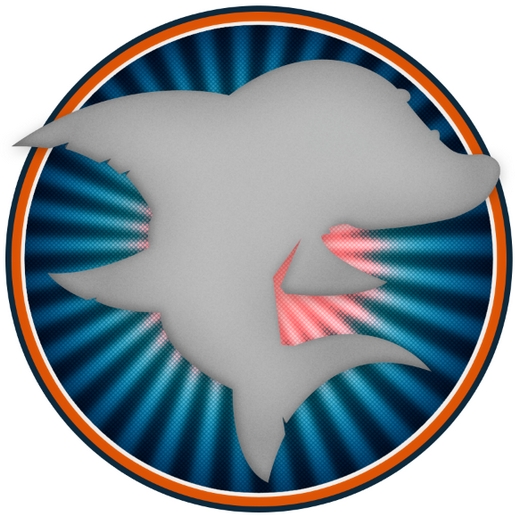
Final Result

Step 1
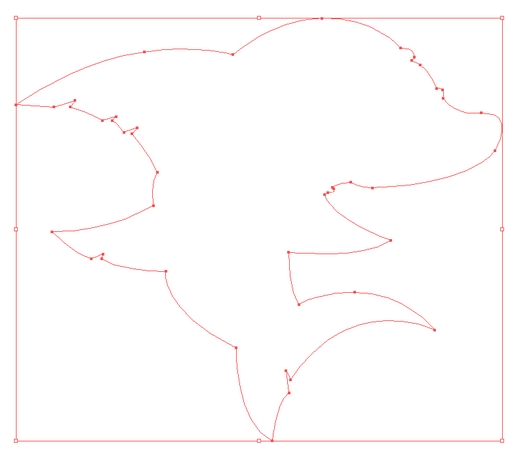
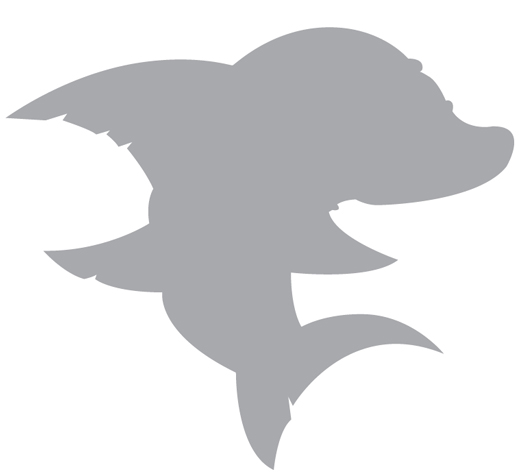
Create a new file in Illustrator and pick the Pen Tool (P). We’ll be creating a shark, which is an easy to draw animal. Draw the outline of your shark and fill it with a grey color (let’s say 40% black). If you want you can apply a stroke.
Step 2
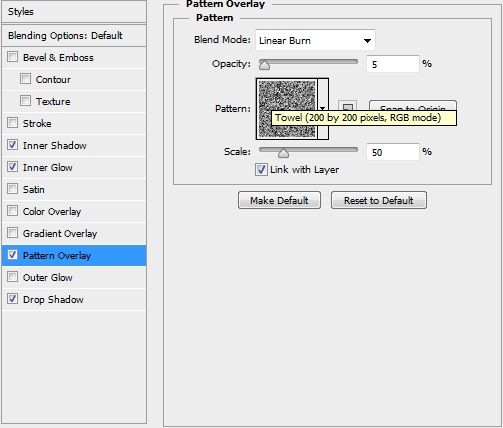
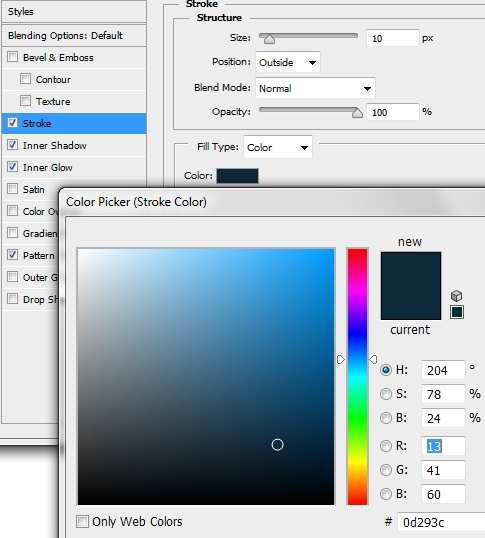
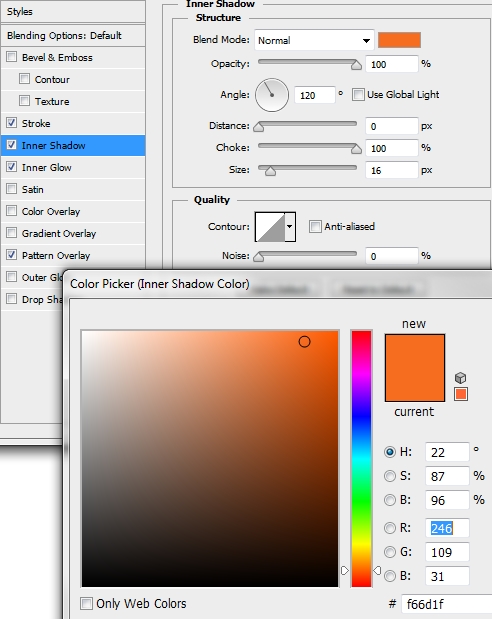
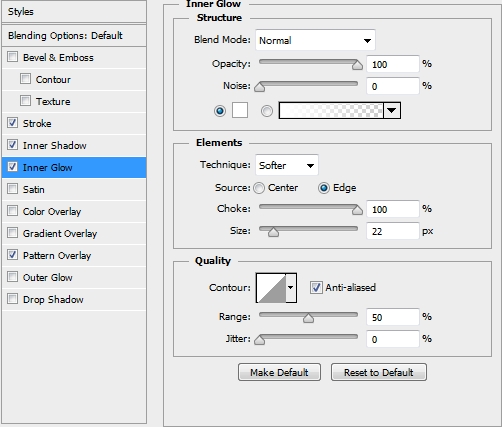
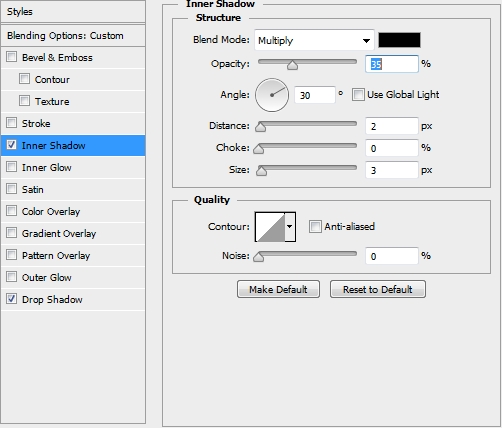
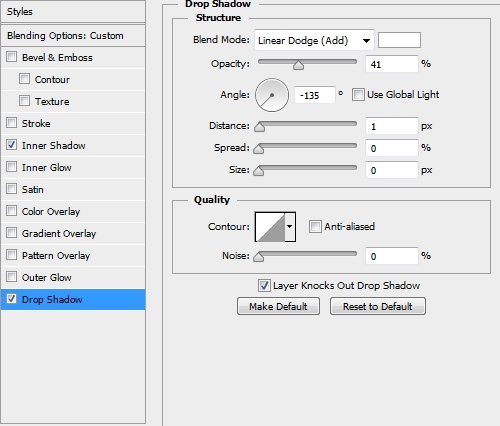
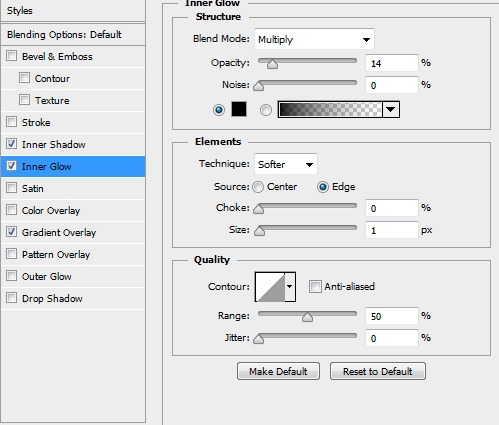
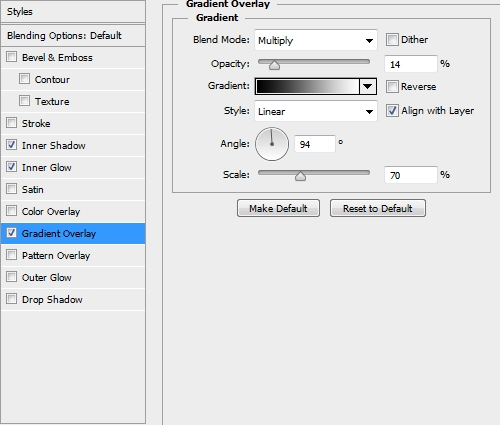
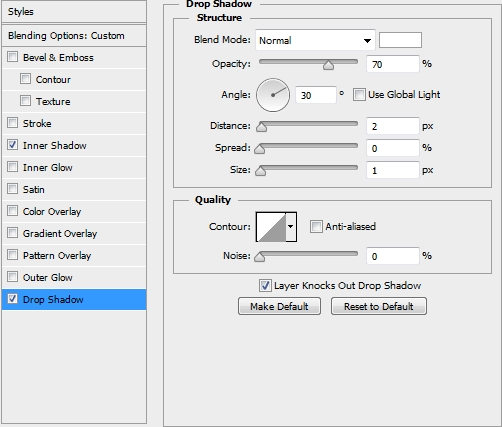
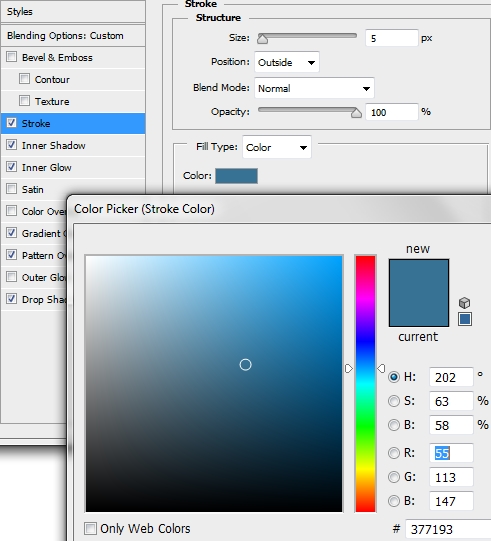
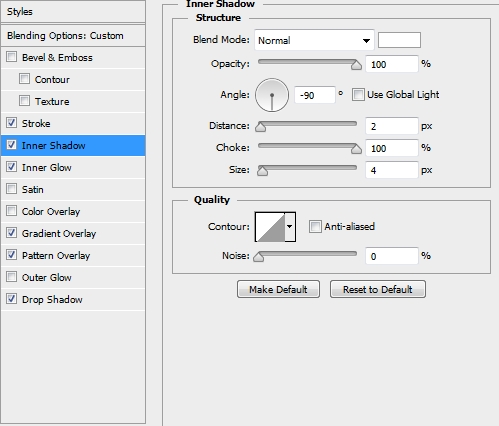
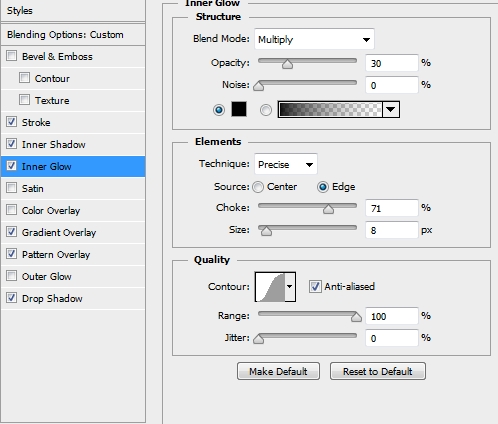
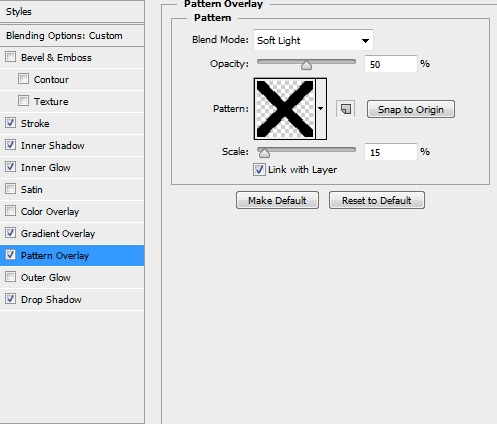
Copy (Ctrl+C) and paste (Ctrl+V) the shark shape in Photoshop and rename this layer to “Shark”. Apply these styles.


Step 3
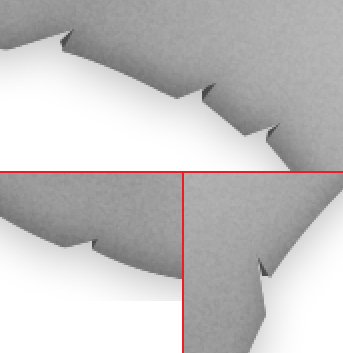
Create a new layer and place it before the Shark layer. Pick the Pen Tool (P) and draw some triangles to add a 3D effects to your shark. Fill them with a slightly darker grey color.
Step 4
Now we’re going to create the background. Add a new layer and place it before the Shark layer. Grab the Ellipse Tool (U) and draw a big circle. Fill it with #0d293c and apply the following styles.

Step 5
Duplicate this circle twice and turn the Fill of these copies to 0%. Apply the first two styles to the first copy and the third one the second copy.
Step 6
Create a new layer and clip it to the first circle (Step 4). Select the Custom Shape Tool (U) and pick the Registration Target 2 shape from the list. Fill it with #ffffff (white) and apply a 5px Gaussian Blur Filter. Change the Blend Mode to Overlay.
Step 7
Duplicate this shape and go Filter>Blur>Gaussian Blur and set the radius to something around 15px (leave the Blend Mode at Overlay).

Step 8
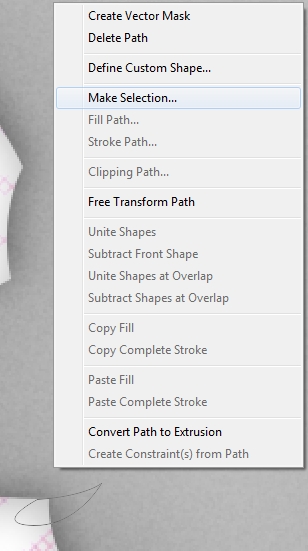
Group the layers created in Steps 4-7 and name the group “Background”. Now, create a new layer and place it above the Shark layer (every layer created from now on will be placed on top of the layers stack). Pick the Pen Tool (P) and start drawing some triangular shapes. Use the technique shown on the https://naldzgraphics.net/wp-content/uploads/2013/03 below. Lower the Opacity to something around 30-40%.
Step 9
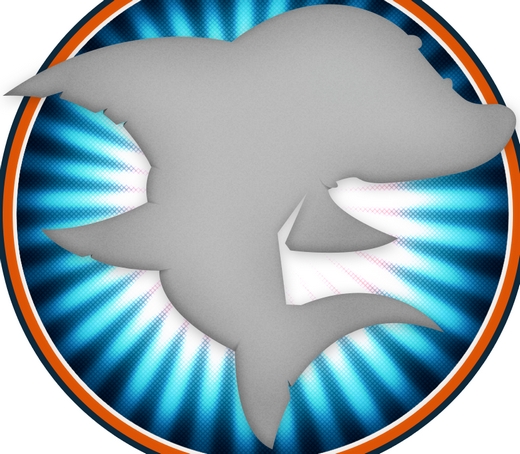
Your shark should now look something like this.
Step 10
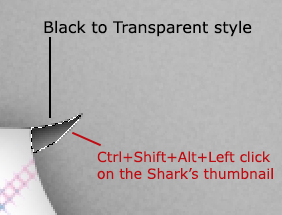
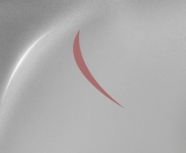
The next step is to add some basic highlights. The image below will explain the easiest technique.
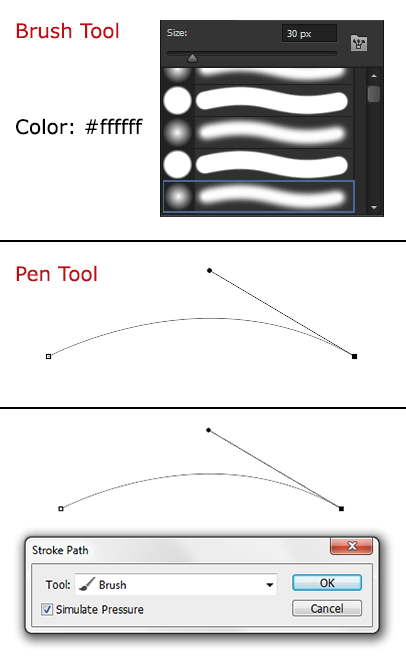
Step 11
Keep adding these Stroke Path highlights until you have something that looks like this. Lower the Opacity to something around 60-70%.

Step 12
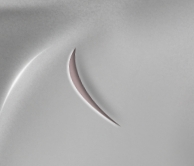
Add some shadows (color: black, layer opacity: 40%, brush opacity: 20%, brush flow: 60%) using a soft round brush (B).

Step 13
Now add some more highlights using the same technique as in Step 10, only this time pick a hard round brush and set the size to 3px.

Step 14
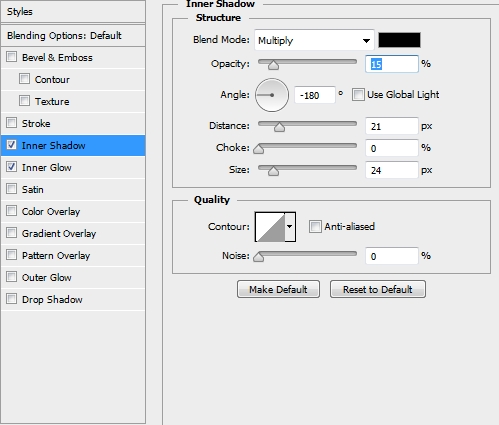
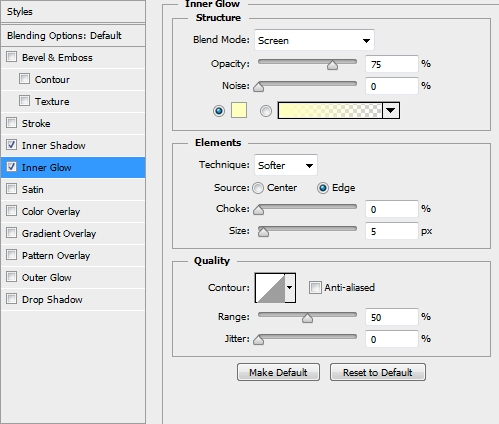
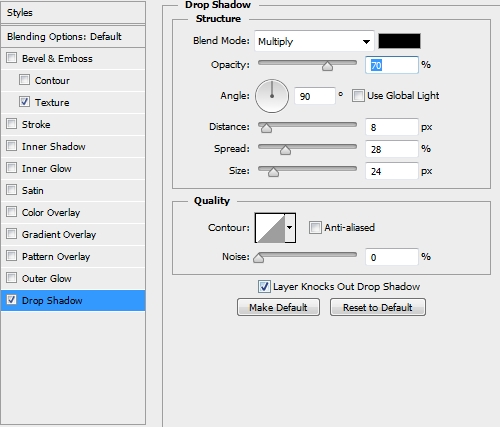
The next thing to create is the belly. So, pick the Pen Tool (P) and draw a shape like the one on the image below. Fill it with #ffffff and apply the following styles.

Step 15
Create a new layer and grab the Brush Tool (B). Pick a Soft Round brush and add some highlights (color: white – #ffffff) to the belly.

Step 16
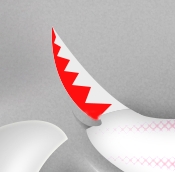
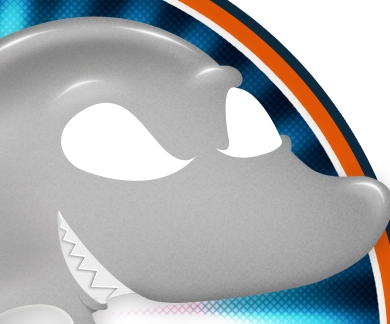
Create a new layer and select the Pen Tool (P). Draw the teeth (color: white).
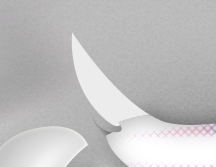
Step 17
Create a new layer and draw a shape like the one on the first image. Turn Fill to 0%, clip this layer to the one that you created in the previous step and apply the following styles.
Step 18
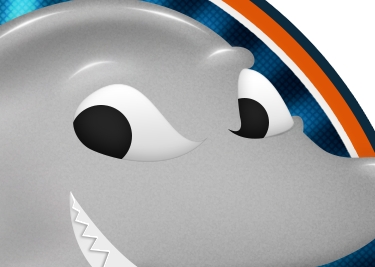
Next, pick the Pen Tool (P) and draw the eyes. Fill them with #ffffff (white) and apply these styles.

Step 19
Draw two circles for the irises (color: black) and clip them to the eyes layer.
Step 20
Add some highlights to the eyes using a soft round brush (B).
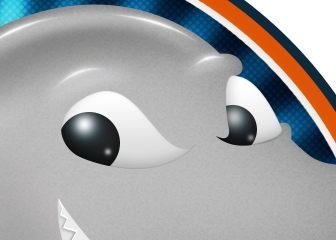
Step 21
Keep adding layers with highlights and shadows using the same techniques that you used with the basic highlights.

Step 22
There’s one last element that has to be created on the shark. The gill openings. So, grab the Pen Tool (P) and draw a shape like the one on the first image. Fill it with #a76d6d and lower the Fill of this layer to 35%. Apply the following styles.

Step 23
Add some shadows around the gill opening.
Step 24
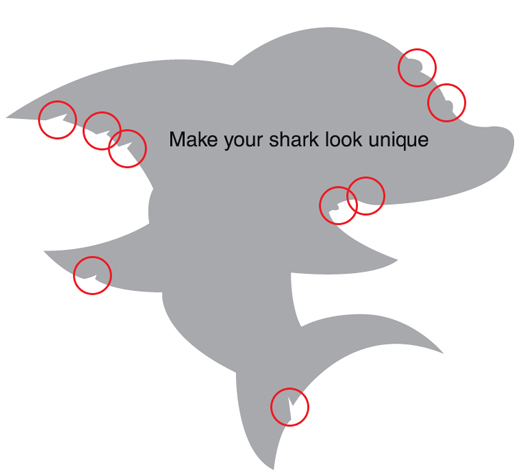
Group these two layers and name the group “Gill Opening”. Duplicate the group twice and place the other openings according to the image.

Step 25
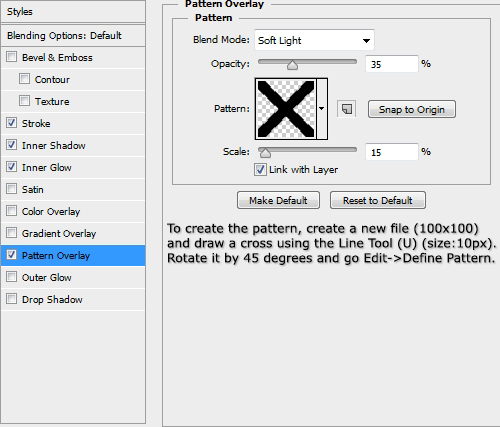
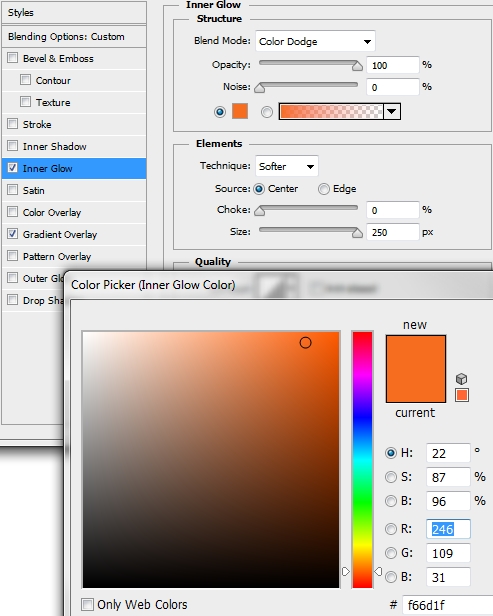
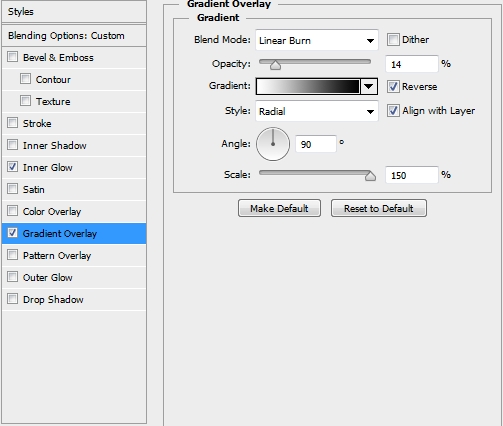
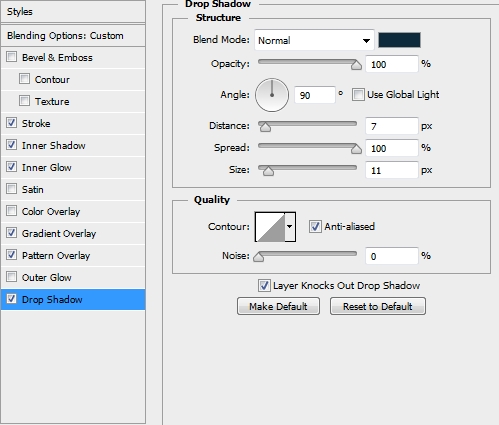
Ok, now that the shark is ready, we need to add some text. The font that we’ll be using is SF Sports Night NS (color: #f26522). Write anything you want and switch the text layer to warp mode. Apply the following parametres and add the drop shadow style shown on the third image.

![]()
Step 26
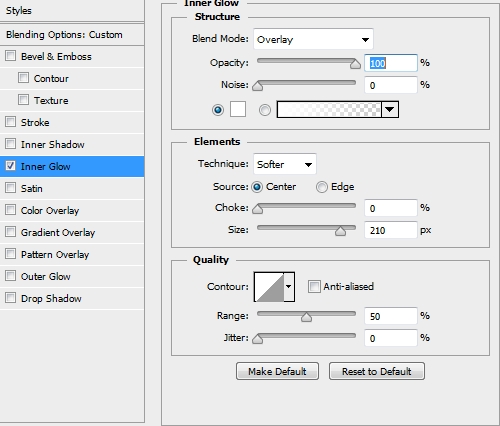
We want the text to have a pseudo 3D effect. So, duplicate the text layer, turn the Fill of the copy to 0% and apply the following styles. That’s a very useful trick that I think every Photoshop user should know.


Step 27
Our design is basically finished. The following steps are optional. Group all the layers created so far (except from the background) and duplicate this group (just a backup in case anything goes wrong). Deactivate the original group and merge the copy.
Step 28
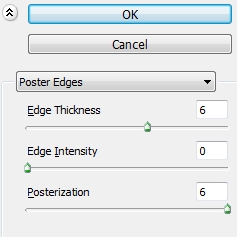
Duplicate this new layer twice, select the first copy and go Filter>Artistic>Poster Edges. Change the Blend Mode to Luminosity and lower the Opacity to 70%.

Step 29
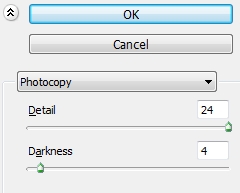
Select the second copy and set the foreground color to black and the background one to white. Then, go Filter>Sketch>Photocopy and change the Blend Mode to Multiply and lower the Opacity to 60%.
Conclusion
That’s it. Your badge is now ready. You can add any details or effects you want to make it look better. We hope you enjoyed the tutorial. If you have any questions or tutorial requests, post them in the Comments Section.
Variation


Nice tutorial,thank you!
It was really fun tutorial,thank you for sharing your knowledge.
Great job!!!
The badge is cute but the procedures in making that badge is very complicated.
Cool tutorial,thanks for sharing your ideas in doing this design.
I am new in Photoshop,can this design be feasible if I’m going to use the lower version?
You can only say that it is easy because you are an expert,right?
But thank you for sharing your skills in photoshop.
You just deliver it well,thank you.
Will that’s great!!
Hi Sele,
You have to duplicate the circle in order to apply different styles. Yes, by “Fill” I do mean the transparency (which is located right under the Opacity). The reason that we turn the Fill to 0% is that we want only the layer styles to appear (if you turn the Opacity to 0% you’ll notice that the whole layer disappears).
TLDR: Opacity 0%-> object/layer styles: invisible; Fill 0%-> object: invisible, layer styles: visible.
Thank you very much for your help.