In this article we’re going to create an interesting and abstract text effect using layer styles, the fantastic Lens and Optical Flare Collection by daWIIZ and some tricks in the post-production phase. So, let’s start.
Tutorial Details
- Program: Adobe Photoshop
- Version: CS6
- Difficulty: Intermediate
- Estimated Completion Time: 1-1,5 hour
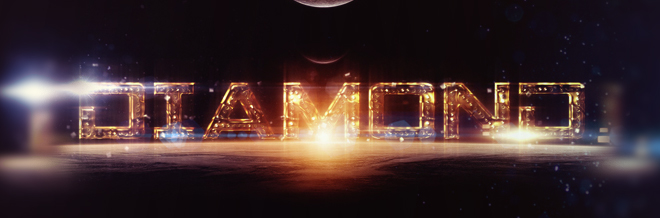
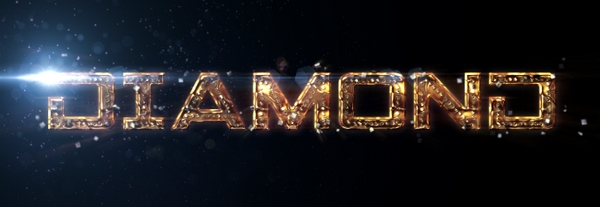
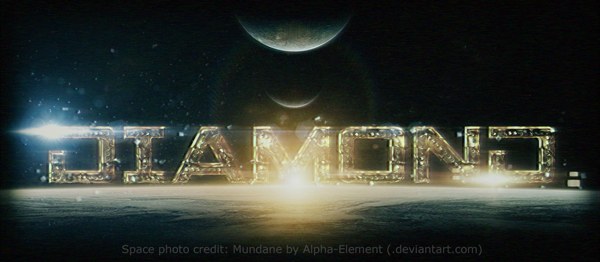
Final Result
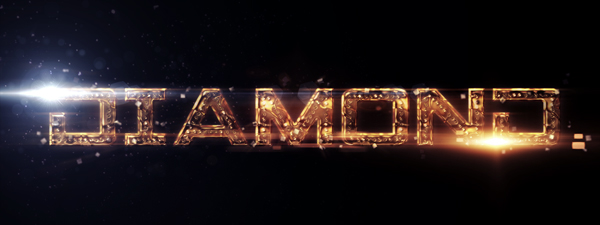
Tutorial Assets
Step 1
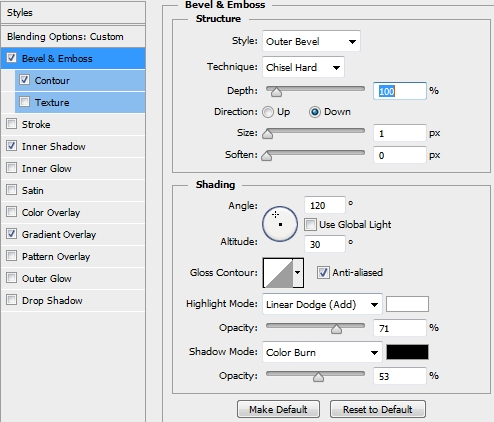
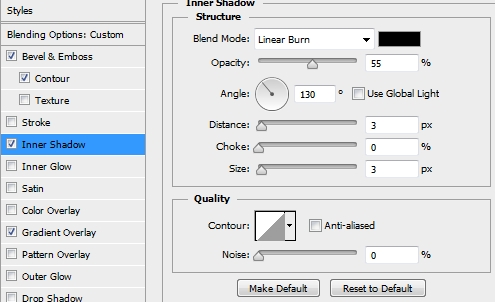
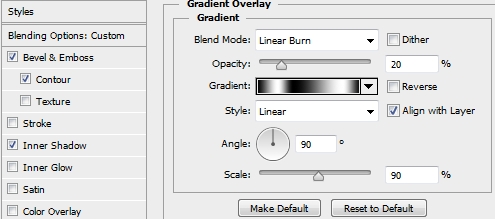
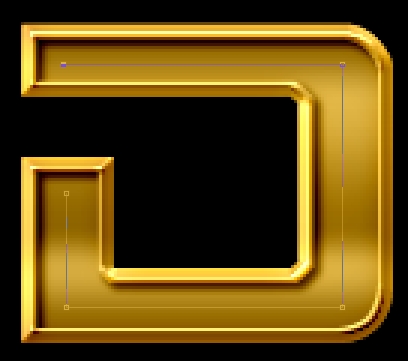
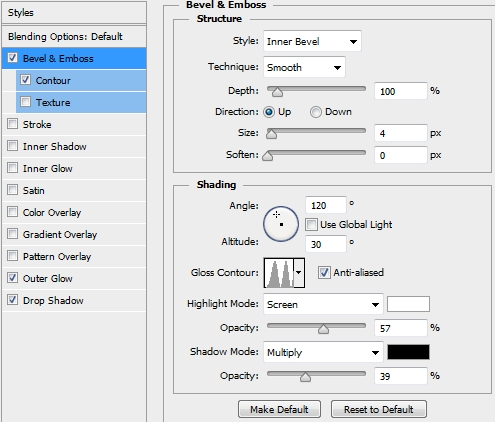
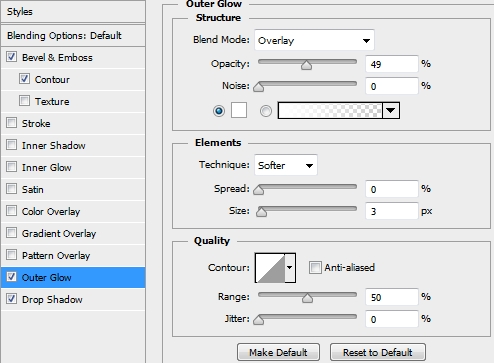
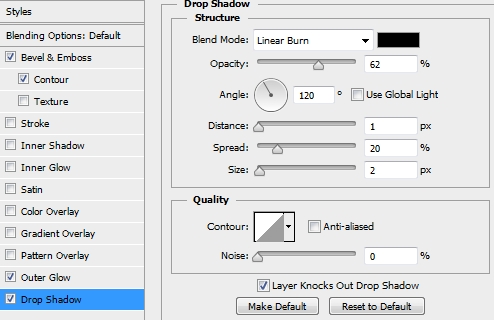
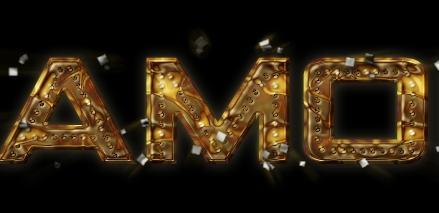
Create a new file in Photoshop. Use any preferences you like. We chose 1100×410, 300dpi, 8-bit RGB, BG colour: Black (#000). Grab the Type Tool (T) and write anything you want. The font we used is called Spy Agency (size: 170px) and you can download it from here. Turn the colour of the text to #d4aa3f and apply the following styles.


Step 2
Duplicate the text layer and clear its existing styles. Turn the Fill to 0% and add these styles.


Step 3
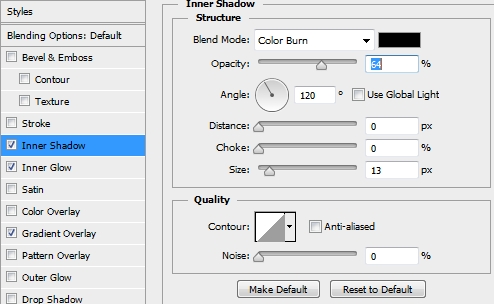
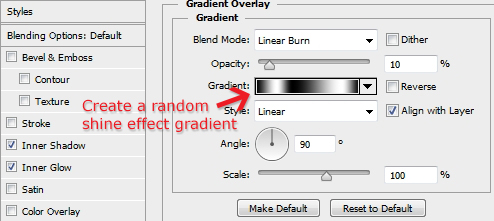
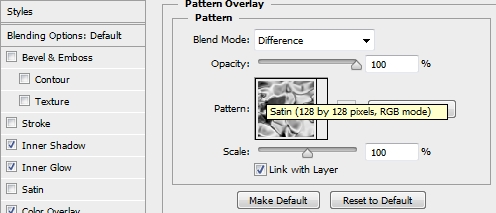
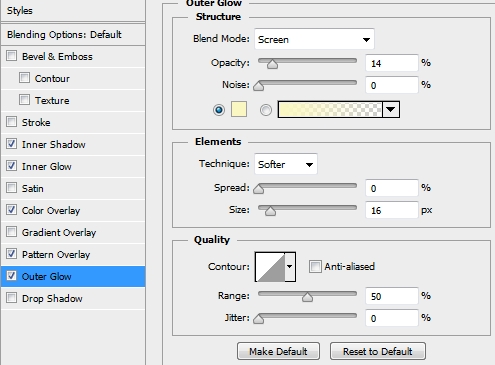
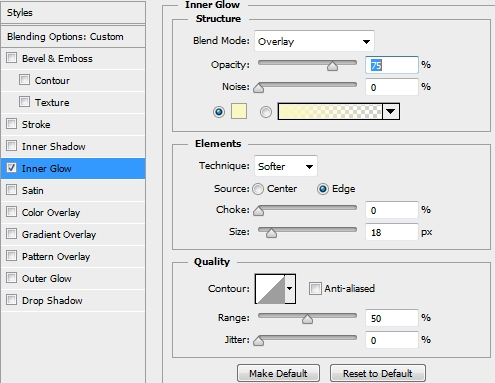
Next, create a new layer and select the text’s pixels (Ctrl+Left Click on layer’s thumbnail). Then go Select>Modify>Contract and set the value to 4px. Paint the selection with a random colour and change the Fill to 0%. Then simply add these styles. Again, to create the gradient just place white and black stops at random spots.


Step 4
Now we need to create the little diamonds that will decorate our text. To do this, pick the Brush Tool (B) and select a hard round brush. Set the size of the brush to 7 px and the Spacing to 160-165%. Then pick the Pen Tool (P) and start drawing simple paths inside each letter. Use the Stroke Path technique (make sure the Simulate Pressure box is unchecked) to add the diamonds. Once you’re done, apply the following styles to the diamonds layer.

Step 5
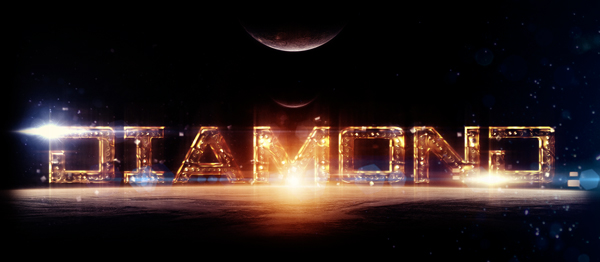
Your design should by now look something like this.

Step 6
Merge all the layers (except from the background) and apply the following styles to this new layer. Rename this layer to Post-Prod.


Step 7
Duplicate the Post-Prod layer and clear its styles. Go Filter>Blur>Gaussian Blur and set the radius to 2-2,5 px. Change the Blend Mode to Soft Light.

Step 8
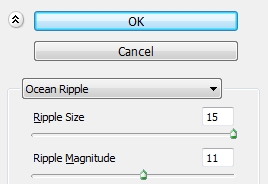
Duplicate the Post-Prod layer once again and clear the styles of the copy. Place it on top of the layers stack and desaturate it (Ctrl+Shift+U). Then add a Ocean Ripple filter and right after that a 1-1,5 px Gaussian Blur. Change the Blend Mode to Overlay and lower the Opacity to 50-55%.
Step 9
The next step is to create the flying particles. It’s an optional step, so if you want you can skip to Step 11. To create the particles we need a new brush preset. So, draw a small rectangle, fill it with black (#000000) and deactivate all the other layers. Draw a rectangle around it with the Rectangular Marquee Tool (M) and go Edit>Define Brush Preset. Now, select this brush and modify it. Check the Shape Dynamics box and
change the Angle Jitter to 100%, the Size Jitter to something around 70%, check the Scattering box and set Scatter to something around 630%. Finally increase the Spacing a lot. Then simply select a grey colour (eg #707070) and draw some particles. Add a subtle Gaussian Blur (0,2-0,5px) and a Drop Shadow style (to create a pseudo-perspective).
Step 10
Create a new layer and using a hard round brush (pick a bright yellow colour) draw some highlights to add some extra perspective.
Step 11
Duplicate the Post-Prod layer again and clear the existing styles. Place it on top of the layers stack and go Filter>Blur>Motion Blur. Change the Blend Mode to Pin Light and lower the Opacity to 35%.

Step 12
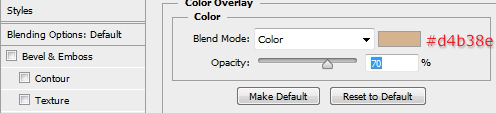
Duplicate the Post-Prod layer and place the copy on top of the layers stack. Again, clear the existing styles and desaturate the layer. Increase the contrast using the Levels (or Curves, whatever works better for you). Apply a subtle Gaussian Blur effect (0,2-0,4px) and add the following style. Finally change the Blend Mode to Soft Light and lower the Fill to 70%.

Step 13
Create a new layer and using the Rectangular Marquee Tool (M) draw a rectangle around your design. Fill it with a random colour and set #db92b5 as your foreground colour and #000000 as the background one. Then go Filter>Render>Clouds. Re-apply the Clouds filter until you feel satisfied with the result. Then simply change the Blend Mode to Soft Light.

Step 14
Create a new layer and paint the canvas blue (#157ba5). Change the Blend Mode to Color and lower the Opacity to 15%. Then duplicate the Post-Prod layer and place it on top of the layers stack. Deactivate the Outer Glow style and create a new layer. Merge these two layers (Post-Prod copy+blank layer). Desaturate this new layer and change its Blend Mode to Color Dodge and the Opacity to something around 65-70%.

Step 15
Now, place the Blurry Sparkles flare from the Lens and Optical Flares Collection. Rasterize it and using the Curves (Ctrl+M) increase the contrast (make the black look blacker; if this makes any sense). Change the Blend Mode to Screen and adjust further the contrast if you want. You can add a mask to make the transition smoother.
Step 16
Place the Sankor flare and repeat the previous step (increase contrast etc).
Step 17
From now on you can experiment as long as you want. Add some gradient map layers, extra flares, smoke, noise, a background or adjust the colours. It’s up to you. Check these variations for inspiration.
Conclusion
That’s the end of this article. We hope you enjoyed the tutorial and learnt something new. As always, if you have any problems with following the steps or tutorial suggestions, post them in the Comments Section below.


Another great tutorial from you Alan,thanks for this.
Thank you for sharing the idea in making an effect in abstract text.
It’s cool..
This post is a long tutorial but it’s okay because you just gave the right step in making this thing.
Nice and detailed tutorial.