There are lots of things and technique you can create on Photoshop. It’s just a matter of creativity and patience to come up a good outcome. Today, we made a simple tutorial for beginners. In this tutorial you will learn How to Make Reflection on your text in Photoshop. It’s pretty easy and simple. This effect is commonly use on making Logo and other stuff. So lets start.
Tutorial Steps
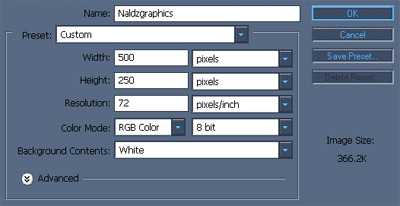
1.First, Create New Layer CTRL+N.

2.Use Pen Tool (P) and type a text that you want.then use Paint Bucket Tool (G) to fill in color.

3.Duplicate the Layer CTRL+J.then go to Edit>Transform>Flip Vertical. Choose Move Tool (V) to move your Duplicate Layer down.

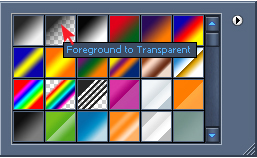
4.Go to Add Layer Mask then Choose Gradient Tool (G).right Click on the text then Choose Foreground to Transparent.

5.Drag Your Mouse on the text. and you’ll have something like this.

Hope this help. Have a nice photoshop day..
If this post is helpful to you,Make sure to Subscribe my RSS feed.


vry good friend.. keep it up
thats exactly how it should be done.
thanks man for the tut , keep it going
Yeah man that’s cool I know this tip but u have tell me a new tip that gradient will help u a lot because I have made a shadow of text first of all I make a duplicate layer of text by ctrl+j then do vertical that layer by ctrl+t then I use a rubber to rub it from the lower site and the gradient process help me a lot thanks!
I Created New Page with width 300px and height 100px and tried this tutorial .. It worked perfectly .Thanks for the tutorial 🙂