Do you have a favourite shoe that no matter how worn out it is, you still would like to use it? Well, you don’t have to throw it away. You can creatively do some touches to make it look brand new. You can start creating your custom shoe design by using Photoshop. This way, you wouldn’t need to buy a new pair of shoes for the holiday season. For this tutorial, we will show you how to design a custom painted shoe.
Aside from giving you the idea on how to create a custom painted shoe, you can also use this tutorial as a guide in creating shoe design presentations. With this, you can surely have an edge as a designer.
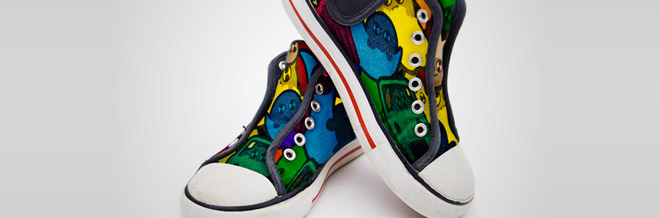
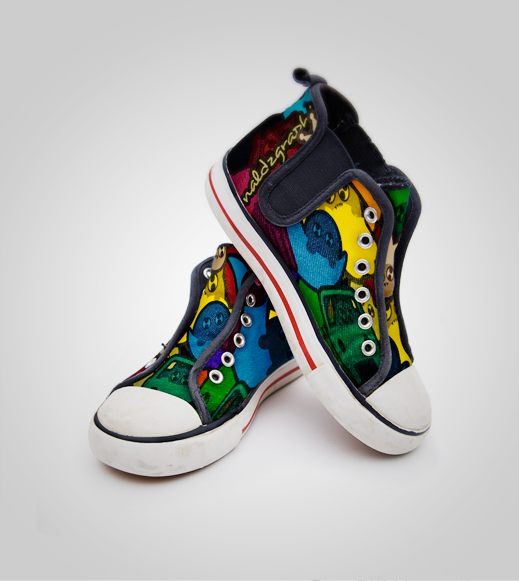
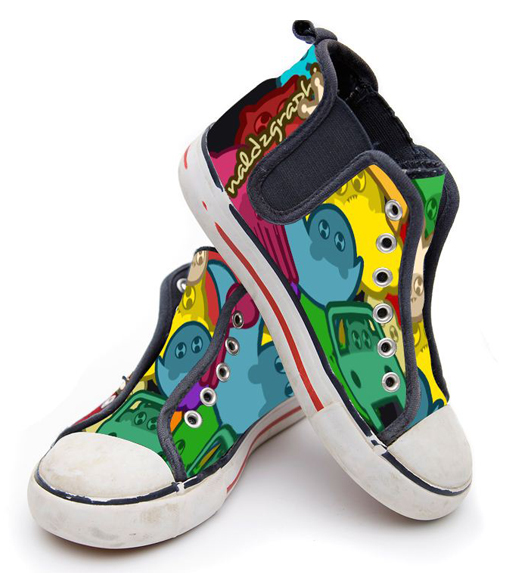
Final Result
Let’s get started.
Step 1
First we need to download a worn out shoes image for our tutorial in here.But you can also take picture of your own worn out shoes.
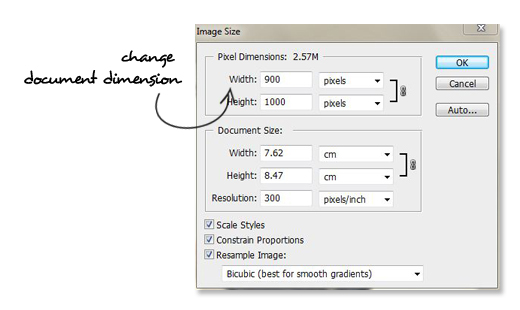
Open the image in Photoshop and change the dimension to 900 by 1000 pixels with 300dpi resolution.
Step 2
Now create a custom shape that resembles the shapes of the shoes.
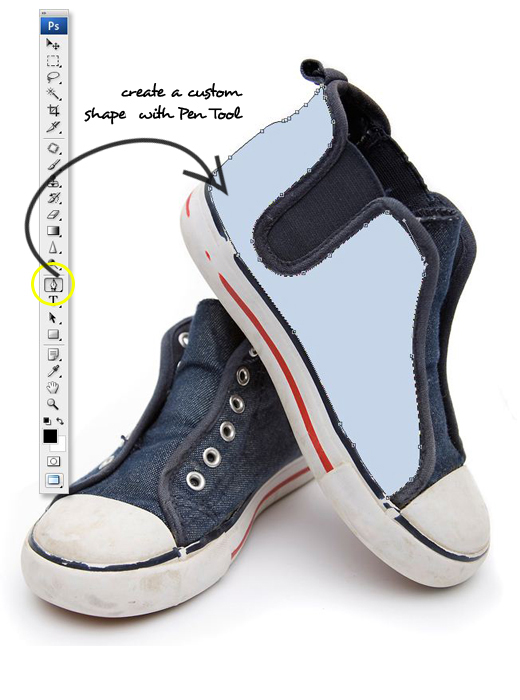
Do the same step to another section.
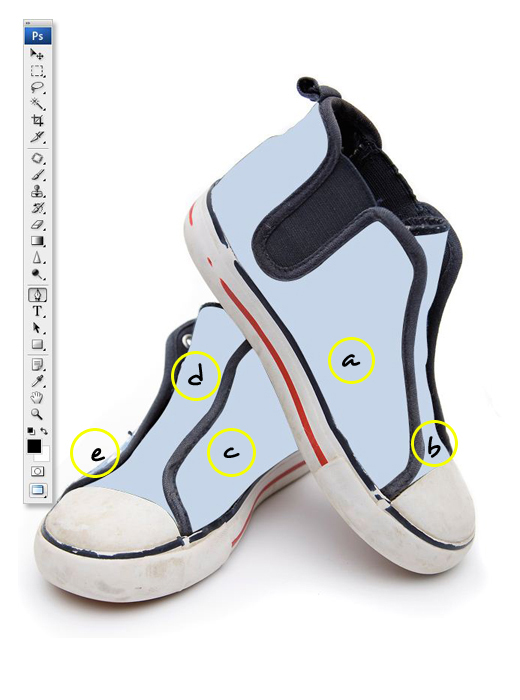
And now we have five sections which we are going to paint.
Step 3
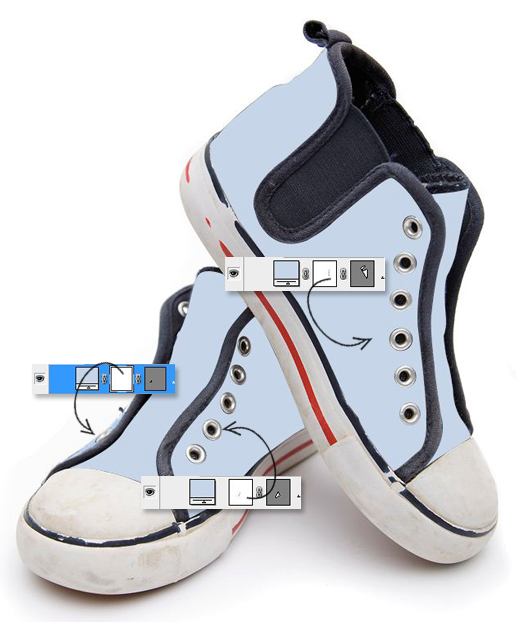
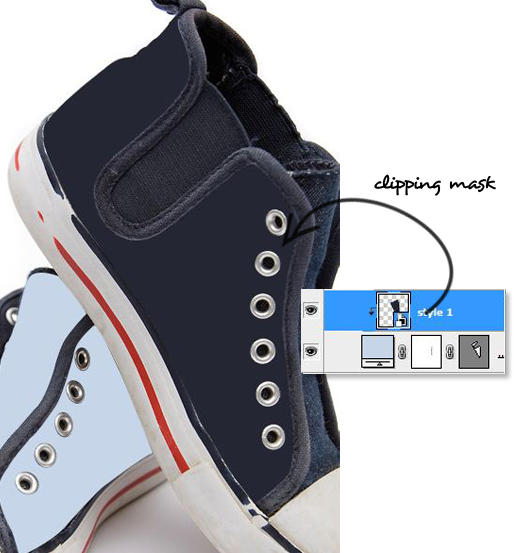
Create ellipse selections on the first shape we have created before with Elliptical Marquee Tool (M) invert the selection (Ctrl/Cmd + I) then apply Vector Mask on it.
Tips: If you do not know where the shoelace holes, you can make the shape transparent for a while.

Apply the same thing in another section that has shoelace holes.
Step 4
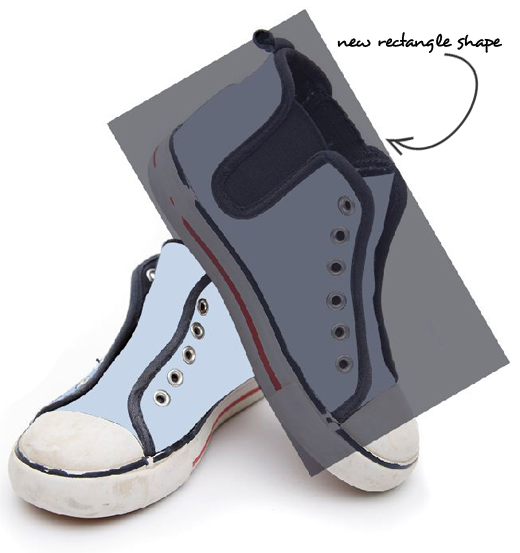
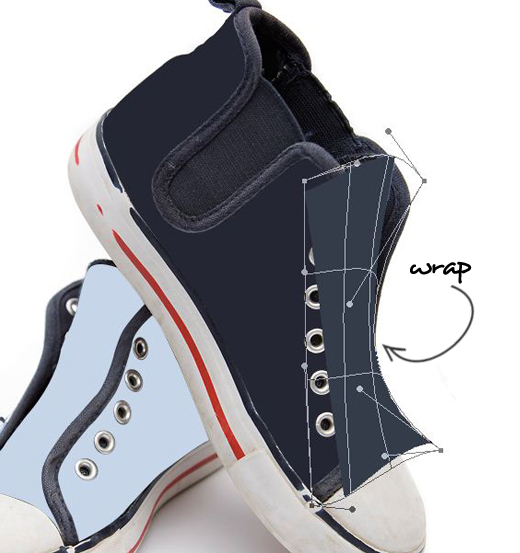
In this step we are going to make wrappers for our painting. Create a new shape rectangle layer, convert it to Smart Objects.
Step 5
Apply Free Transform (Ctrl/Cmd + T) to the layer and switch to Wrap Mode. Wrap the layer, so it nearly resembles the shape of the shoes curve. The layer was made transparent so we can look what are going under.
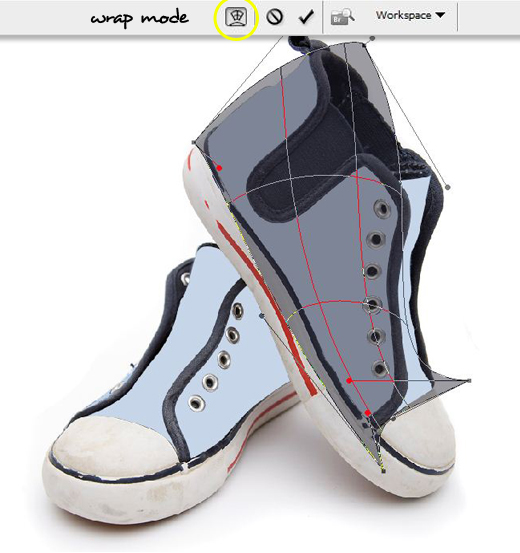
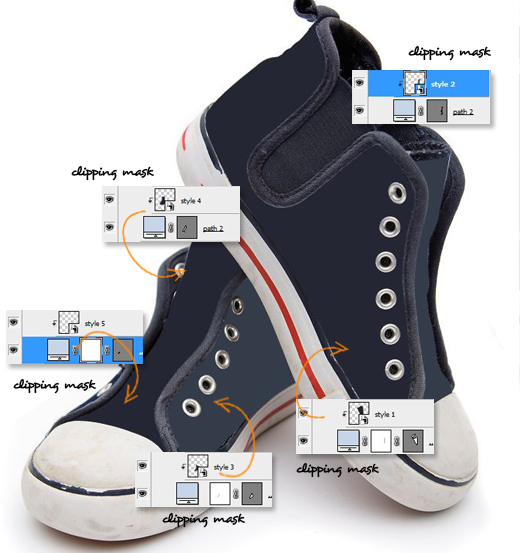
After finishing the wrapping part, now apply clipping mask to the layer. Rename the layer as you might think fit for it, but in this tutorial I name it “style 1”
Apply the same step on the other shoes sections.
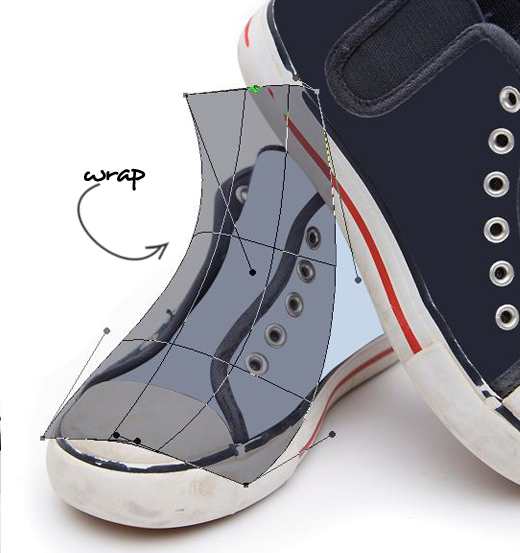
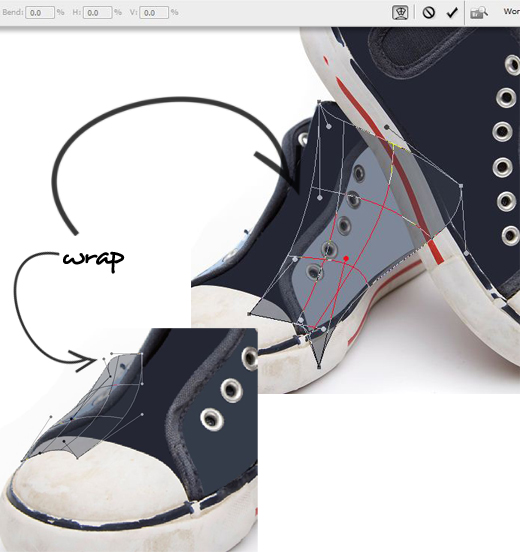
Clipping Mask all the layers, and our shoes will look like the screenshot below.
Step 6
In this step we will create an image or pattern of the painting that we will put on the shoes.
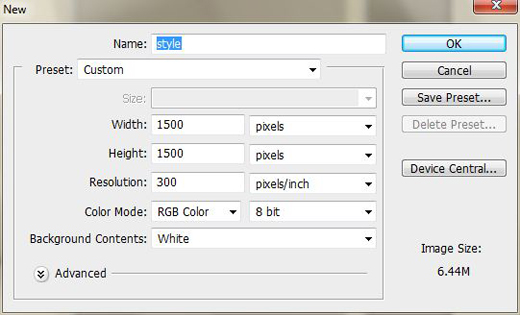
Create a new separate file with size of 1500x1500px. In this case, I name the file “Style” , and of course you can name it as you want that might fit.
Step 7
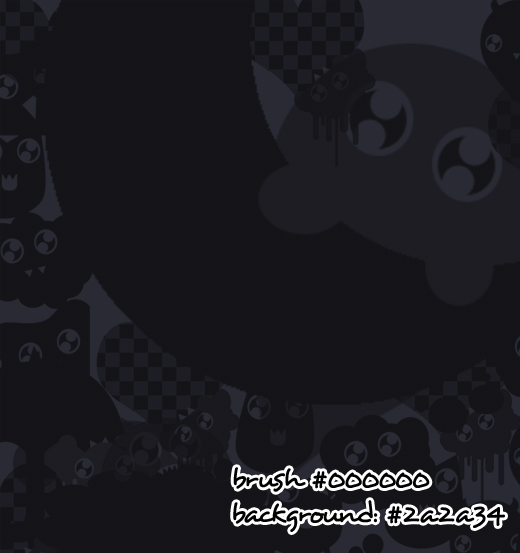
Fill the background with #2a2a34 color. Unless you have a lot of time you can manually draw the monsters. But in this tutorial we will use the Monster Brush Set which you can download from here.
Paint the brush randomly with various monsters and in different size.
Step 8
Create new layer and paint one monster brush.
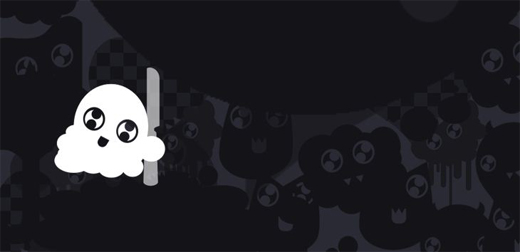
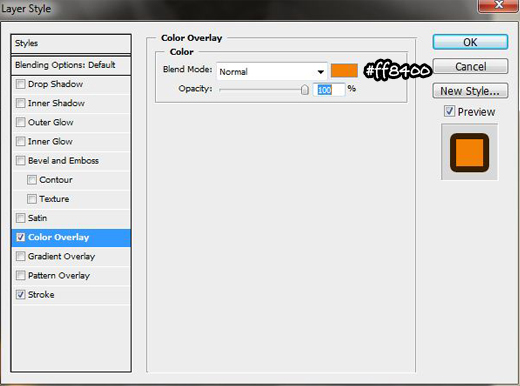
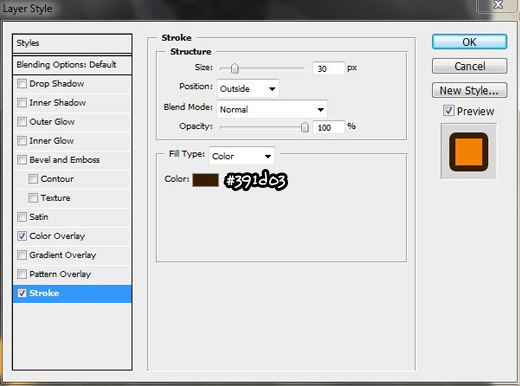
Add Color Overlay and Stroke layer style on it.
Repeat the step to create another adorable monster.

Step 9
We are back to our project file. Now go to one of wrapping layer we have created in Step 4. Double-click the thumbnail layer; it will lead you to a new window. Then put our painting from Step 7 in it. Save the file, it will update the wrapping layer.
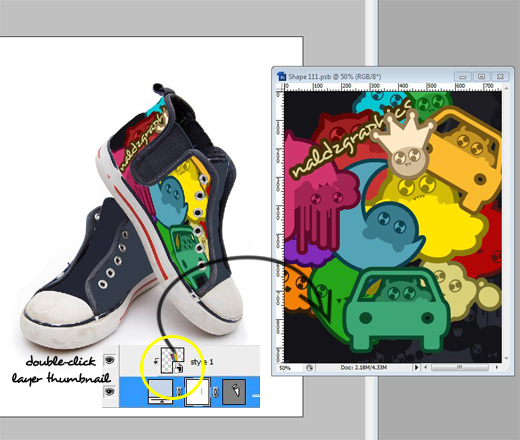
Let’s do the same step to another section.
Step 10
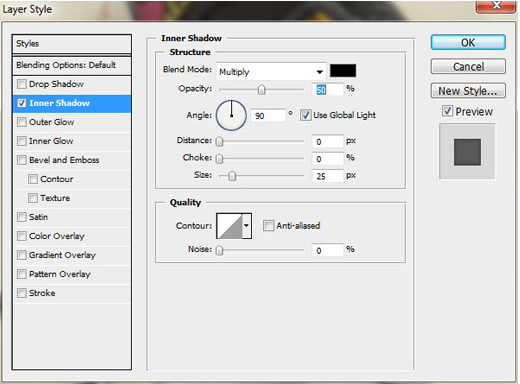
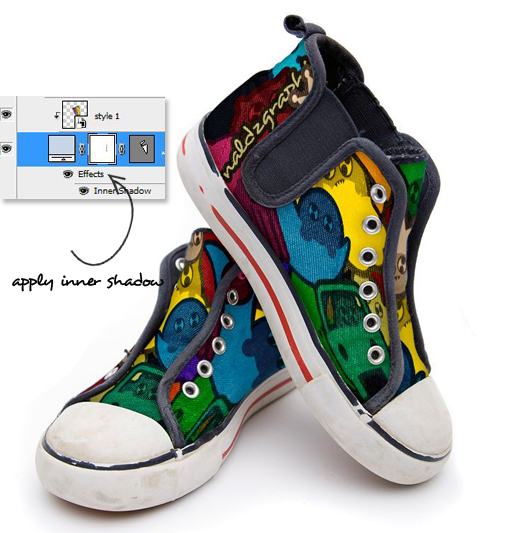
Now add Inner Shadow. On each of the sections we had put the painting on.
Step 11
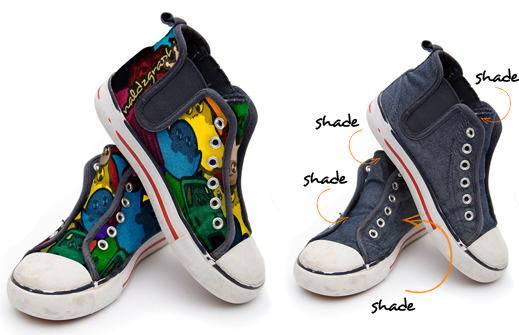
We will add shade on them, just like the shades on the initial shoes, in order to make the painting more convincing.
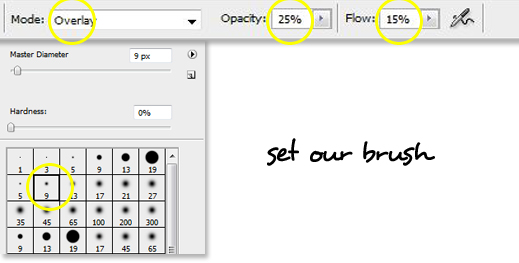
First set our brush. Pick a soft round brush, change brush mode to Overlay, 25% Opacity and 15% Flow.
Create a new layer and change the layer to blend mode to Overlay. Then don’t forget to apply clipping mas to the layer.
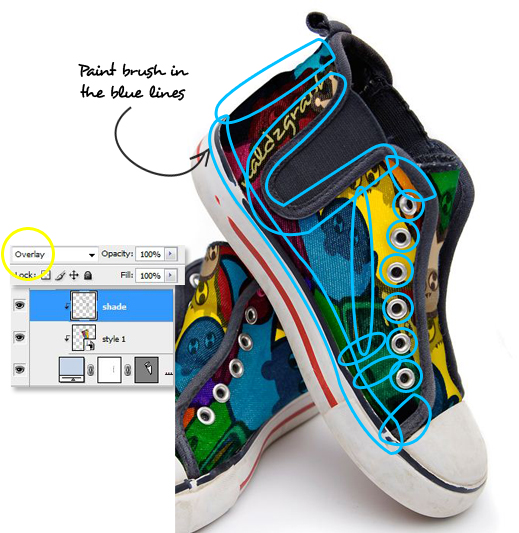
Look at the initial shoes, imitate the shade pattern and do the same step we’ve done previously.
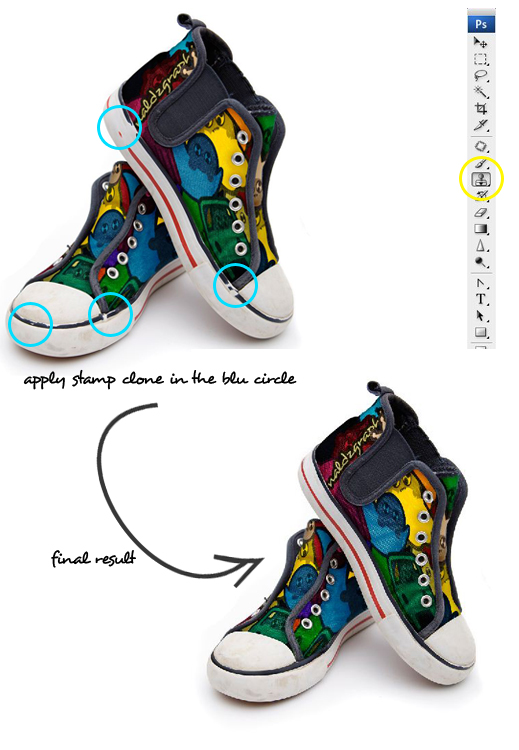
Step 12
In this step we will touch up the shoes a little. Using the Clone Stamp fix the worn out color line on the shoes.
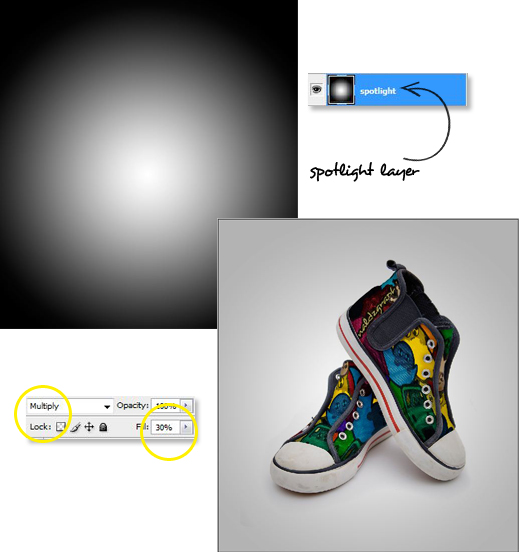
Step 13
In this step we create spotlight effect. Create new layer and put it above all the layer we’ve created before. Change the layer blend mode to multiply and 30% Fill.
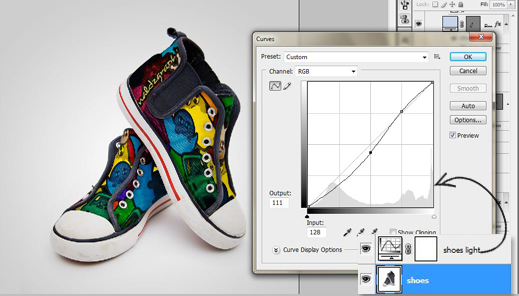
Step 14
Add new Curve Layer, so the shoes look a bit lighter.
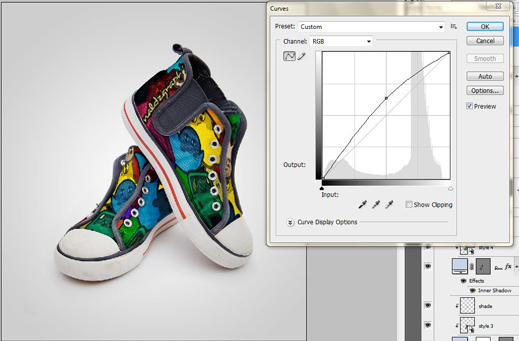
Step 15
Add a new Curve layer as well above the initial shoes, to adjust the shoes contrast.
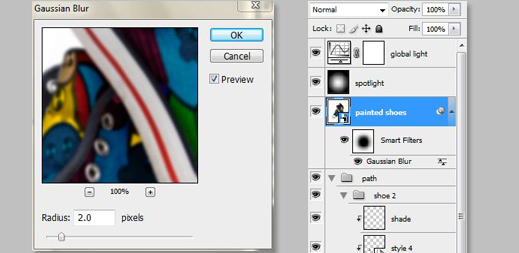
Step 16
Now Select all layer, copy and merge them all (Ctrl/Cmd + E). Convert the layer into Smart Object and Add Gaussian blur filter.
Then with a soft round brush, paint the layer mask in the smart filter with black color, so we have more focus on the shoes.
Final Outcome
This is it, our painted shoes. We hope you enjoy this tutorial.


great tutorial, we can use same idea to do new things… thank you ” Thoriq” hope to see more..
Another “something cool” to try learning! Wow!
Good job Thoriq!
I will surely find time for this dude!
Absolutely cool!
i’m not really much into PSD but this one is really worth a try 😀
Thanks for your appreciation guys, we hope you get something useful from this tut.
We are currently working on another tut. So, stay tune;
Happy Holidays…
ditunggu tutorial pakai gimp 😀
I sometimes do that when I want to know how my designs will look on sneakers. And then go and do the real thing, hand painted 🙂
@raf that is amazing painted shoes, me and my friend were a fan of painted shoes, so that founded a painted shoes company in 2008. this tut was inspired from it. 🙂
Hey 😀
I’m not new in photoshop, but can’t understand what happend between step 9 and 10 with this style “picture”. Is it blending option or something? And what layer do i need to apply this… fix?
Yes it’s blending option…you can check it in the downloadable file…. 🙂 thanks for reading this tut.
very cute result !!! nice work author