In this article I’ll try to show you how easy it is to draw a cartoon character without any drawing skills at all. All you have to do is use your imagination to combine shapes and be familiar with the pen tool. The character is inspired from the Worms video game; one of my favourite.
Tutorial Details
- Program: Adobe Photoshop
- Version: CS5
- Difficulty: Intermediate / Advanced
- Estimated Time of Completion: 1-2 hours
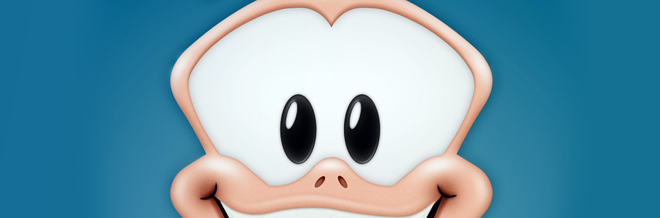
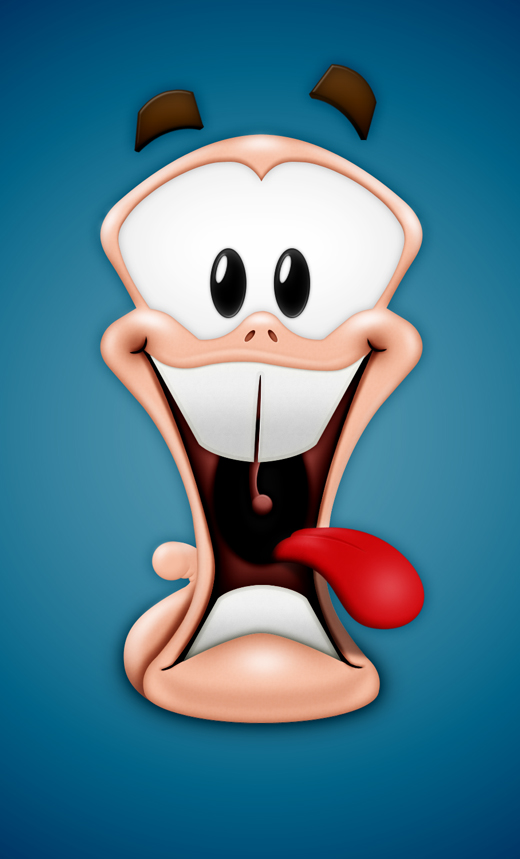
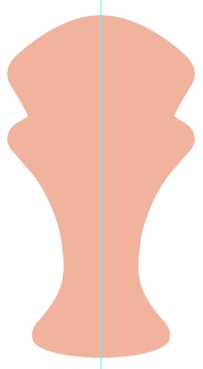
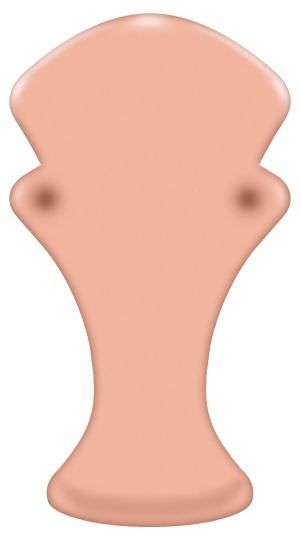
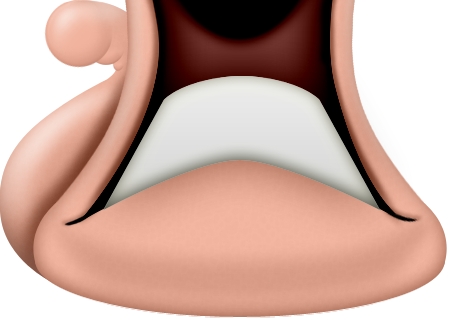
Final Result
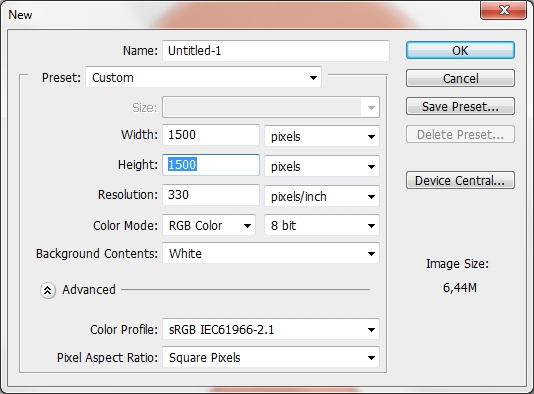
Step 1
Create a new document in Photoshop.
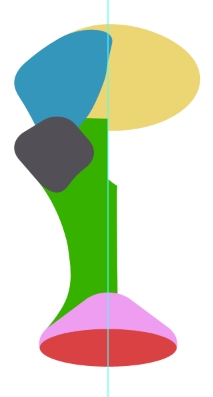
Step 2
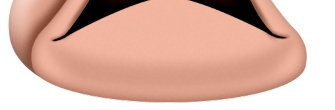
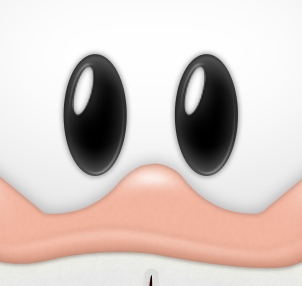
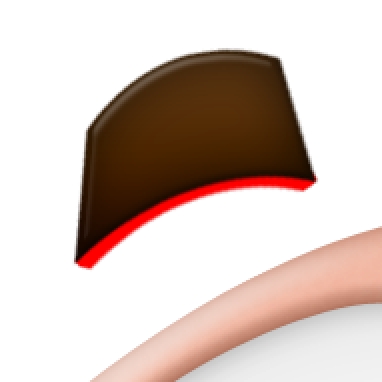
First of all, split the canvas in half with a guide. To create the outline of the head you have to combine a lot of shapes (ellipses, rounded rectangles and custom shapes drawn with the Pen Tool). Try to create something like this. Remember to draw only the one half of your character.
Change the color of all the shapes to #f1b39d and merge the layers. Then duplicate this new layer and go Edit>Transform>Flip Horizontal and place the copy on the other side.
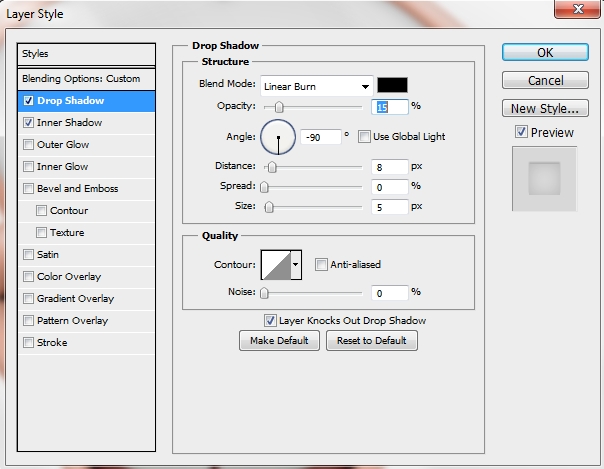
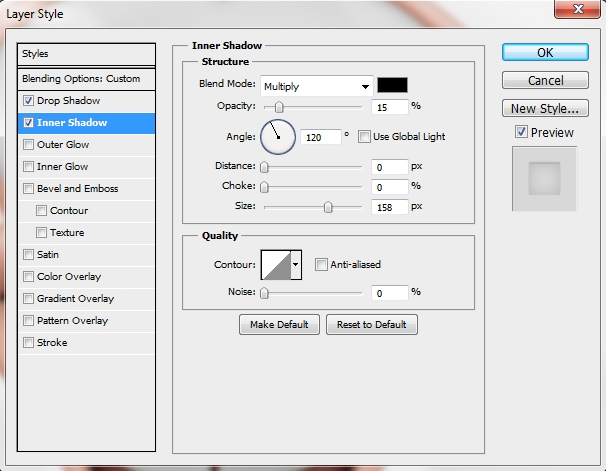
Step 3
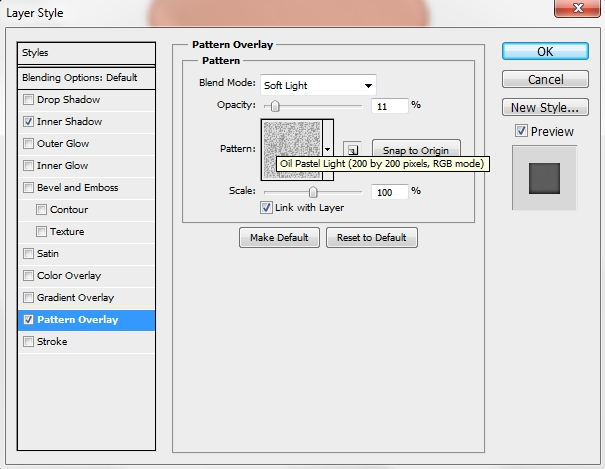
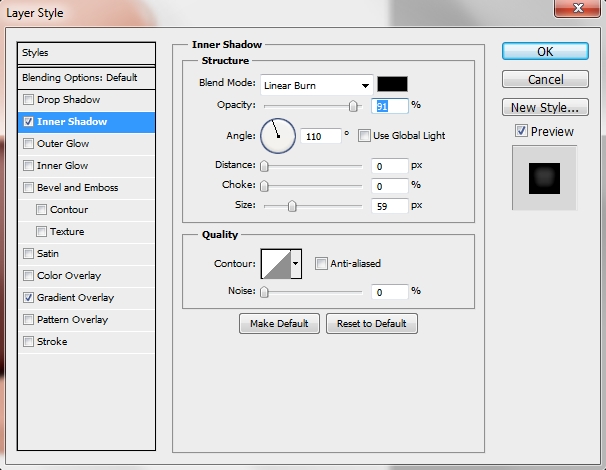
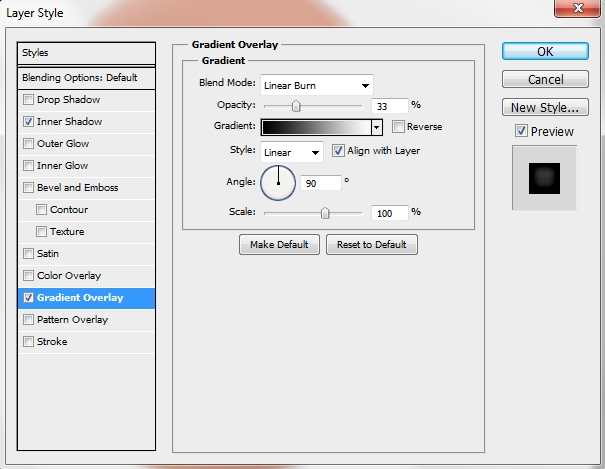
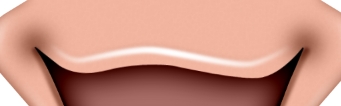
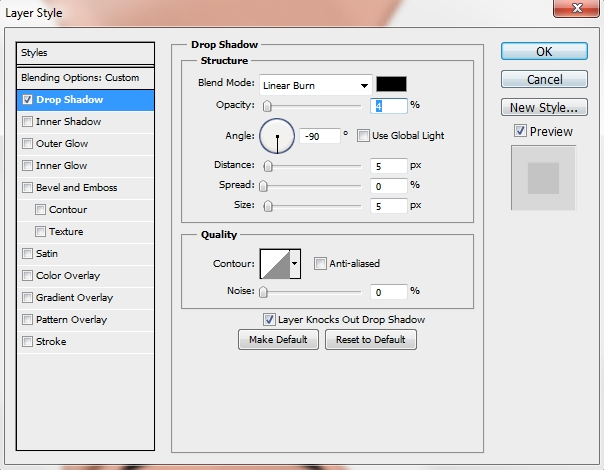
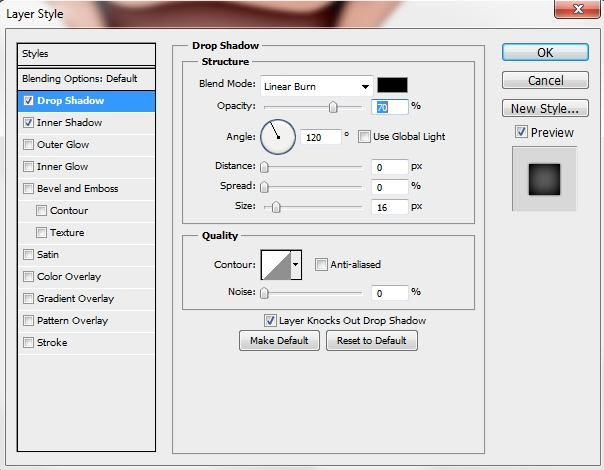
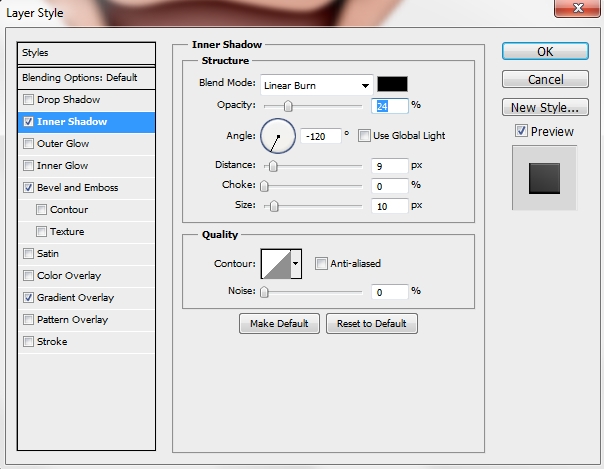
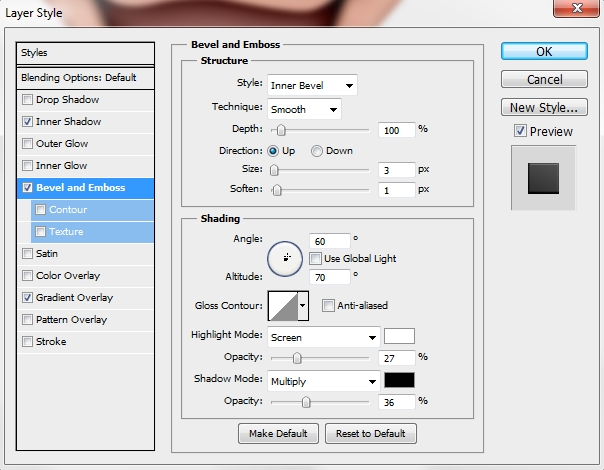
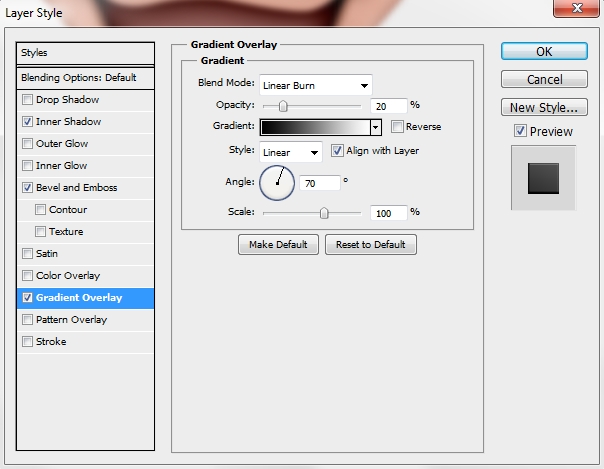
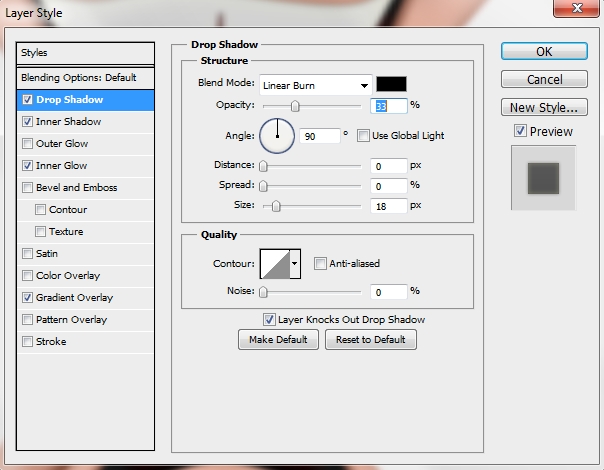
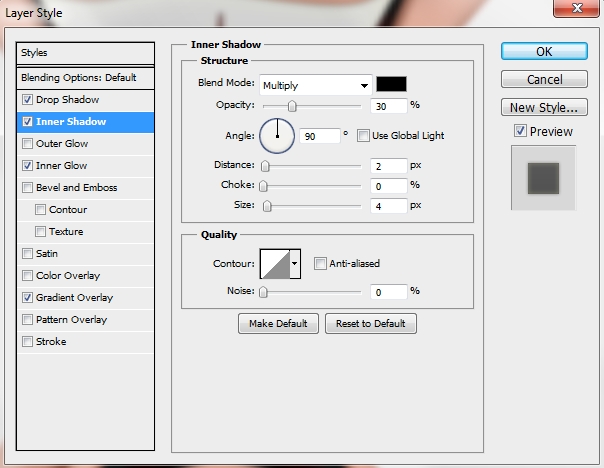
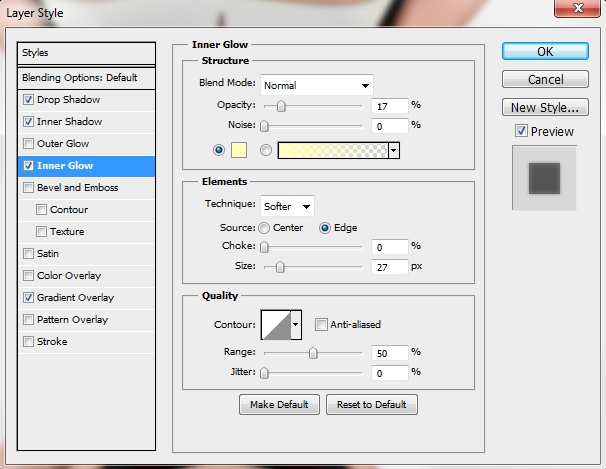
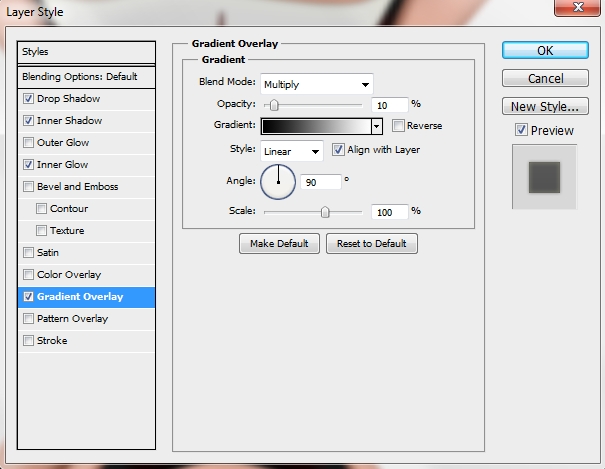
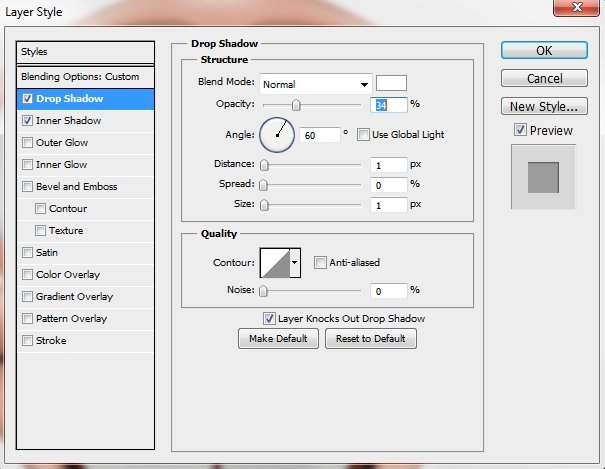
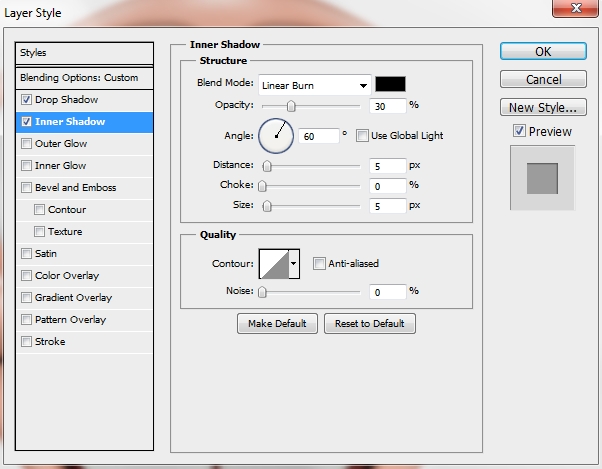
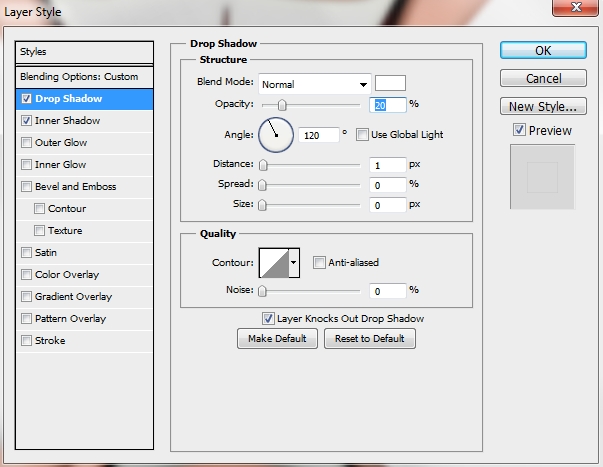
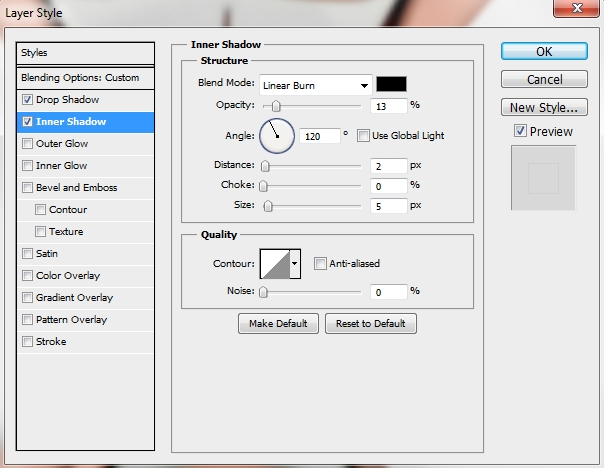
Merge the two layers and add these styles to the new one.
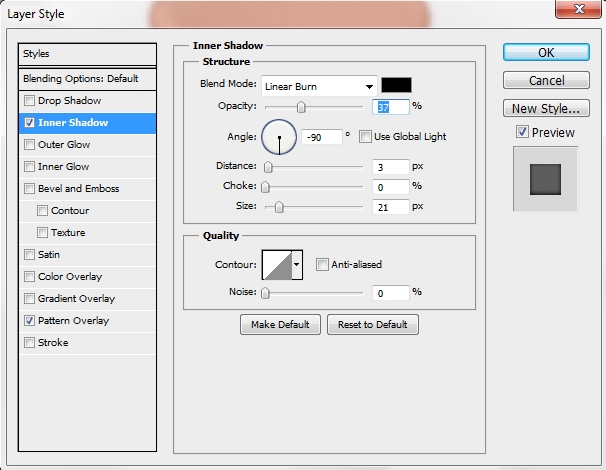
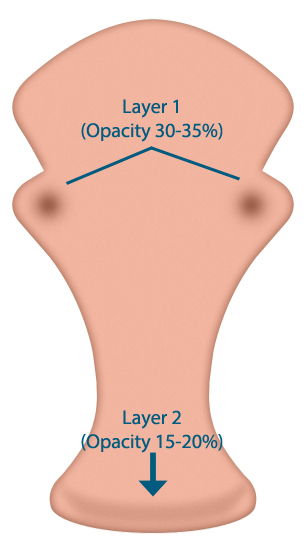
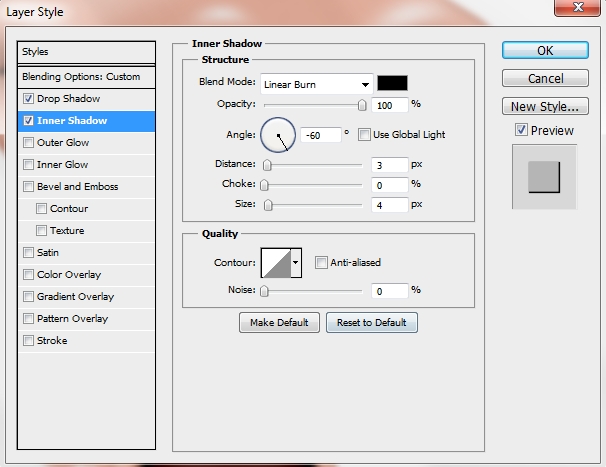
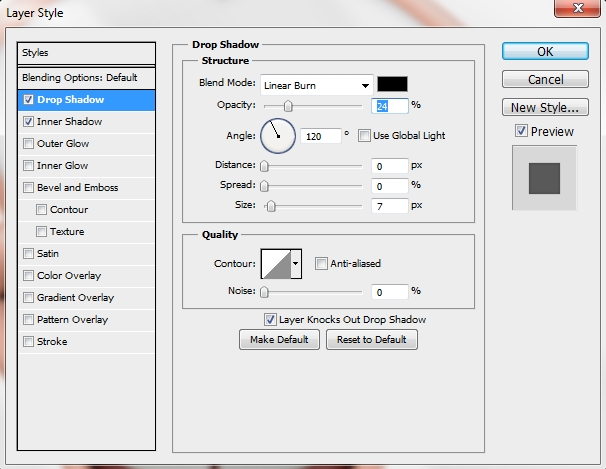
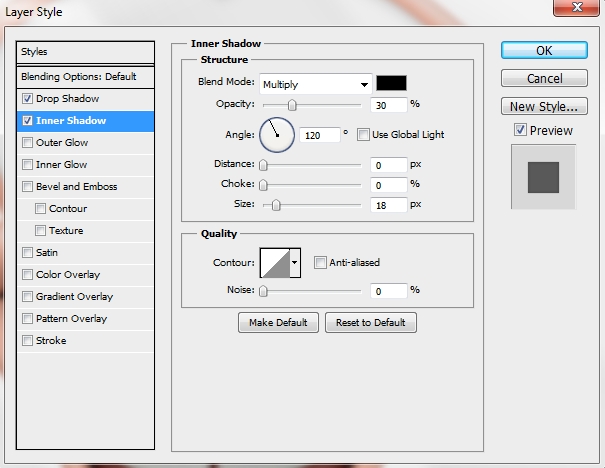
Next, start adding some shadows with a soft round brush (B) either by drawing simple dots or stroke paths with the Pen Tool (P). Use #000000 as your color, change the Blend Mode to Linear Burn and lower the Fill to something around 30-35%.
Step 4
Using the same technique, add some highlights. Use #ffffff as your color and lower the Fill to something around 40-60%. Once again use multiple layers to “play” with the Fill so that the result is not “linear”.
Step 5
Group the layers created in the previous steps and name the group “Head”.
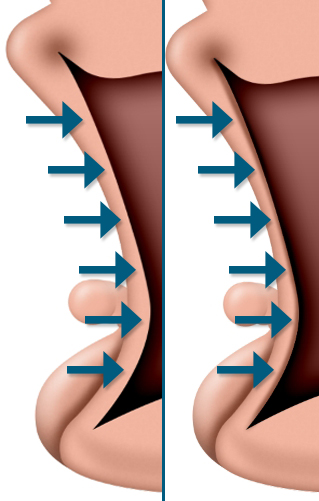
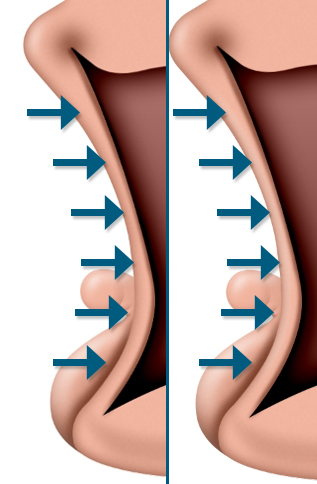
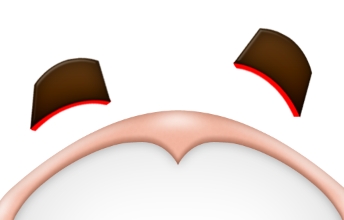
Now it’s time to create the tail. To do this, repeat the process from Step 2 (combine a circle and a custom shape).
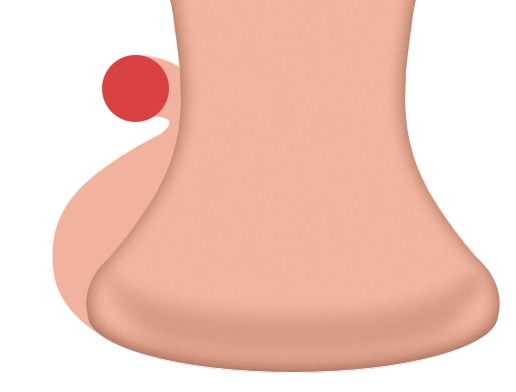
Step 6
Add some shadows and highlights to give the tail a nice 3d effect. Again, use different layers to “play” with the Opacity.
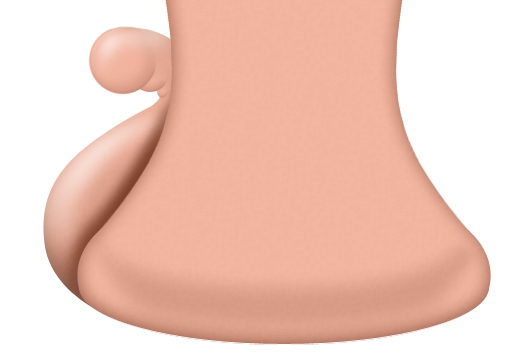
Step 7
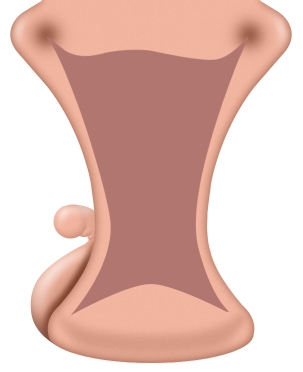
Group the layers created in Steps 5-6 and name the group “Tail”. Place it before the “Head” group in the layers stack.
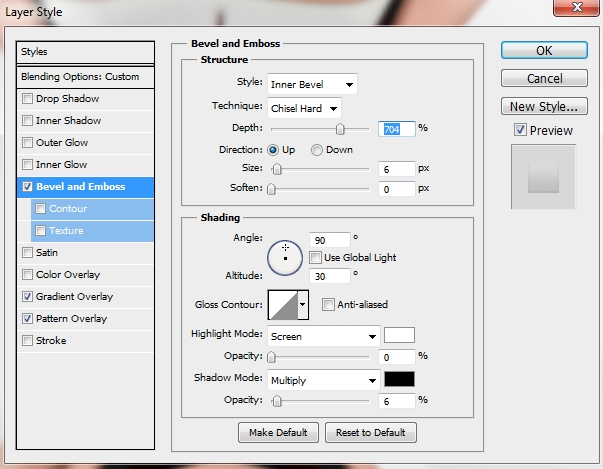
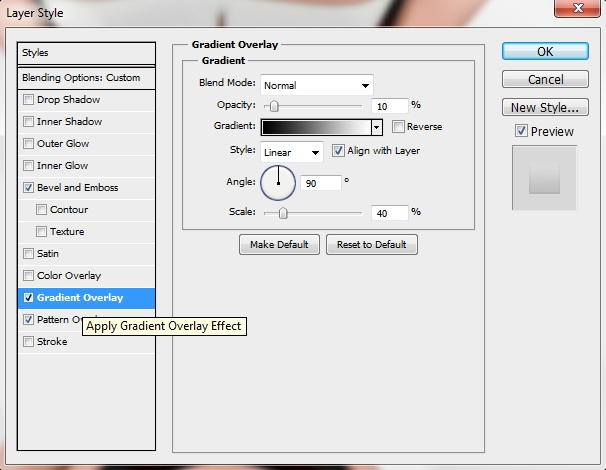
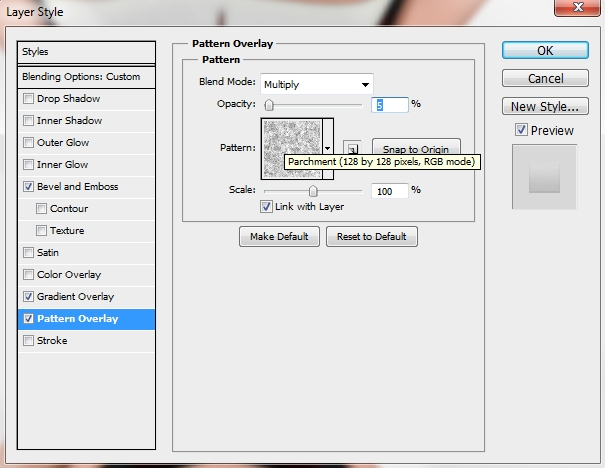
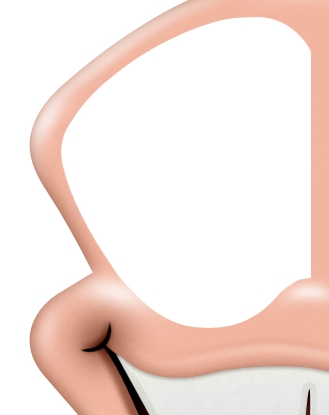
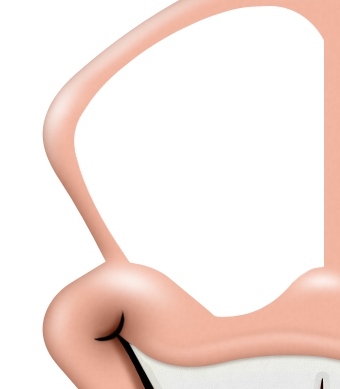
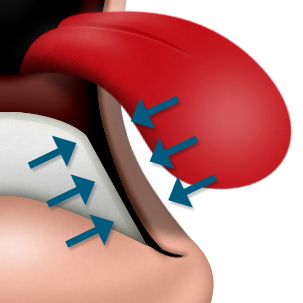
Create a new layer and grab the Pen Tool (P). Draw a shape like the one below and fill it with #b27670. Then simply add the following styles.
Step 8
Add some shadows right outside the mouth (color: #000000, Linear Burn, Fill: 30-40%).
Step 9
Add highlights next to the shadows you created before to add some contrast (color: #ffffff, Normal, Fill: 40-60%).
Step 10
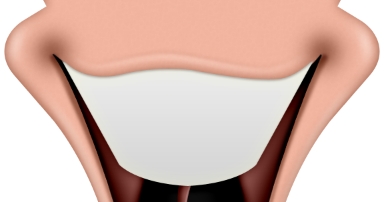
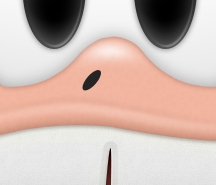
Add some details on the bottom of the mouth.
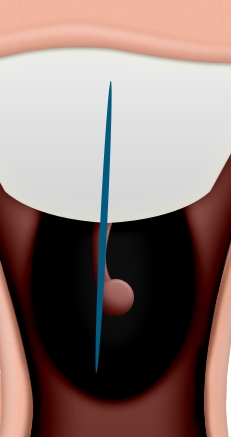
Step 11
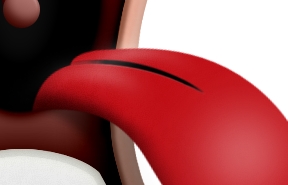
Create a new layer and using the Pen Tool (P) draw a line like this. Change its Fill to 15% and add the following style.
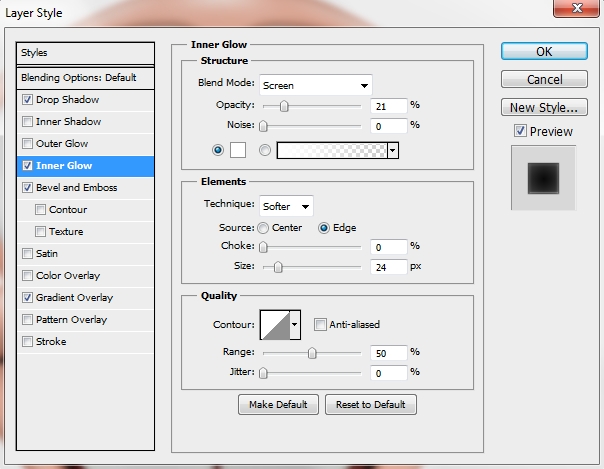
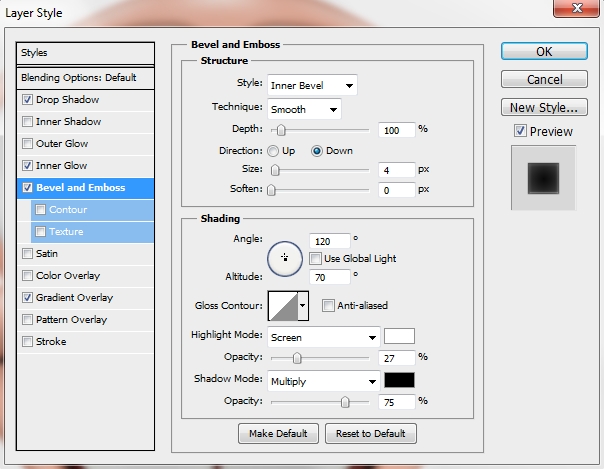
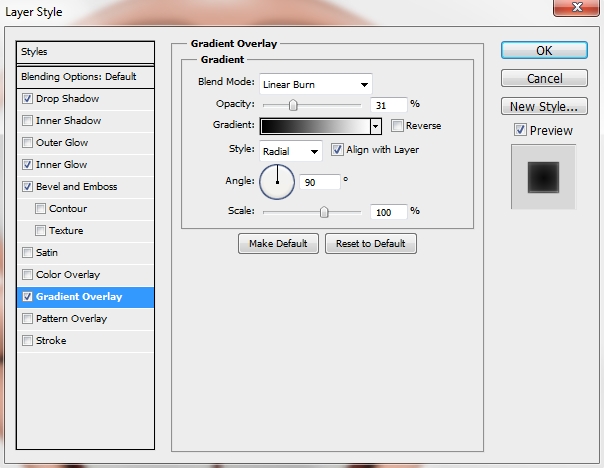
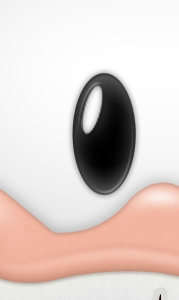
Step 12
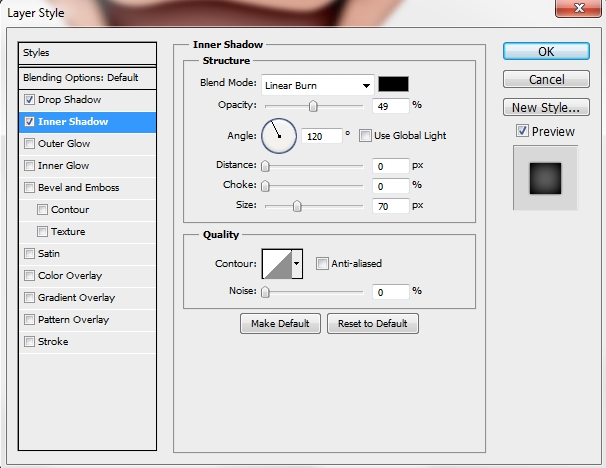
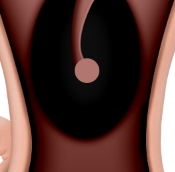
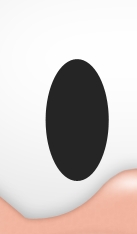
Create a new layer and pick the Ellipse Tool (U). Draw an oval and fill it with #0d0d0d. Add a slight gaussian blur (0,8-1,5px) and then apply the following styles.

Step 13
Draw a shape like this using the Pen Tool (P) and apply the following styles (fill it with #b27670).


Step 14
Draw a small circle (Ellipse Tool – U) and add these styles.
Step 15
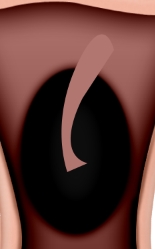
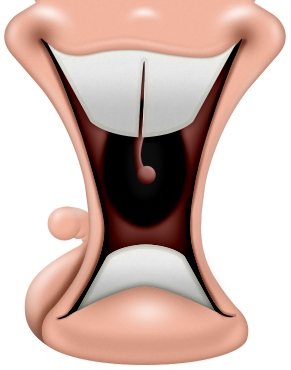
It’s time to create the teeth. Grab the Pen Tool (P) and draw a shape like this.
Draw a shape like this one (Ellipse Tool – U) and select its pixels. Go to the previous layer (teeth) and click on the Add layer mask button. “Hide” this part by painting the selection black.
Then delete this layer (distorted ellipse) and add the following styles to the teeth layer.
Step 16
Duplicate the teeth layer and replace its styles with these ones (remember to turn Fill to 0%).
Step 17
Duplicate both the teeth layers, delete their masks (right click on the mask thumbnail>Delete mask) and scale them down a bit. Then go Edit>Transform>Flip Vertical and place them on the bottom of the mouth.
• NOTE: Don’t forget to adjust the Layer Styles’ parametres (eg. when you have let’s say an inner shadow in the upper teeth with an angle of 90, you have to change it to -90 for the bottom teeth).
Step 18
Add some highlights (Brush Tool – B or Pen Tool’s Stroke Path technique) and group all the layers created in Steps 7-18 and name the group “Mouth / teeth”.
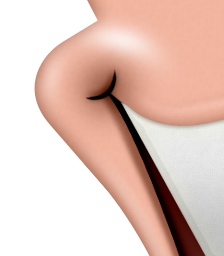
Step 19
Add some details on the upper part of the mouth (cheeks). To do this, create a small crescent moon shape and fill it with #000000. Change the Fill to 20% and add these styles. Then duplicate it and place it on the other side of the mouth.

• NOTE: again don’t forget to adjust the parametres.
Step 20
Group these two layers and name the group anything you want (eg. “Some Shadows”).
Next, create a new layer and pick the Pen Tool (P). Draw a shape like this (fill: #ffffff). Add a layer mask and “form” the cheeks by erasing (painting black) some parts of the eyes (pic 2).
Duplicate it, flip it horizontally and place the copy on the other part of the head. Then merge these two layers and apply these styles.
Duplicate this layer and replace its styles with these ones.
Step 21
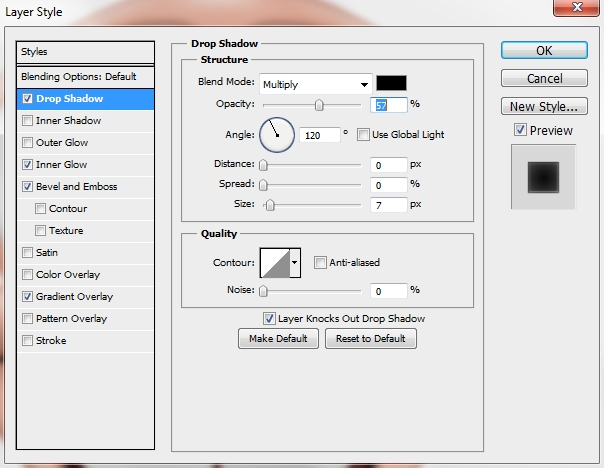
Create a new layer and grab the Ellipse Tool (U). Draw an oval like this (fill color: #252525) and apply the following styles.
Add a layer mask and paint black a small oval to create the light effect.
Step 22
Duplicate the layer and place the copy on the other side of the head.
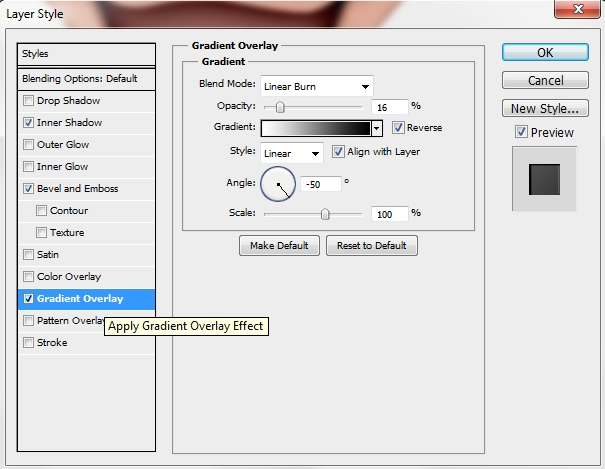
Step 23
Create a new layer and draw a small oval (Ellipse Tool – U). Fill it with #252525, change the Blend Mode to Linear Burn and the Fill to 35%. Then add the following styles.
Duplicate the layer and place it symmetrically on the other side of the head (once again remember to adjust the layer styles’ parametres). Finally, group all the layers created in Steps 20-23 and name the group “Eyes / Nose”.

Step 24
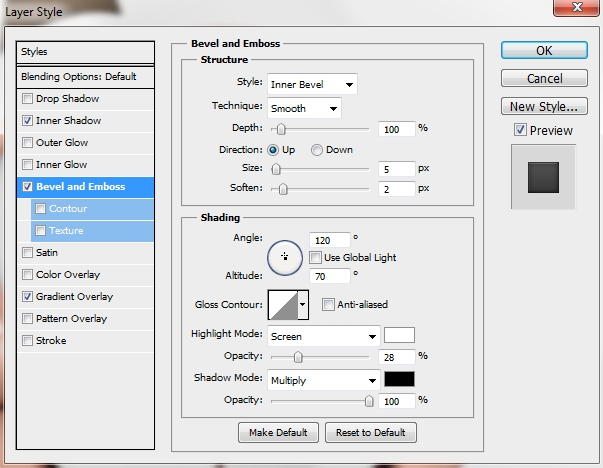
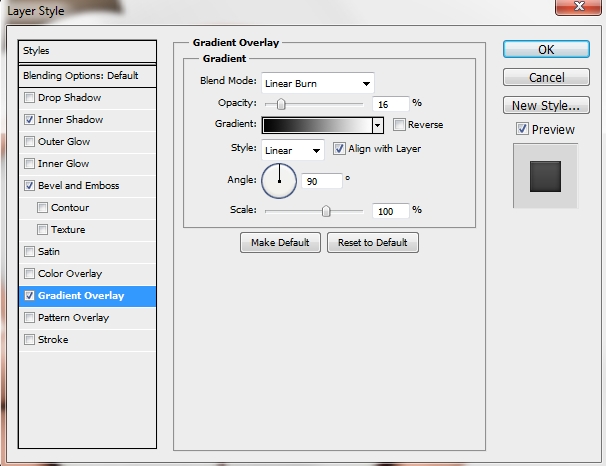
Create a new layer and pick the Pen Tool (P). Draw a shape like the one on the image below and then add the following styles (fill: #603913).
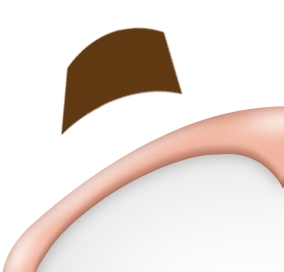

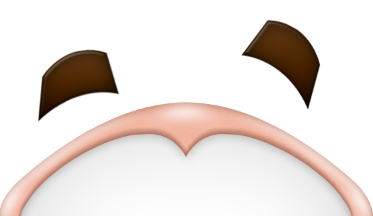
Duplicate the layer, flip it horizontally, rotate it a bit to give your cartoon a silly look and place it above the other eye.
Step 25
Create a new layer and place it before the ones created in the previous step. Using the Pen Tool (P) draw a shape under the brow to give it a 3d effect. Fill the shape with #000000. Duplicate the layer, flip it horizontally and place it under the second brow. Group those four layers and name the group “Brows”.
Step 26
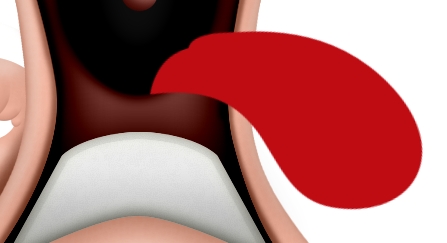
It’s now time to create the last element; the tongue. Once again create a new layer and grab the Pen Tool (P). Draw a shape that will make the cartoon look funny and silly. Use the image below as a guide (color: #603913).
Step 27
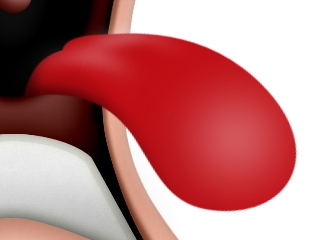
Add some shadows and highlights (separate layers) just like you did previously in the tutorial.
Step 28
Pick the Pen Tool (P) and draw a simple curved path. Select the Round Point Stiff brush from the list and apply a simple stroke on the path Right click on the path>Stroke Path; check the Simulate Pressure box).Then turn Fill to 0% and add the following styles.
Step 29
Finally add some shadows on the face and inside the mouth. Group all the layers created in Steps 26-29 and name the group “Tongue”.
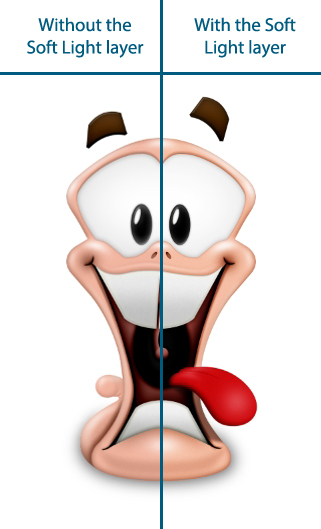
Step 30
Merge all the groups and the layers and duplicate the new layer. Select the copy and tweak a bit the Levels (Ctrl+L) to increase the colors’ intensity (you can do it in the Hue/Saturation panel too; whatever works better for you). Then change the Blend Mode to Soft Light and turn down Fill to something around 60%. If the brows look too dark, erase them from the copy. This is a handy technique to add some depth to your images.
Conclusion
Your cartoon character is now ready. That’s the end of the first part. I hope you enjoyed it. In the second part, we’ll create the hands that will be holding some guns.


Great tutorial, very detailed, love the end result.
hi it is very cool and very detailed tut pl… complete this tutorials and keep it up such good work man did cool work…..Alan Klim