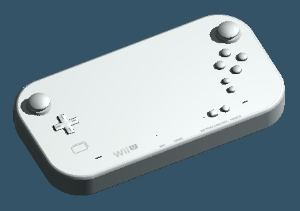
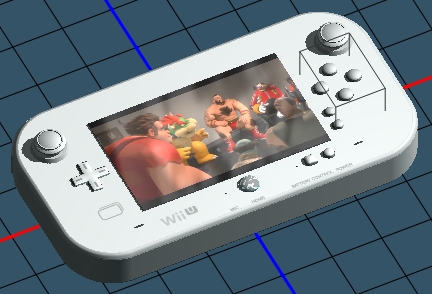
In this tutorial we’re going to create a 3D video games controller based on the Wii U design. You don’t need to have any advanced 3D experience to follow the steps, yet we strongly suggest you to read the “3D basics” article before getting started. It will help you understand the logic behind the whole 3D thing in Photoshop.
Tutorial Details
- Program: Adobe Photoshop / Adobe Illustrator
- Version: CS6 Extended
- Difficulty: Intermediate / Advamced
- Estimated Completion Time: 2 hours
Tutorial Assets
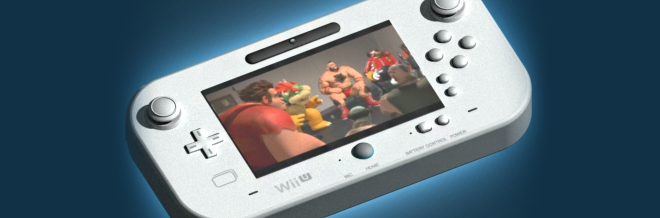
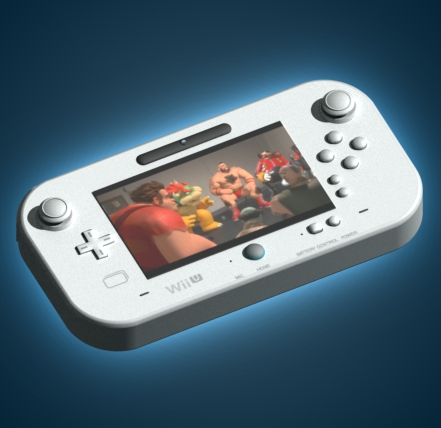
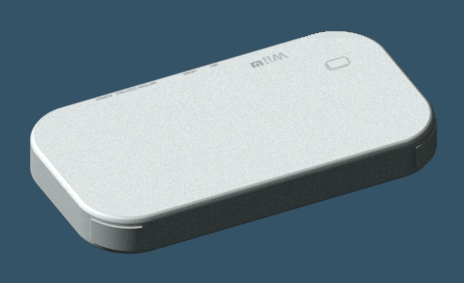
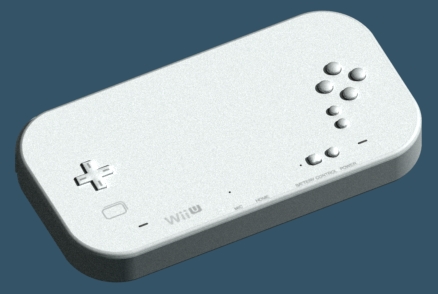
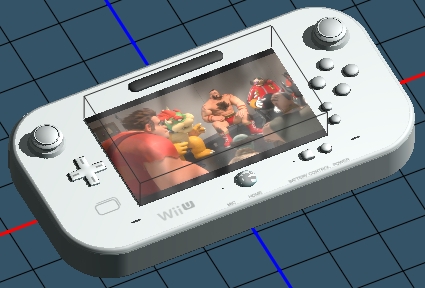
Final Result
Step 1
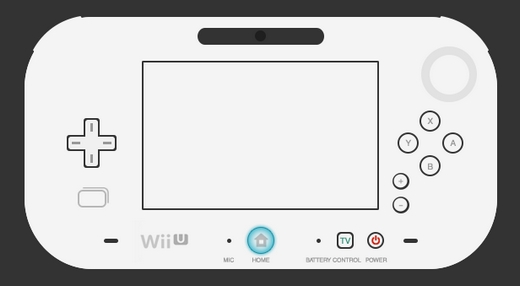
Download and open the psd file from the tutorial assets (Template). We’re concentrating on the 3D design in the tutorial, so there’s no need to create the 2D template. As you’ll see, the whole template we’ll be using is very simple and easy to create. Once again, we’re not creating the exact replica; only an object loosely based on the original Wii U controller.
Step 2
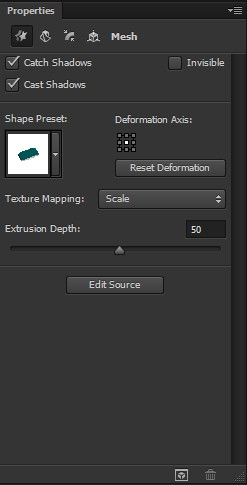
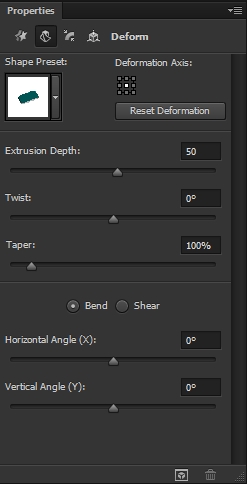
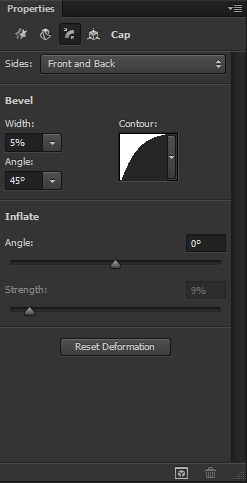
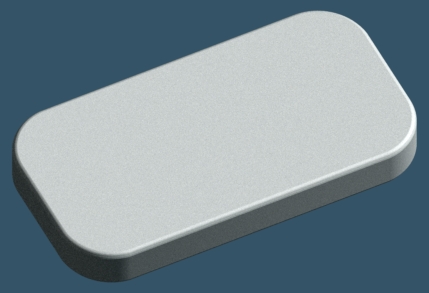
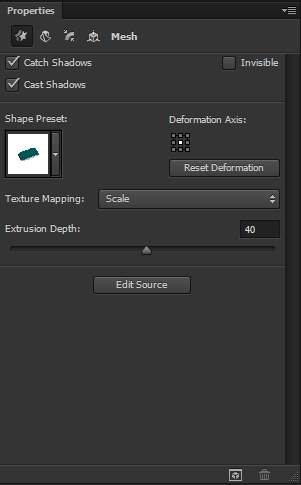
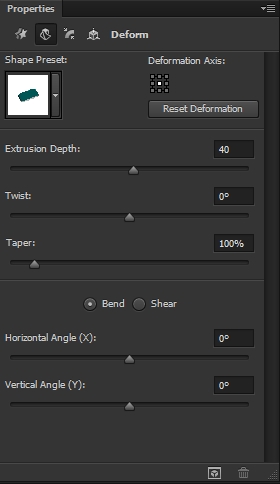
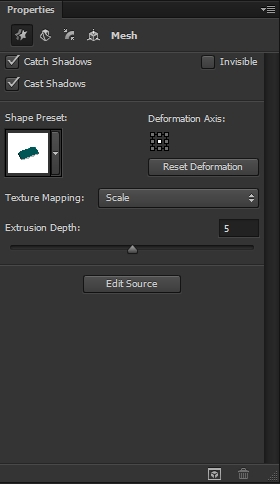
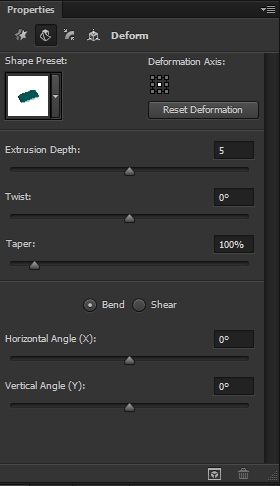
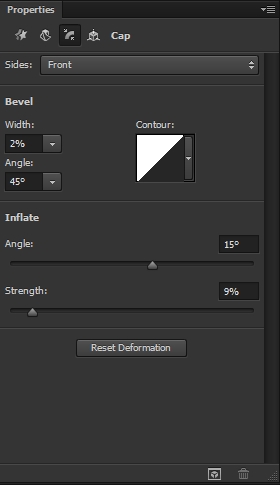
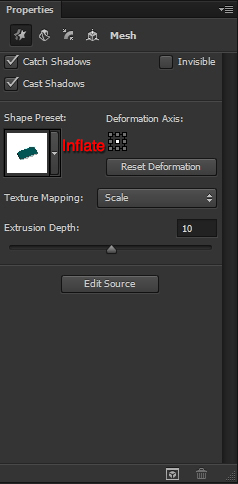
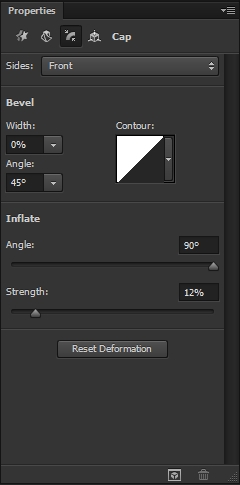
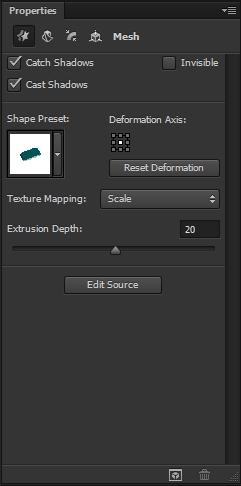
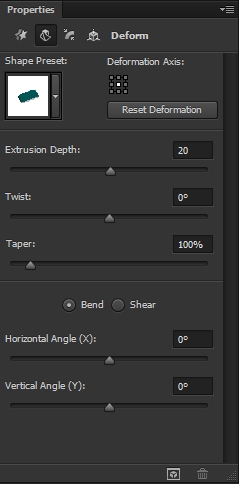
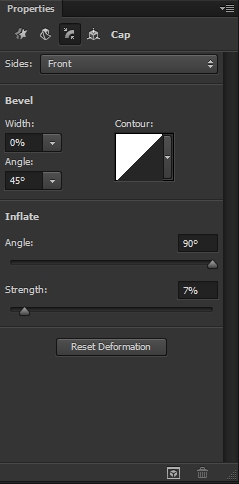
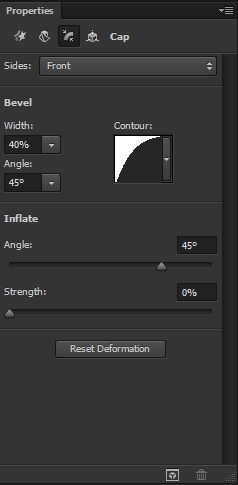
First of all, we need to make a 3D layer from the basic shape. As you can see in the psd file, there are two base layers. Base Blank, which is the main shape (vector shape) and Base 1 (deco) which is the main shape rasterized and merged with some decoration layers. So, select the Base Blank layer, switch to the 3D workspace, check the 3D Extrusion option in the 3D panel and hit Create (alternatively go 3D>New 3D Extrusion from Selected Layer. Apply the following parametres and rotate the camera until you’re satisfied with its angle. Save this Custom View.
Step 3
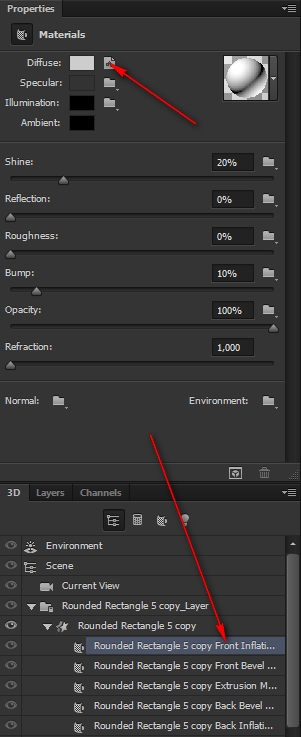
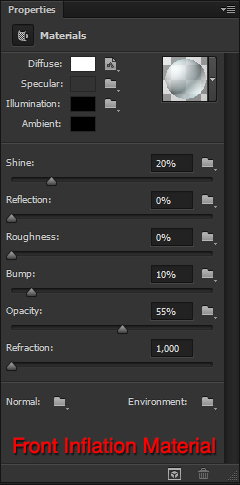
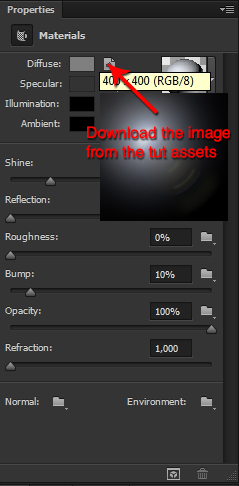
Now in order to decorate the controller, select the Base 1 (deco) layer and “hide” all the other layers (the background as well). Go Image>Trim and hit OK. Save it as a PNG (don’t forget to check the Transparency box). Go back to the 3D Base Blank layer and select the Front Inflation Material. Click on the small icon next to Difuse and select Load Texture. Find the png file you’ve just saved.

Step 4
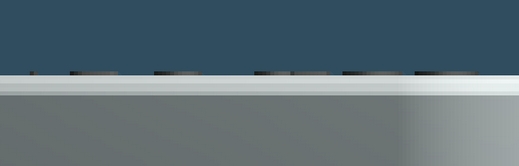
Now that our basic shape is ready, we can move on to create the particular elements. We’ll start from the buttons on the back. Reveal the Back Buttons group and merge the two shapes. Create a 3D Extrusion from this layer and apply the parametres shown on the images below. Once you’ve done this, select this layer and the 3D base one and merge them (3D>Merge 3D Layers). Move the “back buttons” until you’re satisfied with the result.
Tip: When merging 3D layers make sure you use the same View for both the layers (eg. Top).

Step 5
Select the Shadows Buttons layer and turn it into a 3D layer (extrusion). Apply the parametres shown on the first three images and merge this layer with your Base one. Move them so that the 99,9% of the shape is hidden on the depth axis (y). The idea is to place the shape 1mm right over the base shape to give the illusion of depth.


Step 6
Select the Cross layer and create a 3D out of it. Apply the following parametres and in order to decorate it, use the technique described in Step 3 (don’t forget to merge this layer with your original Base one).
Step 7
Save the parametres used in the Cross (extrusion depth etc.) by revealing the menu of the Shape Preset and selecting the New Extrusion Preset from the list. You won’t have to adjust all these parametres manually for the other elements. So, create 3D layers from all the other button layers (“abxy buttons”, “+/- buttons”, “power button”, “TV button”) and select this preset for each of the layers. Merge them with your original 3D Base layer and move them. Your design should look something like this.
Step 8
Add the decoration to your buttons just like you did with the cross and the base layers.
Step 9
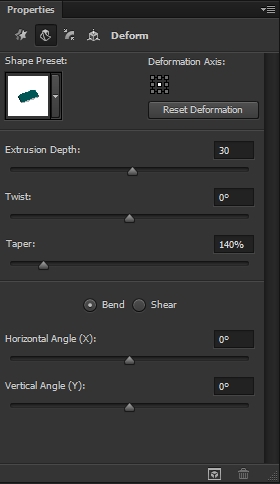
Let’s proceed to the analogue sticks. Reveal the grouped layers in the Right Analogue group and select the Ellipse 2. Create a 3D extrusion and select the pixels of the Ellipse 2 copy. Go 3D>Add Constraint from>Current Selection. Switch to the 3D panel and change the Type of this Internal Constraint to Hole. Then apply the following parametres to the ellipse. Do not merge it with the 3D base layer yet.

Step 10
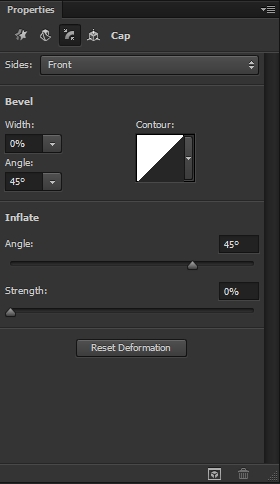
Select the Ellipse 2 copy layer and apply the following parametres. Don’t merge this particular layer with the 3D Base layer.


Step 11
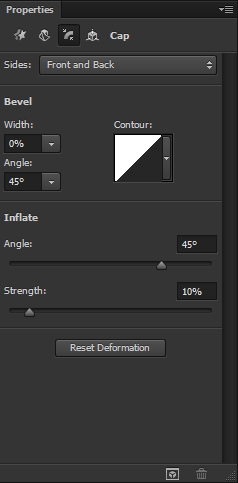
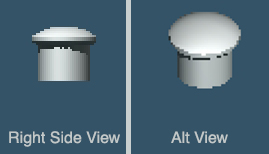
Select the Ellipse 2 copy 2 layer and simply add some depth to it (let’s say 30). Merge it with the 3D Ellipse 2 copy layer created in the previous step. Move the objects so that you get something like the shape shown on the first image. Then, merge this new 3D layer with the one created in Step 9 and duplicate the new layer (Ctrl+J). Finally, merge this new 3D layer (should have two analogue sticks inside) with your 3D Base layer and place the analogue sticks accordingly to the second image.
Step 12
Select the Home Button layer and apply the following parametres (merge it with the 3D Base layer). Add the decoration just like you did previously with the base, cross and buttons layers.

Step 13
The next thing to create is the screen. There are two ways to do this. Select the Screen layer and either chose the 3D Postcard option or simply make a 3D Extrusion layer and set the depth to 0. Simple as that. No further adjustments are required. You can decorate it with a photo or a logo using the same technique that you used with the buttons, the base etc.
Step 14
There’s one last element that has to be created. The camera. Reveal the shapes in the Camera group and select the Rounded Rectangle 4. Use these parametres.
Step 15
Select the Ellipse 3 layer and make it a 3D layer (extrusion). Apply the following parametres and place it right over the Rounded Rectangle 4.


Conclusion
That’s it. You’ve just created a cool video games controller. Adjust the camera angle, add any details you want and render the the 3D design. We hope you enjoyed the tutorial and if you have any questions, feel free to post them in the Comments Section and we’ll answer them asap.


Great tutorial!!Thanks.
I remember the article about the new nintendo wii u controller,I also like your post this time.
Nice tutorial,thank you for the new ideas..
The nintendo wii u is more complicated to do than the video game controller but the ideas are more likely the same.
Cool and enjoyable tutorial,,Thank you.
Impressive,!!It looks like you can make like this so easily.
Thank you Alan for this tutorial,your really good in graphic and photoshop designing.
What a good result from a scratch..well done!
I’ve enjoyed it..TY.