In this article we’re going to create a shinny metallic text effect and then animate it using simple mask tricks.
Tutorial Details
- Program: Adobe Photoshop
- Version: CS5
- Difficulty: Beginner
- Estimated Completion Time: 45 minutes
Tutorial Assets
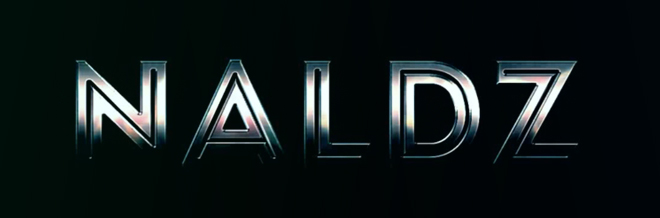
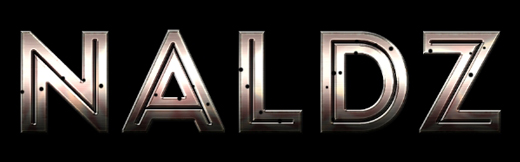
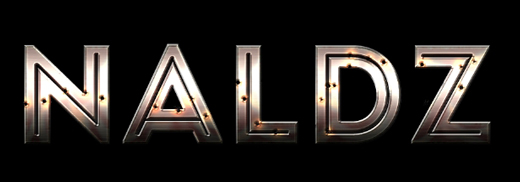
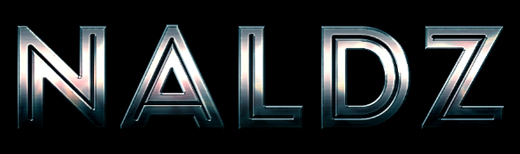
Final Result
Design
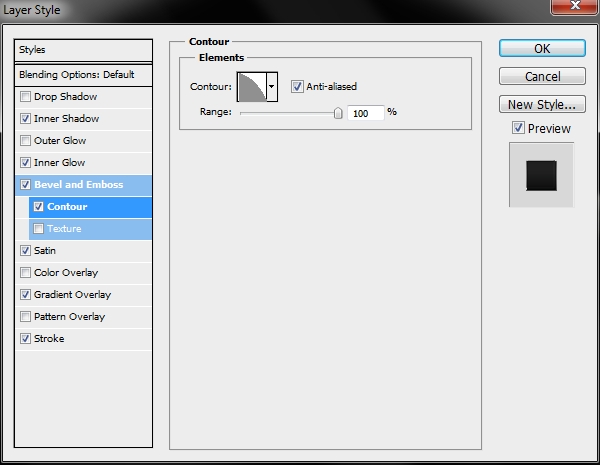
Step 1
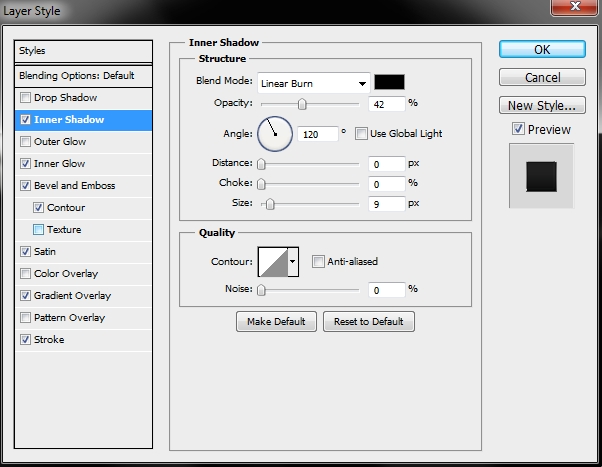
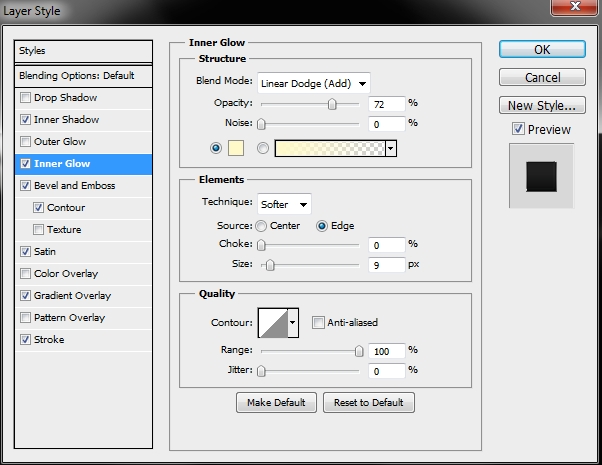
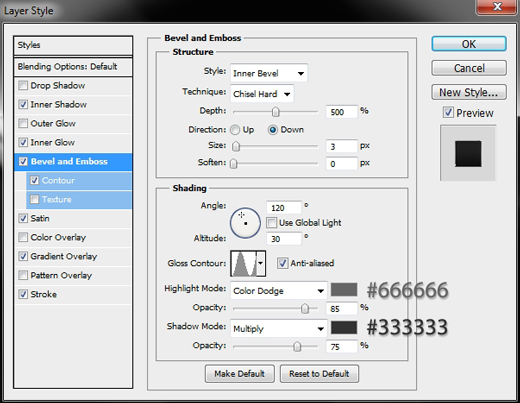
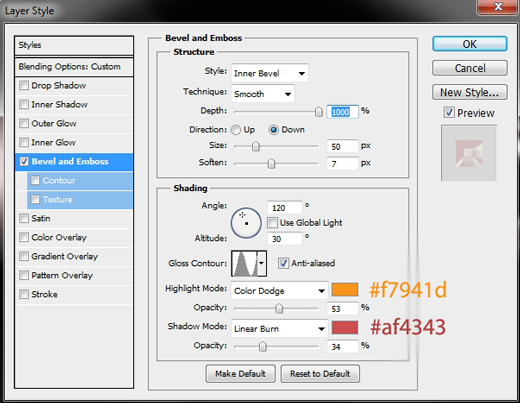
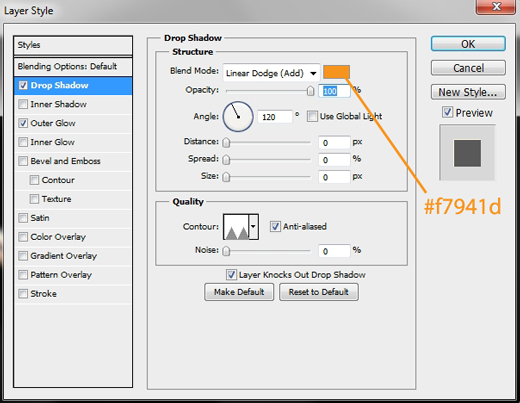
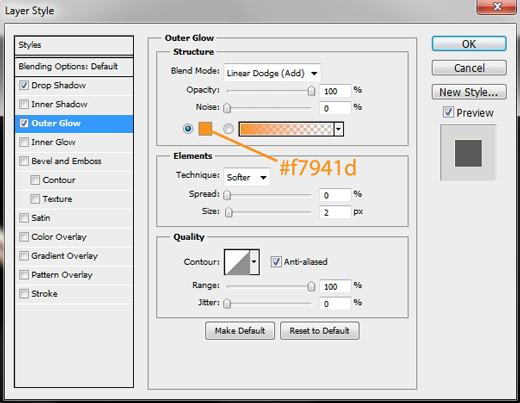
Create a new file in Photoshop. I chose 1200x700px, RGB 8bit, res: 300; background color: #000000. Then pick the Type Tool (T) and write anything you want (the font we’re going to use is called Intro Inline and you can get it here; size: 55pt; color: #ffffff). Now simply add the following styles.
Step 2
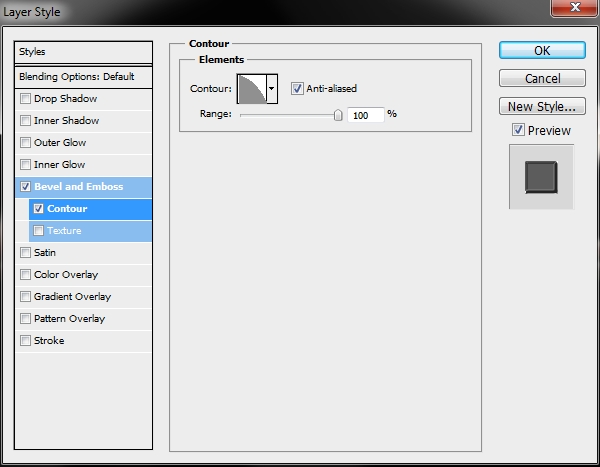
To create our custom brush, download the image from the tutorial assets and open it in a separate window. Pick the Rectangular Marquee Tool and draw a rectangle around the black shape. Then go Edit>Define Brush Preset. That’s it. Close this window and go back to your design. Duplicate the text layer and clear the styles on the copy (right click on the layer>Clear Layer Style). Add a layer mask. Select text’s pixels (Ctrl+Left Click on the layer’s thumbnail) and go to the Paths tab (right above your layers in the layers stack) to create a path from the selection.
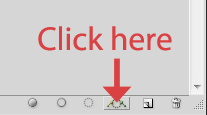
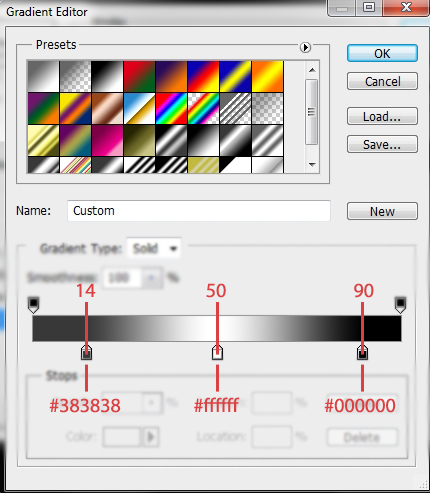
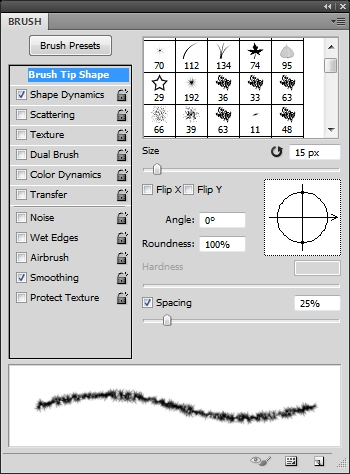
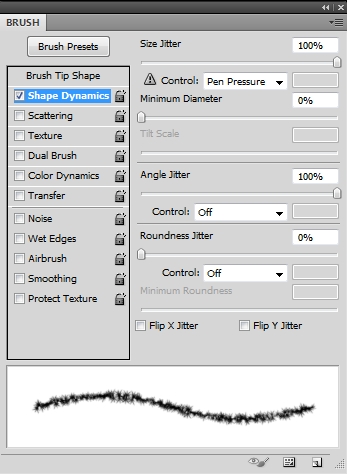
Once your path is created, select the Brush Tool (B) and pick the brush you’ve created. Apply these parametres (hit F5).
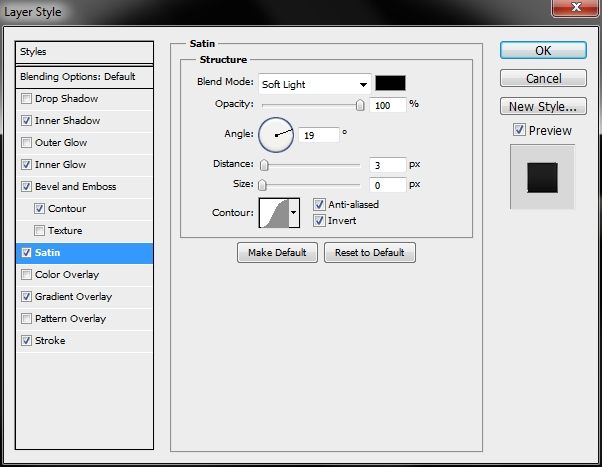
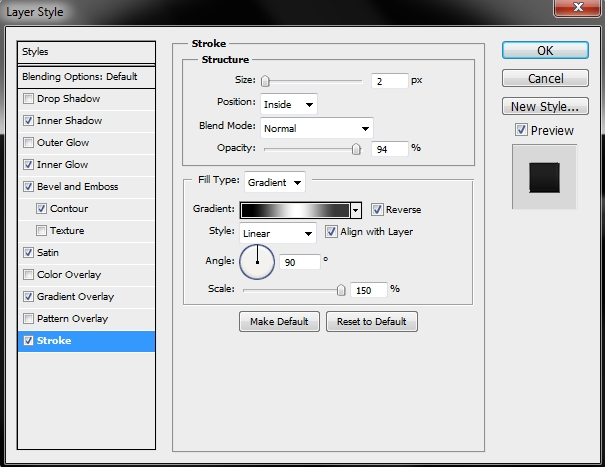
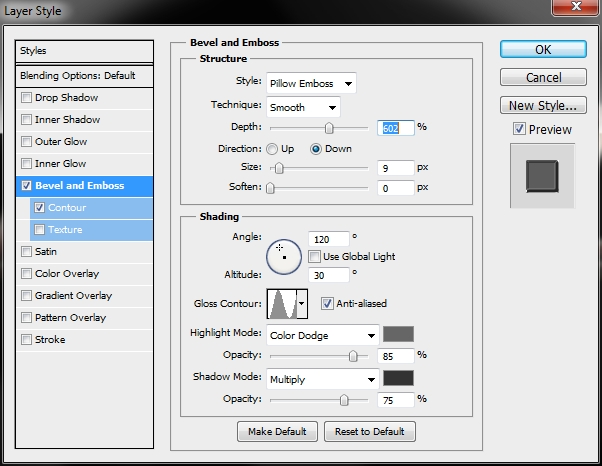
Now pick the Pen Tool (P), click on the mask’s thumbnail, change your foreground color to black and right click on the canvas. Then press Stroke Path and make sure you have selected Brush as a tool and that the Simulate Pressure box is unchecked. Then simply add this style and lower the Opacity to 40% (Fill should be set to 0%).
Step 3
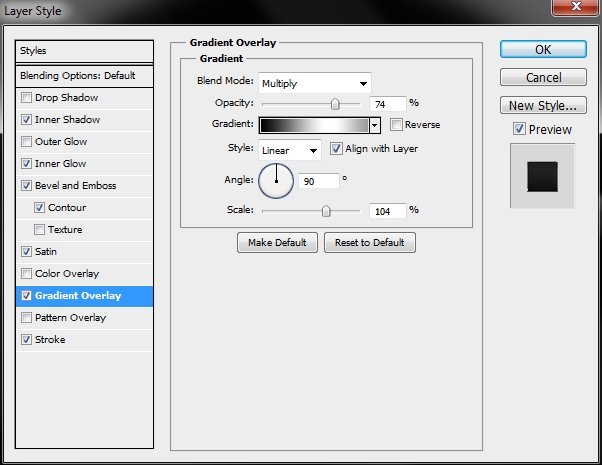
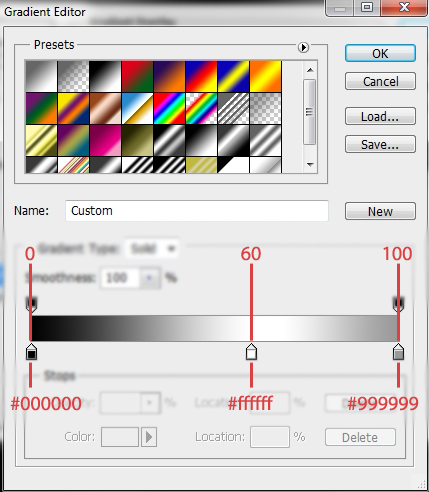
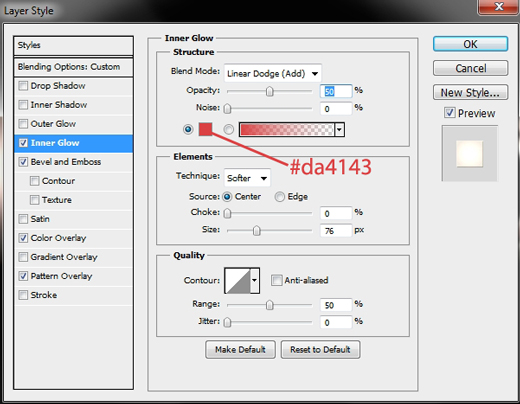
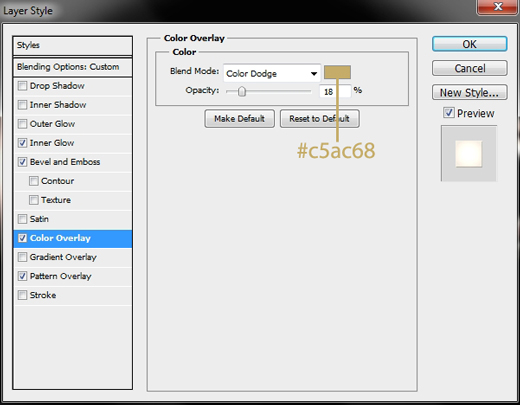
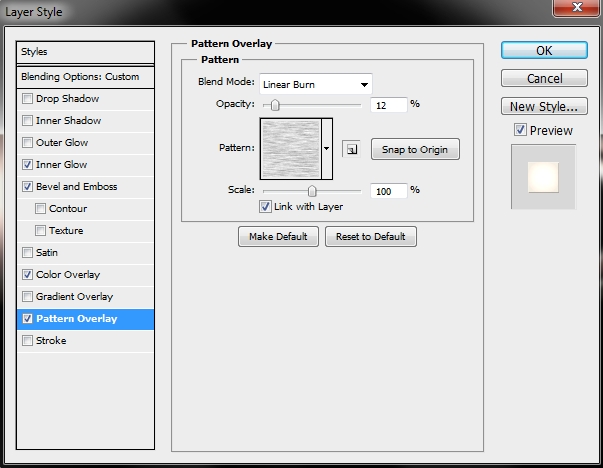
Duplicate the original text layer once again and place the copy on top of the layers stack. Turn Fill to 0% and apply these styles (download the pattern from the tutorial assets).
Step 4
Group all the layers created so far (the three text layers) and name the group “Design”, “Text” or anything you want.
Create a new layer and pick the Brush Tool (B). Select a hard round
brush, set #000000 as your foreground color and draw some dots. These will be the holes from the bullets. Next, add the following style.
Step 5
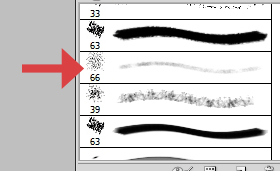
Create a new layer and set #ffffff (white) as your primary color. Grab the Brush Tool (B) once again and find the Dry Brush Tip Light Flow brush.
Now simply click on the places where you added your holes in the previous step. After doing this add this style.
Step 6
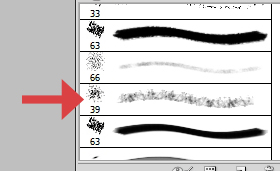
Create a new layer and repeat the previous step, only this time select the Dry Brush from the list (set the Angle Jitter in the Brush parametres box to 100% to randomize the effect a bit) and add the following styles.
Step 7
Your design should look by now like this.
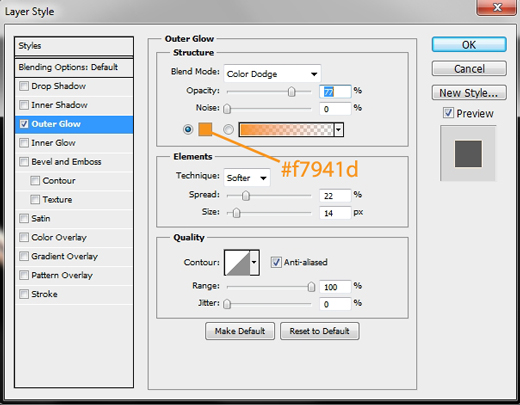
Group the three layers created in Steps 4-6 and name the group “Bullet holes”, “Bullets” or anything else. Create a new layer and paint it blue (#005b7f). Change the Blend Mode to Soft Light and add this gradient.
Step 8
Create a new layer and paint it white (#ffffff). Keep white as your foreground color and change the background one to a nice grey (something like b6b6b6). Then go Filter>Render>Clouds. Change the Blend Mode to Color Burn and lower the Fill to 25-30%.
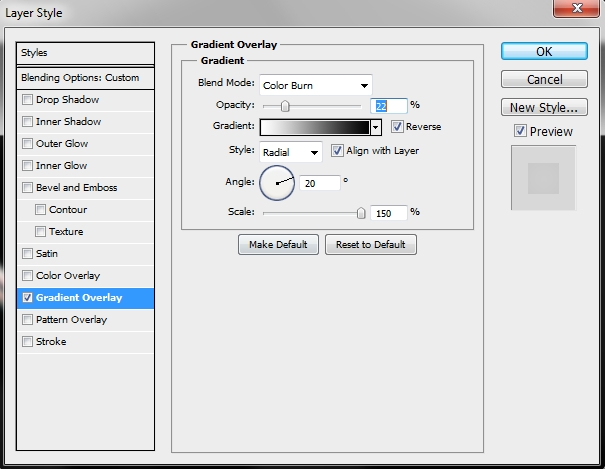
Step 9
Repeat the previous step only this time select #000000 (black) as your background color (Blend Mode: Color Burn, Fill: 40%).
Animation
Step 10
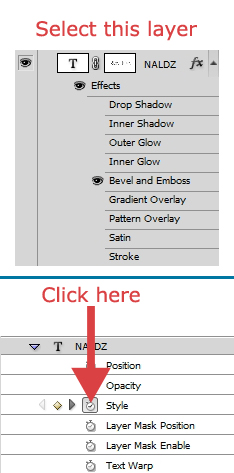
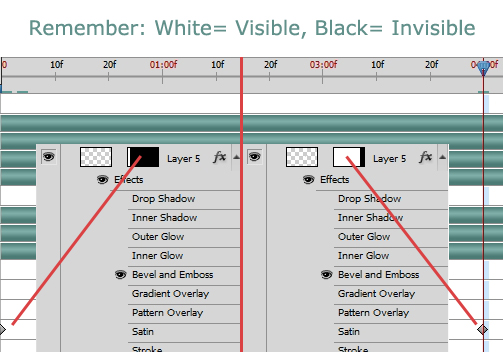
Now that you’ve created your text, it’s time to animate it. Reveal the animation panel (Window>Animation) and click on the Convert to Timeline Animation icon right under the layers stack. Select the middle layer in the “Design” group (the one that has only the bevel and emboss style). Reveal its menu by clicking on the small arrow and then click on the stopwatch next to the Style (make sure the time indicator is at the beginning of the animation – 0:00f; 0s).
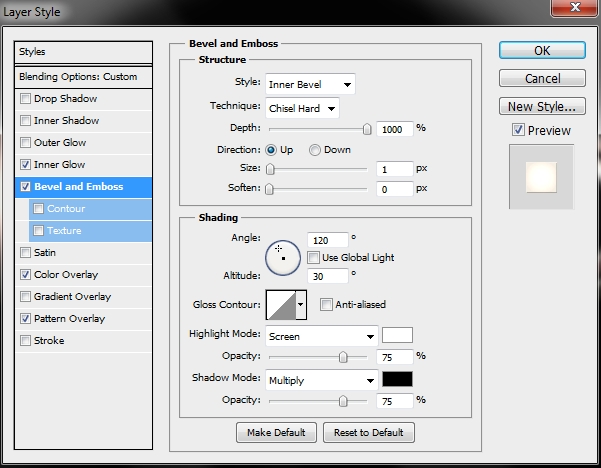
Then move the indicator to the ending point of your animation (I chose it to be 5s – 05:00f). Modify the Bevel and Emboss style of the layer by applying these parametres.

Step 11
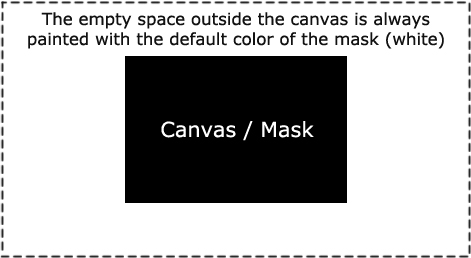
Select the bullet holes layer and add a mask. Unlink the mask by clicking on the little chain between layer’s and mask’s thumbnails. Paint the whole canvas black (mask) except a small part that you should leave white and move the indicator back to the beginning. Click on the Layer Mask Position stopwatch in layer’s menu. Then move the indicator to 04:00f (4s). Click on the mask’s thumbnail and move the mask to the right until the white part overlaps the whole text.
Step 12
Select the next layer (the one with the Outer Glow style) and add a mask. Unlink it and paint the whole black. Then pick the Brush Tool (B) and select a soft round brush. Set the size to something around 100px, change the foreground color to white and draw a straight vertical line across the canvas. Go the beginning of the animation and click the Layer Mask Position stopwatch. Move the mask to the left. Then place the indicator at 4s (04:00f) and move the mask all the way to the right edge of the canvas.
NOTE: When you move the mask a lot, you’ll notice that some white
parts start to appear on the sides.
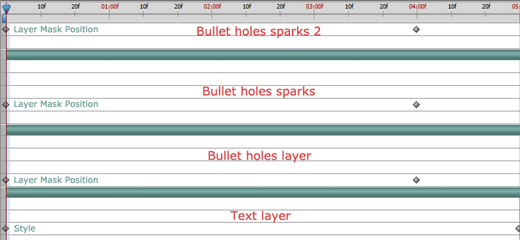
Step 13
Repeat the previous step for the last layer of the “Bullets” group. Your timeline should then look something like this. Save the animation by going Edit>Export>Render video.
Conclusion
That’s the end of this article. You’ve just created a nice metallic text effect and a cool animation at the same time. Add any effects you want (eg. blood coming out of the holes etc.) to make it look even better. I hope you enjoyed the tutorial and learnt something new. If you have any questions post them in the comments section and I’ll answer as soon as possible.


Very nice tutorial you have. 🙂