In this article you’ll learn some basic techniques, tips and tricks that will make you reconsider Photoshop’s capabilities.
Tutorial Details
- Program: Adobe Photoshop
- Version: CS5
- Difficulty: Beginner
- Estimated Completion Time: 45 minutes
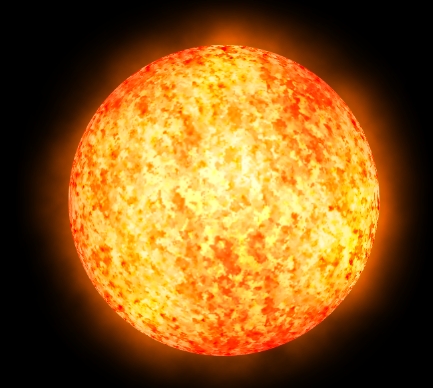
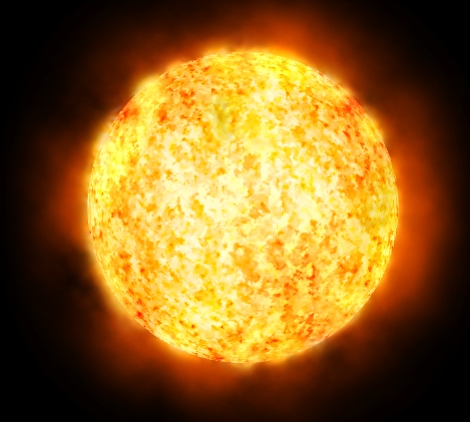
Final Result
Step 1
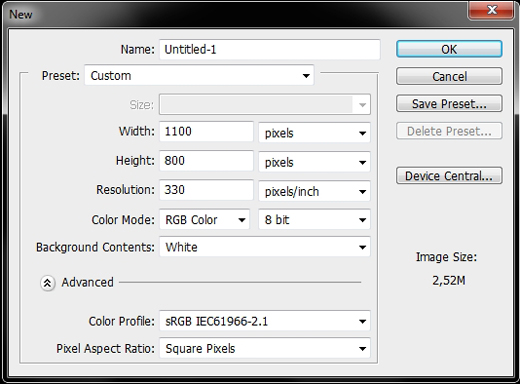
Create a new document in Photoshop. I chose these parametres.
Step 2
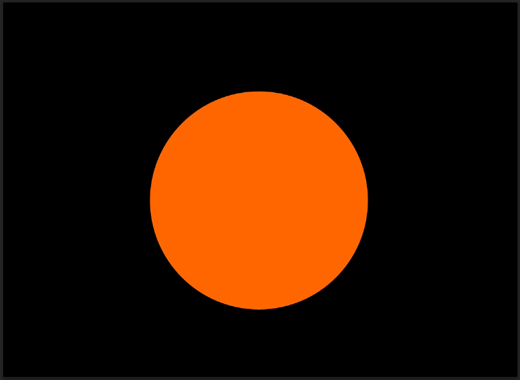
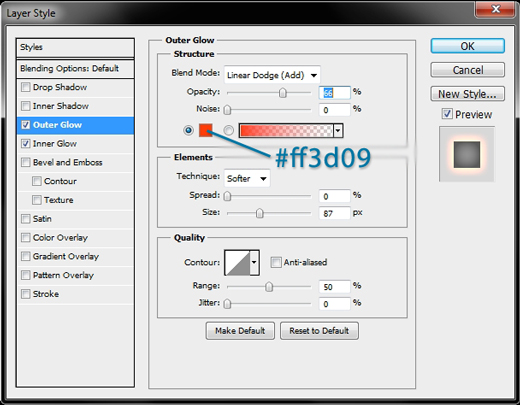
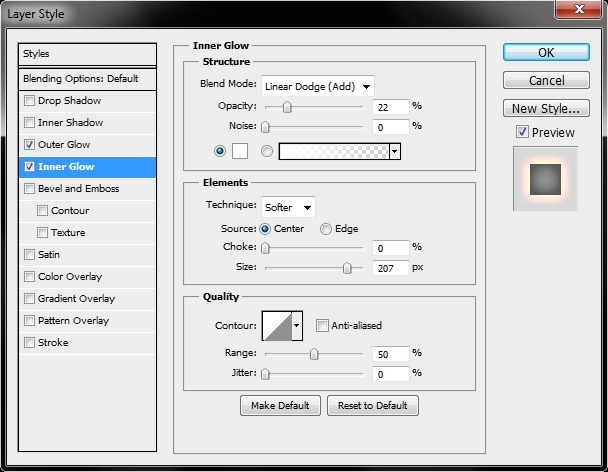
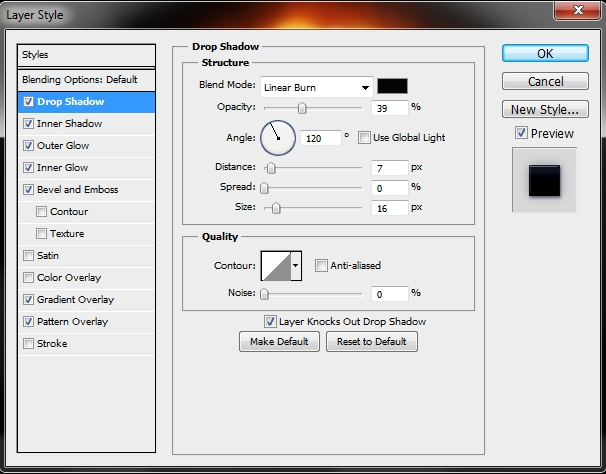
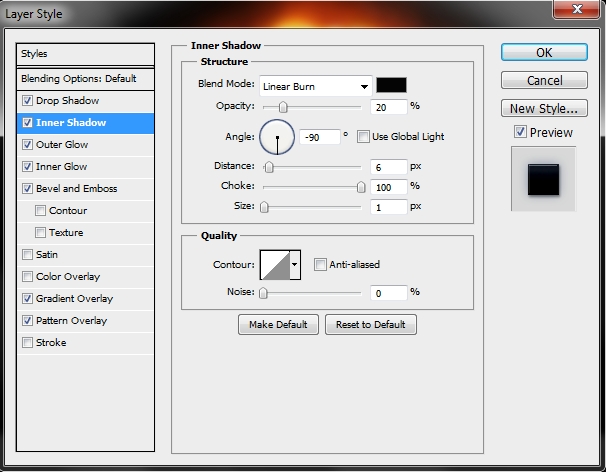
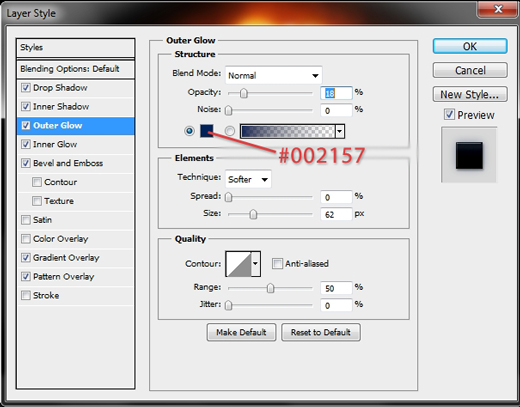
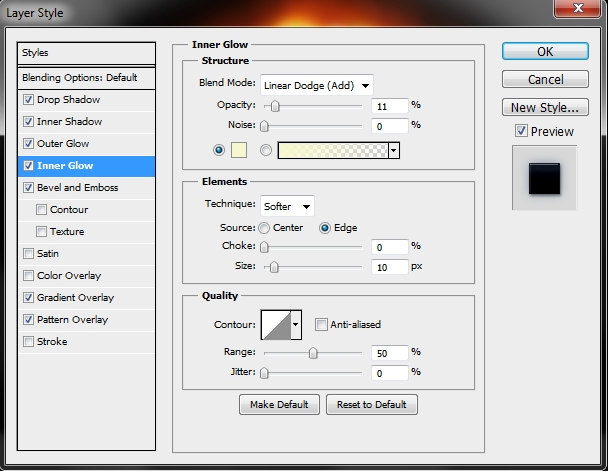
Pick the Ellipse Tool (U) and draw a circle (hold Shift). Fill it with #ff6600 and apply the following styles. Rename the layer to “Sun basic”.
Step 3
Duplicate this layer (rename it to anything you want) and clear its styles (Right click on the layer>Clear Layer Style). Rename the layer to “Effect 1”. Then add this pattern.
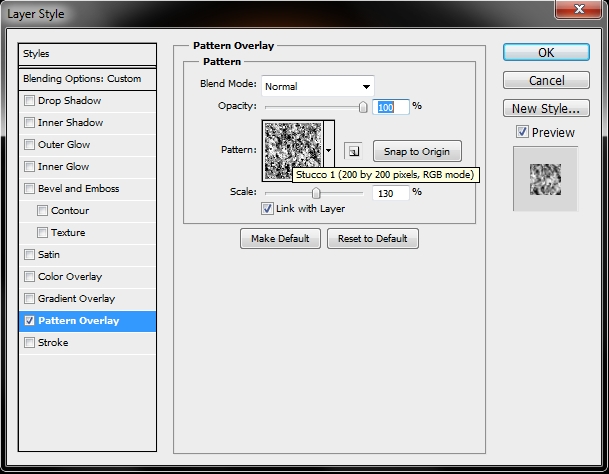
Select “Sun basic’s” pixels and go Filter>Distort>Spherize and change the Blend Mode to Linear Dodge and the Fill to 35-40%.
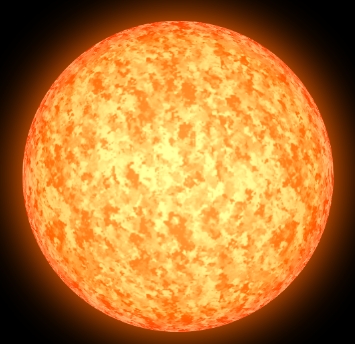
Step 4
Create a new layer and paint the whole canvas white (#ffffff). Then go Filter>Pixelate>Pointillize (cell size: 7). Next go Image>Adjustments>Hue/Saturation (Ctrl+U) and desaturate the layer (-100). After that apply a simple Gaussian Blur (radius: 2,5). Add a layer mask to the layer and select the “Sun basic’s” pixels, hit Ctrl+Shift+I (inverse selection) and paint the selection black (hide the unwanted part). Change the Blend Mode to Color Burn and the Fill to 60%. Rename the layer to “Effect 2”
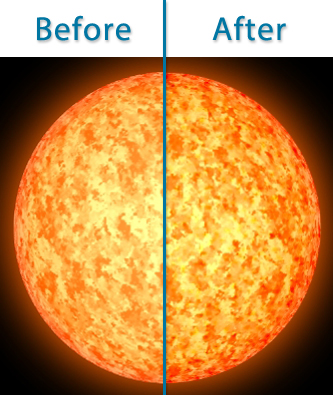
Step 5
Create a new layer, paint it white and extend its edges.
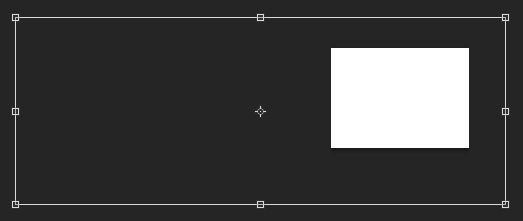
Then go Filter>Render>Clouds and hit ok (make sure your foreground color is set to #ffffff and the background color to #000000). Change the Blend Mode to Overlay. Rename the layer to “effect 3”.
Step 6
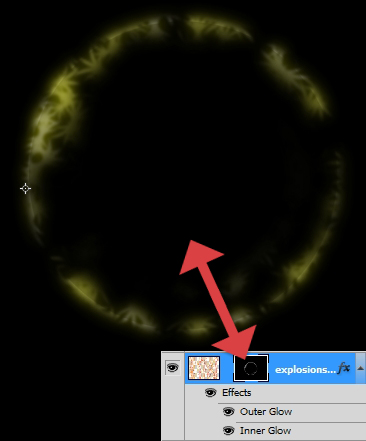
Group these layers and name the group “Sun group”. Next, create a new layer and create this custom brush using the Pen Tool (P) (apply Stroke on each path; right click>Stroke Path). *Note: use the Round Point Stiff brush for the strokes.
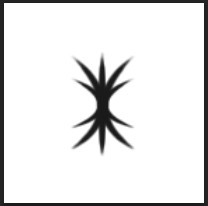
Tweak its parametres in the Brush panel (F5; Window>Brush). Increase the Spacing a bit, check the Shape Dynamics box and turn Size Jitter to 100% as well as the Angle Jitter. Then simply draw some “lines” using different tones of orange. This layer’s size should be once again bigger than your canvas. Next, add some Gaussian Blur (no more than 3px).
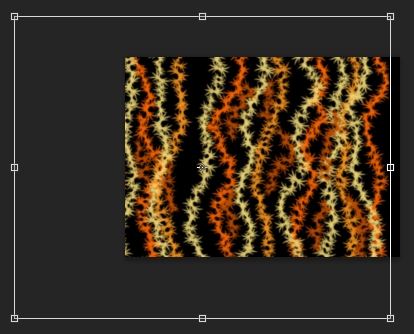
Add these styles.

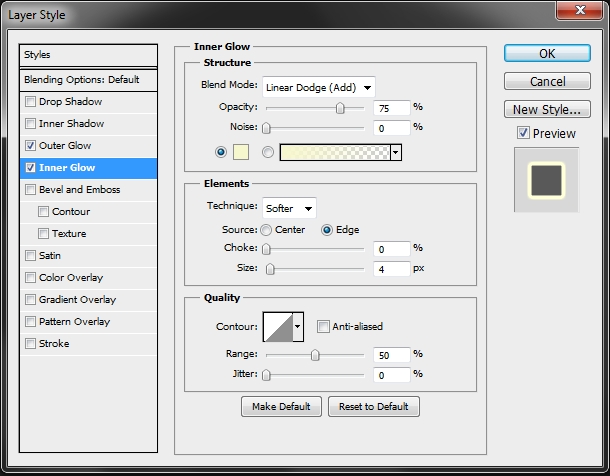
Click on the “Add Layer Mask” button on the bottom of the layers stack. You need to “reveal” only a small area around the edges of the circle (once you’re done, select the mask; click on the thumbnail in the layers stack- and go Filter>Blur>Gaussian Blur and set the radius to something around 3px). Rename the layer to “explosion 1”.
Step 7
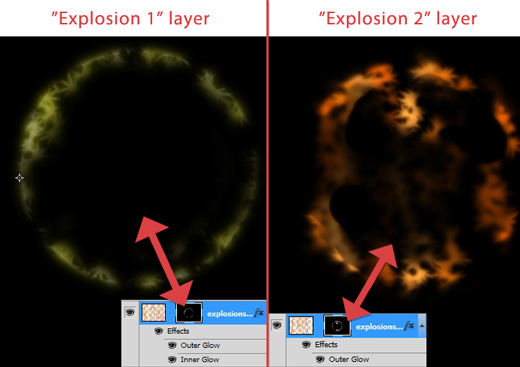
Duplicate the previous layer and add some more Gaussian Blur (1-1,5px) and replace the styles with this one. Place it before the “original” layer in the layers stack.
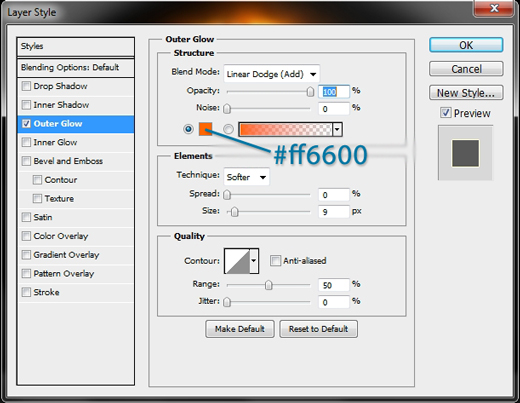
“Hide” and “reveal” some random parts in the mask. Rename the layer to “explosion 2”.
Step 8
Repeat the previous step. You should now have three “explosion” layers. Group them and name the group “Explosions”.
Step 9
Create a new layer and paint the canvas white. Change the Blend Mode to Overlay and the Fill to something around 30%.
Step 10
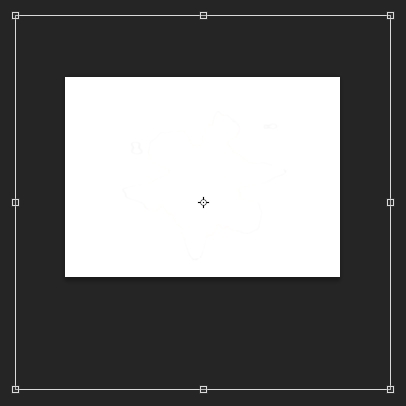
Create a new layer, paint it white, expand its edges and go Filter>Pixelate>Pointillize (use the same cell size; 7).
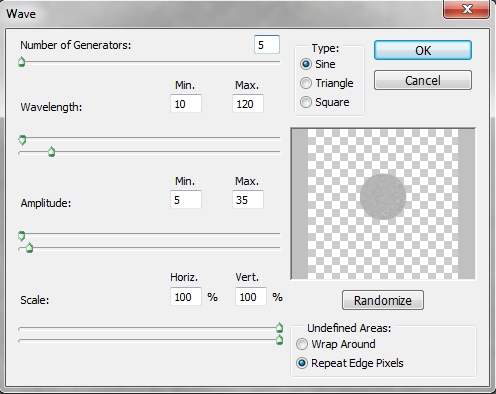
Then go Filter>Distort>Wave and set these parametres.
Add some Gaussian Blur.
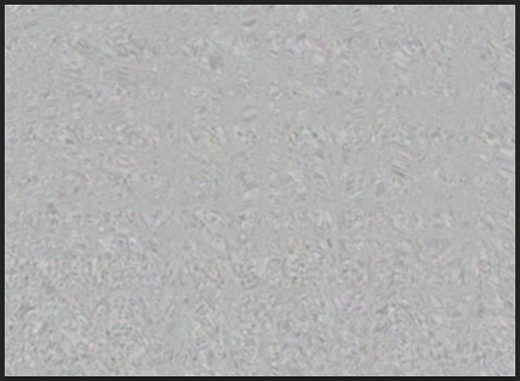
Add a mask to the layer and select “Sun basic’s” pixels. Paint the area outside the selection black to hide it and change the Blend Mode to Soft Light. Rename the layer to “Random effect”.
Step 11
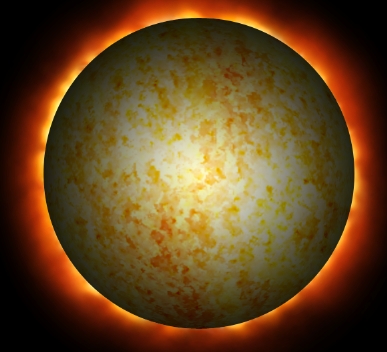
Create a new layer and select “Sun basic’s” pixels once again. Pick the Gradient Tool (G), select a simple black to transparent gradient, radial, and draw a straight line from the centre of the selection to an edge. Then change the Blend Mode to Soft Light and the Fill to 40-45%.
Step 12
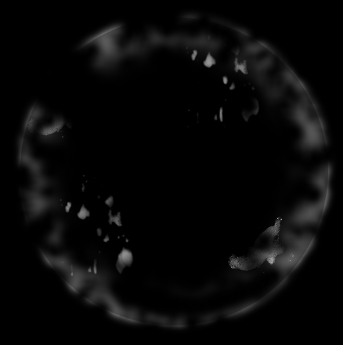
Go back to the “Explosions” group and duplicate any of the layers. Place the layer on top of your layers stack and hit Ctrl+U to reveal the Hue/Saturation panel. Turn the Lightness to +100 to make it white. Then add some more Gaussian Blur and once again “reveal” some other random parts inside and on the edges of the main shape (sun). Rename the layer to “random explosions”.
Step 13
Go back to the “Sun group” and select the two first layers (sun basic, effect 1). Duplicate them and merge them. After that place them on top of the layers stack. Go Filter>Blur>Gaussian Blur and select something around 3-4 px. Then scale the shape up a lot.
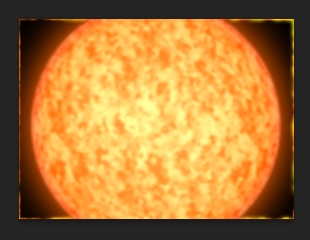
Hold Alt+Left click and drag the mask of the previous layer (step 12) onto this one. It’s a simple trick to “copy” masks. Again, paint some random parts inside and on the edges of the basic sun shape. Rename this layer to “Big sun”.
Step 14
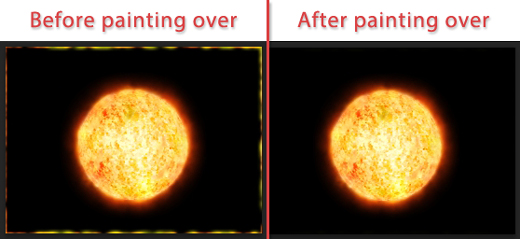
If you spot any disturbing glowing parts around the edges of the canvas (see previous step’s image), simply paint over them with a soft round brush (color: black).
Step 15
Create a new layer and paint the canvas using #a60e0e. Then select white as your foreground color and black as the background one. Next, go Filter>Pixelate>Mezzotint and after that Filter>Pixelate>Pointillize (cell size: 15-20). Finally add some Gaussian Blur (Filter>Blur>Gaussian Blur; 3-4px).
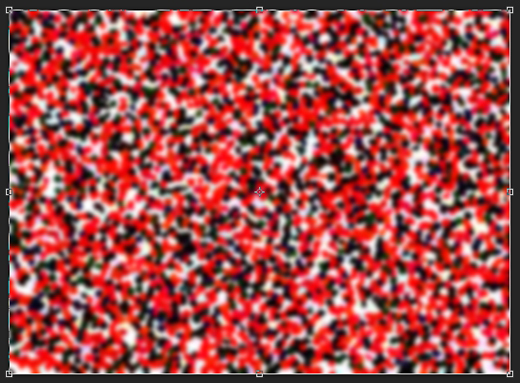
Change the Blend Mode to Vivid Light and the Fill to something around 45%. Add a layer mask and select “Sun basic’s” pixels. Press Ctrl+Shift+I and paint the new selection black to hide this part. Rename this layer to “hot spots”.
Step 16
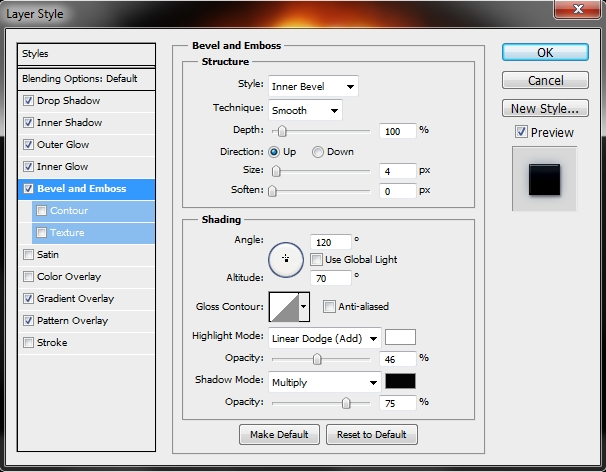
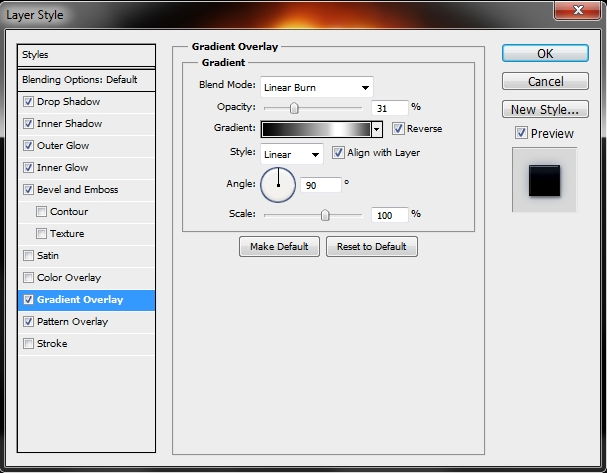
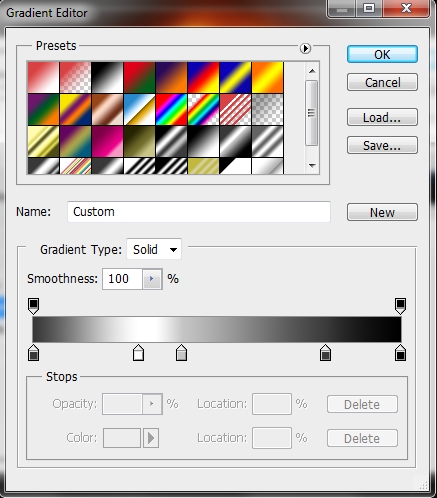
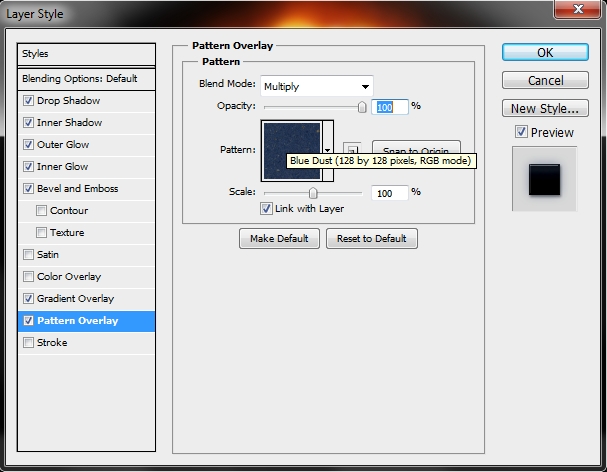
Create a new layer and using the Type Tool (T) write anything you want. Then apply these styles (the font I used is American Captain; size: 24pt, color: d7d7d7).
Step 17
Create a new layer and pick the Brush Tool (B). Select a soft round pressure brush and set the size to something around 125px. Then simply draw a vertical line (hold Shift).
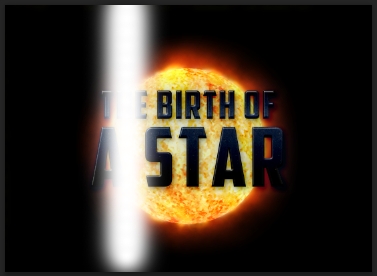
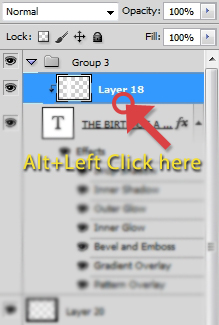
Then hold Alt and Left Click (Clipping mask) on the line separating this layer from the text one created in the previous step in your layers stack. Rename the layer to “text effect light”.
Animation
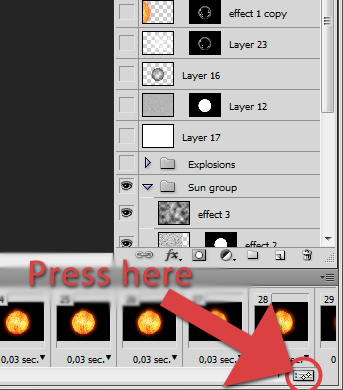
Once we’ve got our design ready, it’s time to animate the object. First of all, go Window>Animation to reveal the animation panel. Press on the Convert to Timeline Animation button under the layers stack.
Step 18
Hide all the layers (click on the eye next to the layer in the layers stack) except from the “Sun group”. Click on the little arrow in the Animation timeline to reveal the layers inside the Sun Group.
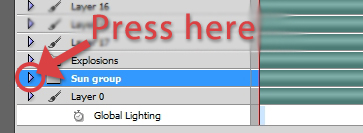
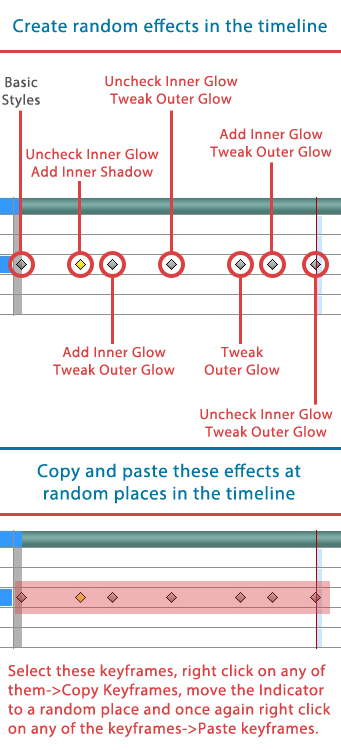
Find the Sun Basic layer and click on the little arrow to reveal the options panel. Press on the stopwatch next to “Style”. This will set a keyframe but it will also start “mapping” (create automatically keyframes) any changes made through the animation within the Layer Styles. Try it for yourself. Drag the Time Indicator a couple of seconds to the right and change the Layer Styles (make the Outer Glow’s size bigger or smaller, add an Inner Shadow etc.). Now hit Space to play the animation.
Step 19
Reveal the options for the Effect 1 layer and again hit on the Style stopwatch. Tweak the Fill of the layer through the timeline (Style-Fill, Opacity-Opacity) just like you did in the previous step.
Step 20
Move to the next layer (Effect 2) and before animating it click on the little chain between the layer’s thumbnail and its mask (unlink mask).
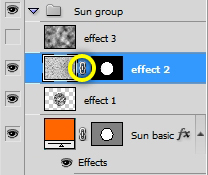
Then click on the Position stopwatch and set a keyframe at the beginning of the animation. Move the layer (not the mask) to the left. Then go to the end of your animation (I chose it to be 6 secs – 06:00f) and move the layer to the right. The more you move it, the faster your object will “spin”.
Step 21
Do the same with the Effect 3 layer (you don’t have a mask there, so simply change its position).
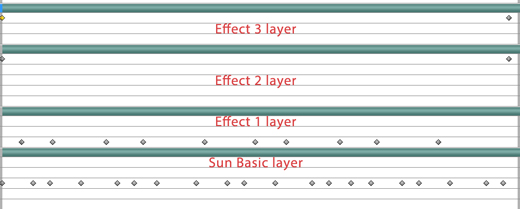
Your timeline should by now look like this (well, more or less).
Step 22
Hide the Sun group and reveal the Explosions. Select the first layer (explosions 3) and repeat the previous step. Do the same with the other two “explosion” layers.

Step 23
Select the “Random effect” layer (don’t forget to press on the little box next to the layer in the layers stack to reveal it). Unlink the mask like you did before (step 20) and click on the Position stopwatch. Again add a starting keyframe and an ending one.
• Note: You have to unlink the mask so that when you move your original content, the mask stays in place. If you want to move the mask, you also have to unlink it but instead of pressing on the Position stopwatch, you have to press on the Layer Mask Position and then move it.
Step 24
Select the “random explosions” layer and repeat the previous step. Do the same with the rest of the layers (big sun, hot spots, text effect light).
Step 25
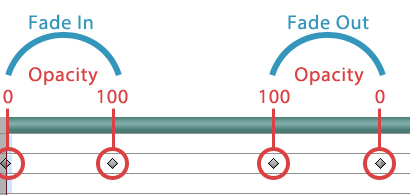
Finally select the text layer and set four keyframes; two for the fade in and two for the fade out effect.
Step 26
Once you’re satisfied with the effect simply export the animation (File>Export>Render Video).
Conclusion
As you can see Photoshop’s animation capabilities offer you a lot of space to experiment. Of course there are some things that can’t be achieved (eg. you can’t “map” the rotation of an object), but overall it’s a very powerful tool and in the CS6 version it’s even better. Now and then I’ll try to show you some more tips, tricks and different techniques to create nice and simple animations. I hope you enjoyed this article and learnt something new.


Of course, it will be easier and cooler if we will create the animation in After Effects. However, showing such technique in Photoshop is great also. Good Work!
really nice explanation of each step of photoshop animation tutorial . i love to make it thanks