
In this article I’ll show you an easy way to create the oil painted-like effect. Before we begin, I have to make clear that if you want to use another photo, you will have to make some adjustments. There’s a big amount of variables that affect the final effect (eg. the amount of black color, shadows, highlights, level of details etc.); therefore these particular parametres shown in this article might not work properly with every photo. However, once you understand the logic behind the whole process, you’ll know exactly what adjustments have to be done in a custom photo.
Tutorial Details
- Program: Adobe Photoshop
- Version: CS5
- Difficulty: Intermediate
- Estimated Time of Completion: 45 minutes
Tutorial Assets
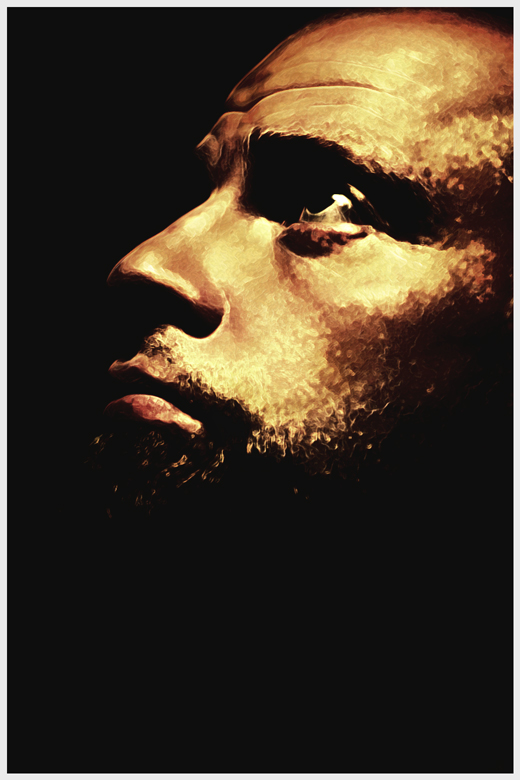
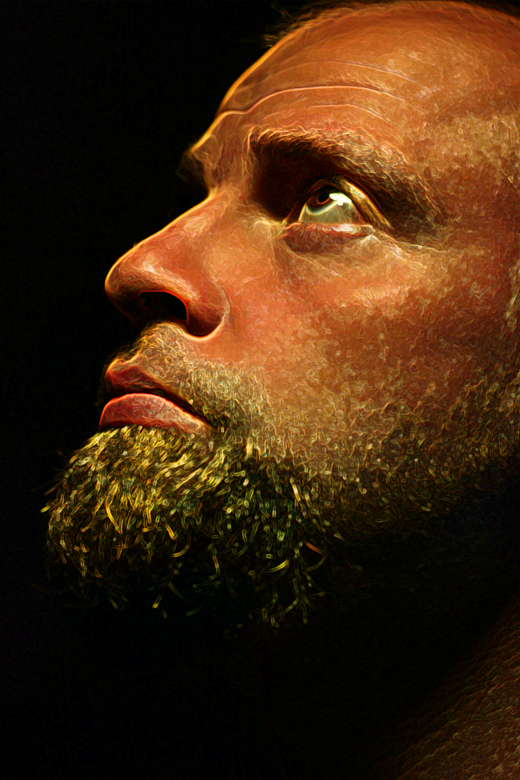
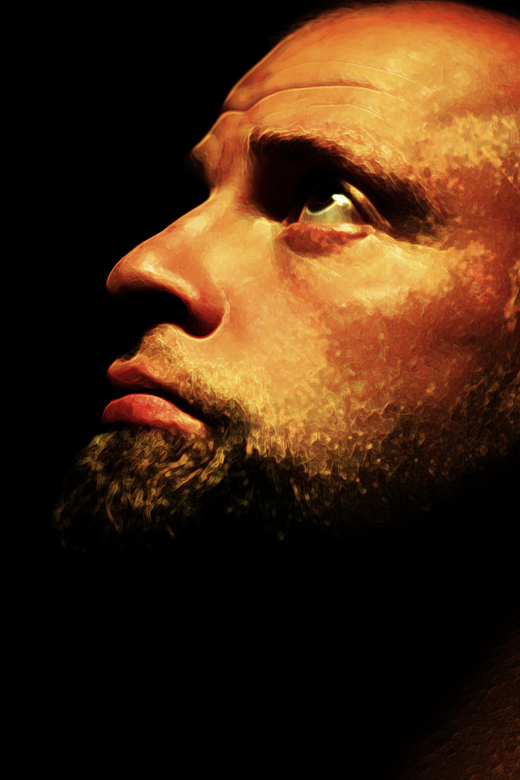
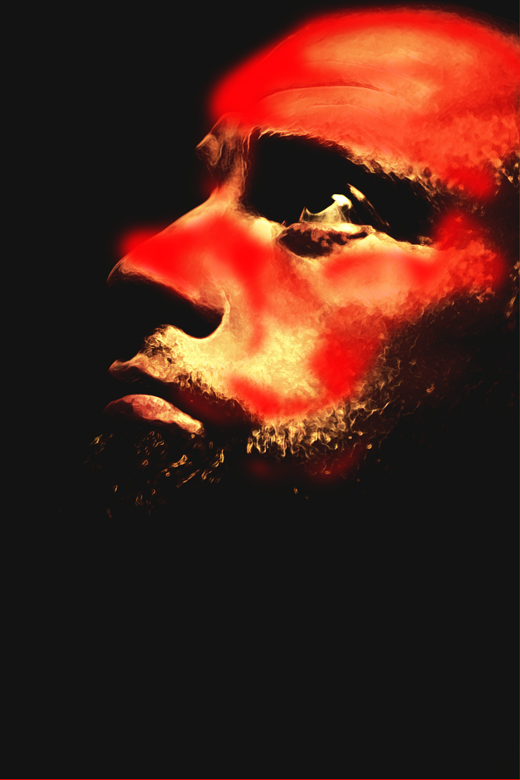
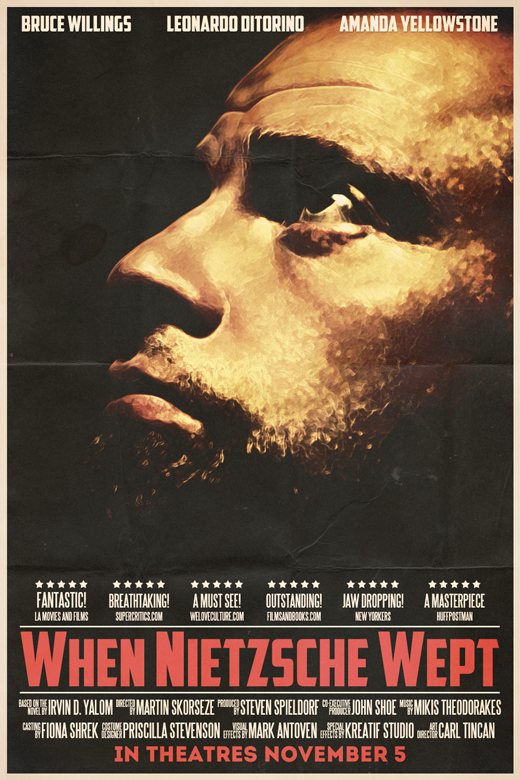
Final Result
Step 1
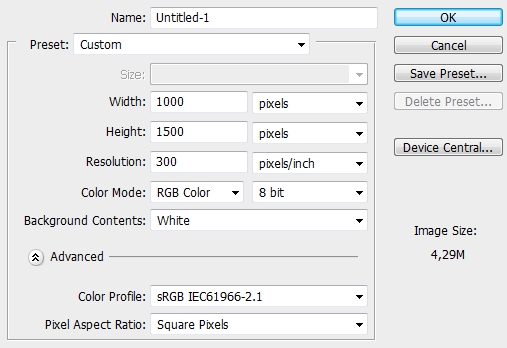
Create a new file in Photoshop.
Step 2
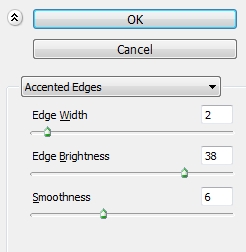
On a new layer place the photo. Go Filter>Brush Strokes>Accented Edges and apply select these parametres.
Step 3
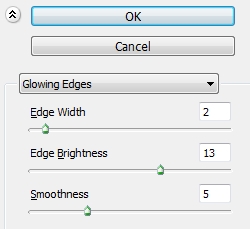
Duplicate the photo, change the Blend Mode to Soft Light and replace the Accented Edges filter with Glowing Edges (Stylize). Set these parametres.
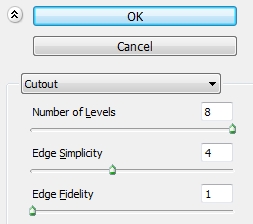
Then go Filter>Artistic>Cutout and apply the following parametres.
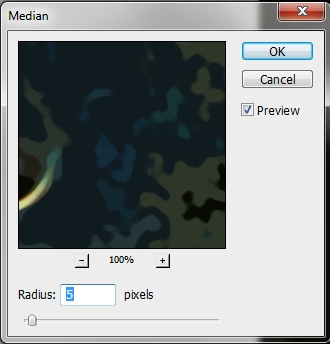
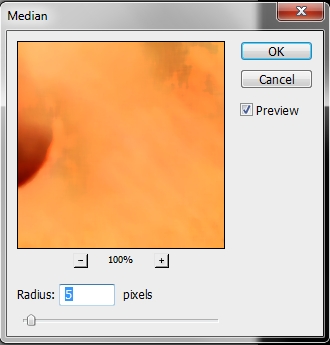
Finally go Filter>Noise>Median.
Step 4
Duplicate once again the photo and delete all the previously applied filters except from the Glowing Edges. Change the Blend Mode to Screen and the Fill to 58%. Your photo should then looks like this.
Step 5
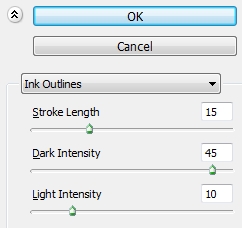
Duplicate your photo again and go Filter>Brush Strokes>Ink Outlines.
Then add the Median filter.
Step 6
Create a new layer and paint the whole canvas black (#000000). Change the Blend Mode to Color and the Fill to 30% (it’s basically an adjustment layer). Your photo should then look something like this.
Step 7
Group all the layers created so far, name the group “Base” and merge it. In this new layer go Image>Adjustments>Hue/Saturation (Ctrl+U) and the the Saturation to -15. Duplicate the merged layer and desaturate the copy (-100). Next go Image>Adjustments>Levels (Ctrl+L) and play with the indicators until you achieve an effect like the one on the image below (you may have to repeat it a couple of times). Finally change the Blend Mode to Color Dodge and set the Fill to 13%.

Step 8
Duplicate the original “Base” layer from the previous step, place it on top of the layers stack and repeat the previous step (desaturate, levels) only this time give your photo a more “natural” look (without the excessive highlights from the previous step). Change the Blend Mode to Soft Light and the Fill to 40%.
Step 9
Create a new layer and paint the canvas black (#000000). Change the Blend Mode to Color and the Opacity to 15%. Then create a new layer and paint it with #131312. Change the Blend Mode of this layer to Lighten. If you’ve done everything properly, your photo should now look like this.
Step 10
Duplicate the original “Base” layer and place it on top of the layers stack. Go Filter>Brush Strokes>Angled Strokes and apply these parametres.

Lower the Opacity (or Fill) to 61% and add a layer mask. Paint the mask black to hide everything. Next, paint the selection shown on the image below with a big soft round brush (color: white). If you spot any harsh spots, blur them using the Blur Tool (Soft round brush; Strength: 15-20%).
Step 11
Duplicate the Base layer again. Place the copy on top of the stack and go Filter>Stylize>Glowing Edges.

Then desaturate it (-100) and change the Blend Mode to Color Dodge and the Opacity to 25%.
Step 12
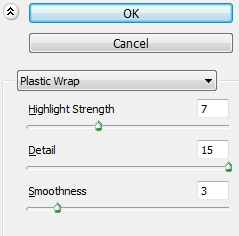
Duplicate all the layers in your stack (except from the background) and merge the copies. Select this new layer and go Filter>Artistic>Plastic Warp.
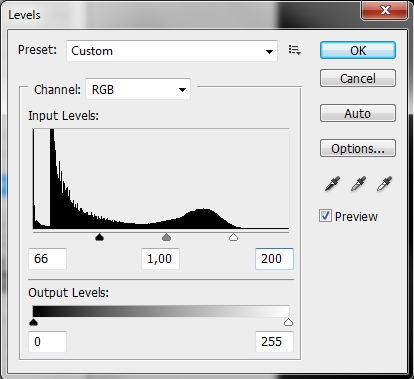
Then desaturate it (-100) and hit Ctrl+L to reveal the Levels panel and set these parametres.
Change the Blend Mode to Multiply and the Opacity to 28%. Finally add another layer and paint it with #111111. Change the Blend Mode to Color and the Opacity to 17%.
Step 13
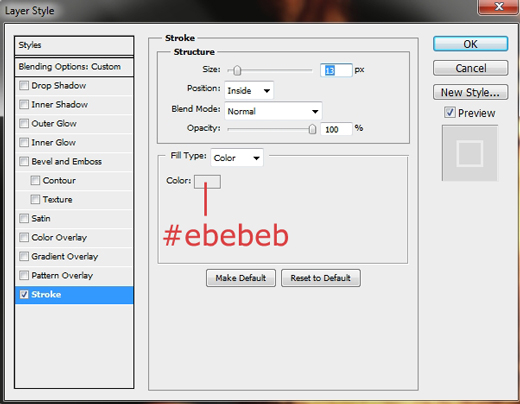
This last step is optional. Create a new layer and paint it using a random color. Turn Fill to 0% and apply this style.
Variation
The whole image gave me the feeling of a retro movie poster, so I decided to add some text and make a poster of it.


Great detailed tutorial, will give it a go.