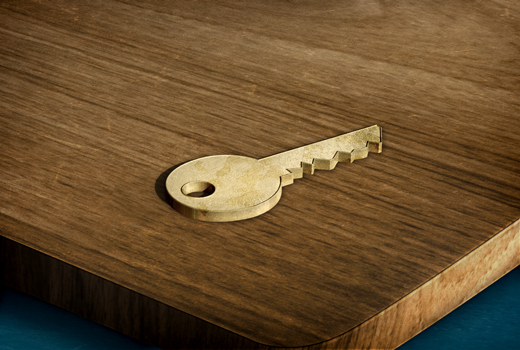
In this tutorial we’re going to create a photo-realistic key using the powerful capabilities of Photoshop’s 3D feature. If you have no previous experience with the 3D feature, I strongly recommend that you experiment on your own before continuing to the tutorial.
Tutorial Details
- Program: Adobe Photoshop
- Version: CS6 Extended
- Difficulty: Intermediate/Advanced
- Estimated Completion Time: 1 hour
Tutorial Assets
Final Result

Step 1
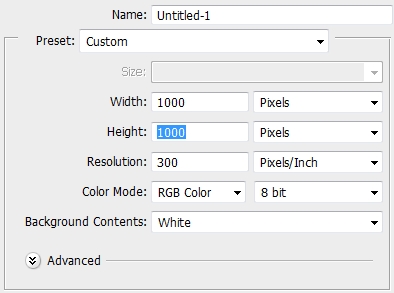
Create a new document in Photoshop.
Step 2
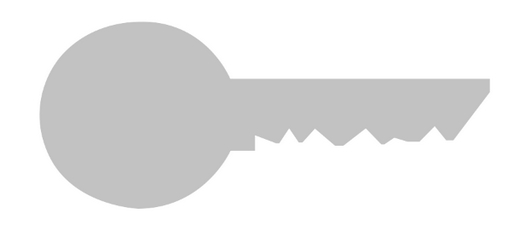
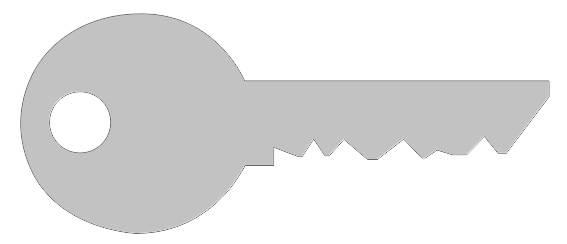
Using the Pen Tool (P) draw the outline of a key. It’s pretty easy, yet you can use a reference photo. Once you’ve done with the path, right click on the canvas and select Create Vector Mask. Fill the canvas with #c2c2c2. Then, pick the Ellipse Tool (U) and select the Subtract from Shape in the Path Operations. Draw a circle for the hole.
Step 3
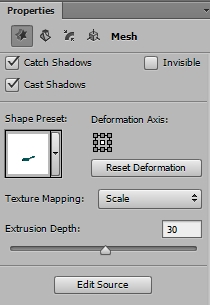
Now go 3D->Extrusion from Selected Path. Skip the Environment and Scene panels and select the Layer 1 (or whatever you named your layer). Start applying these parametres.
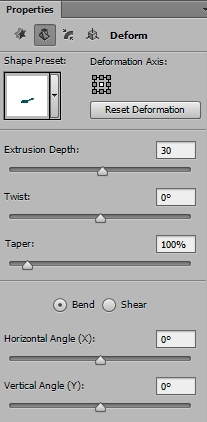
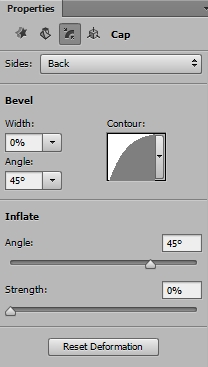
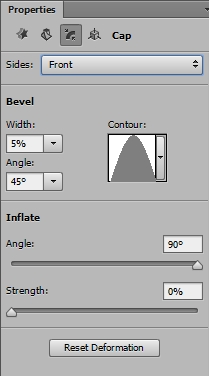
Step 4
Now that your main shape is ready, switch to the Front Inflation Material panel (just click on it in the 3D layers stack). Apply these parametres.
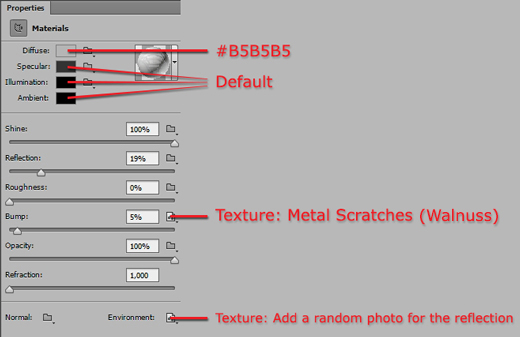
Step 5
Select the Front Bevel Material panel and apply the following parametres.
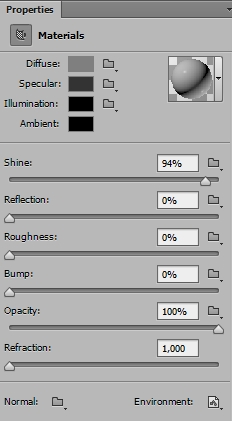
Step 6
Do the same with the Extrusion Material panel. Since our key is placed on the floor, there’s no need to tweak the Back Bevel and Back Inflation Materials.
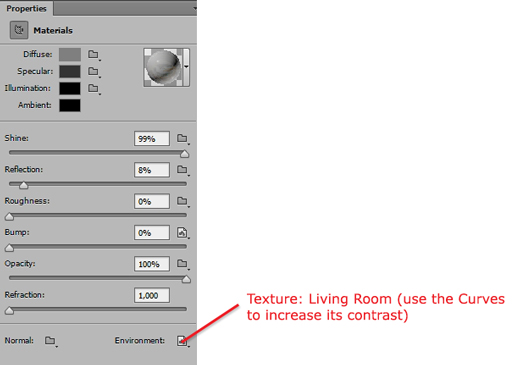
Step 7
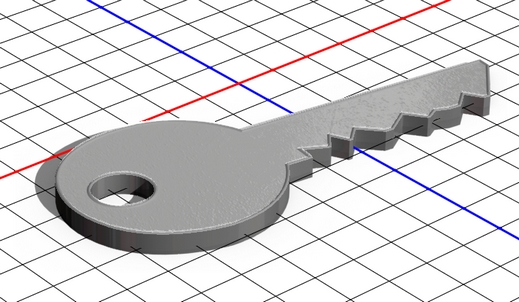
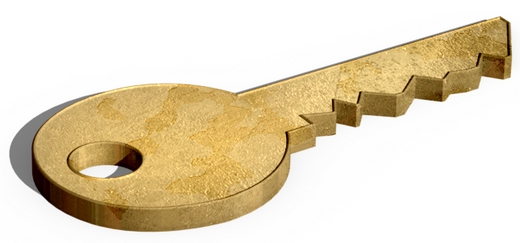
Your key should now look something like this (depends on the orientation parametres you applied).
Step 8
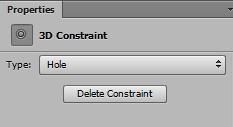
To create the hole simply select the Internal Constraint (inside the Boundary Constraint) panel and select Hole.
Step 9
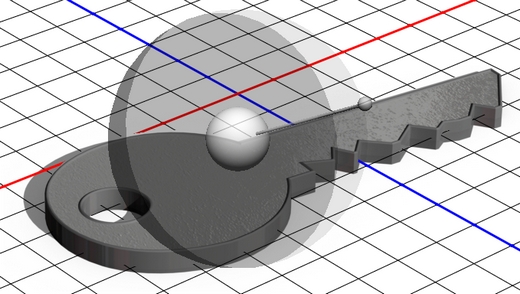
Next, select the Infinite Light 1 (you can add more light sources if you want) and move it around until you’re satisfied with the result.
Step 10
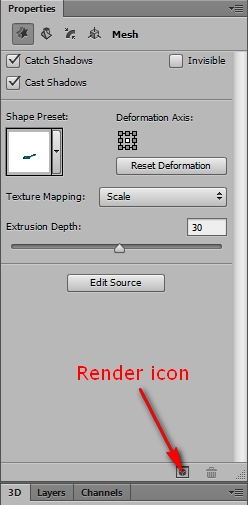
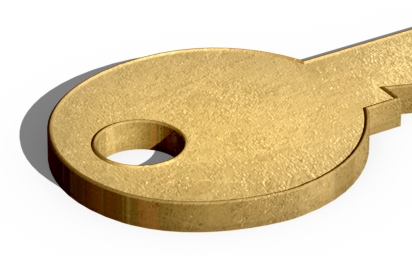
Our key is now ready. Hit the Render icon and wait a couple of minutes… or hours depending on your computer.
Step 11
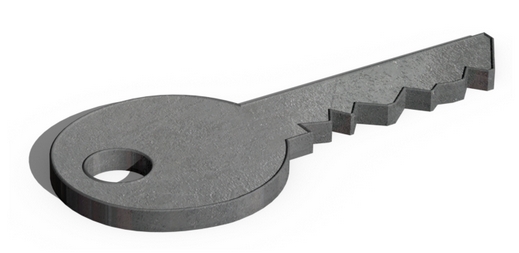
Switch back to your default workspace and place the Metal Scratches texture (the one you used before) on a new layer. Scale it down, rotate it and do whatever you want with it to give your key a random effect. Change the Blend Mode to Vivid Light and lower the Fill to 35%. Clip this layer to the original 3D key layer.
Step 12
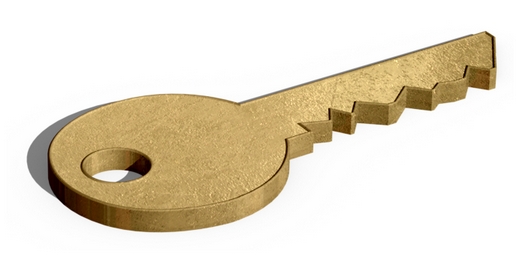
Create a new layer, turn it into a clipping mask and paint the whole canvas orange (#fbaf5d). Change the Blend Mode to Hard Mix and the Fill (or Opacity) to 25%. Then create another layer and this time paint it yellow (#b6b16a). Change its Blend Mode to Vivid Light and the Opacity to 40% (don’t forget to clip it).
Step 13
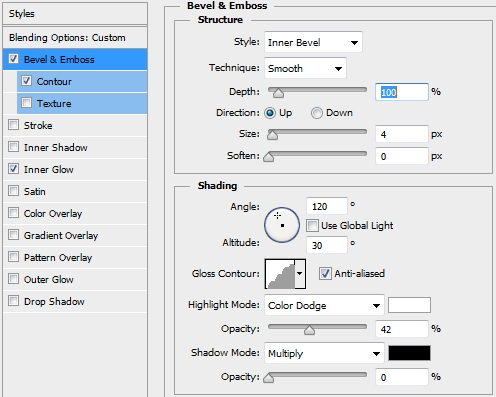
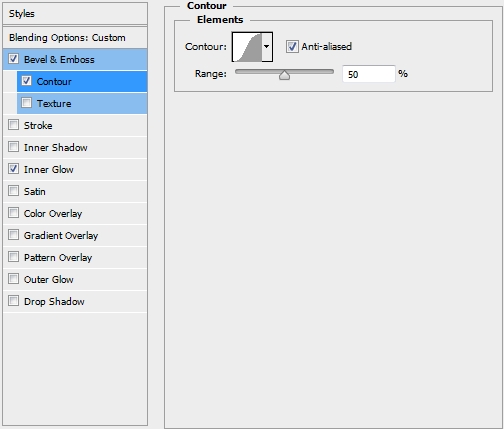
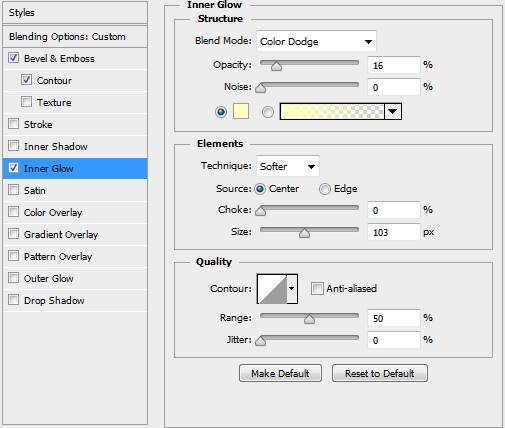
Next, create a new layer, clip it again and select the pixels of the 3D key. Paint the selection with a random color, turn the Fill to 0% and apply these parametres.
Step 14
Create a new layer and add some scratches using the Brush Tool (B).
Step 15
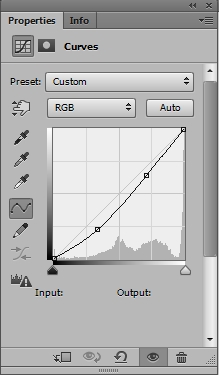
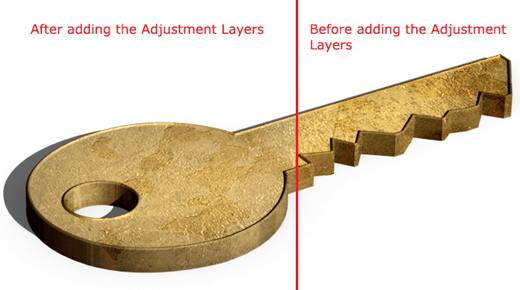
Finally, create a Solid Color Adjustment Layer (color: #000000) and change the Blend Mode to Color and the Opacity to 25%. Then add a Curves Adjustment Layer to tweak the contrast.
Step 16 – Background
Group and merge all the layers except from the background and the Adjustment layers. Paint the background layer with any color you like. Then, create a new layer and place the Metal Scratches texture. Clip it to the background layer and change its Blend Mode to Linear Light and lower the Opacity to something around 15%. Go Edit->Transform->Distort and experiment with the anchor points to give the texture some depth.

Step 17
Grab the Pen Tool (P) and draw a shape like the one on the first image. Fill it with #c69c6d. Place the Wood texture on a new layer and distort it. Change its Blend Mode to Luminosity and clip it to the orange shape.


Step 18
Duplicate the Metal scratches layer and distort it a bit more. Change its Blend Mode to Color Dodge and the Opacity to 80%. The idea is to make the wooden surface look old and used.

Step 19
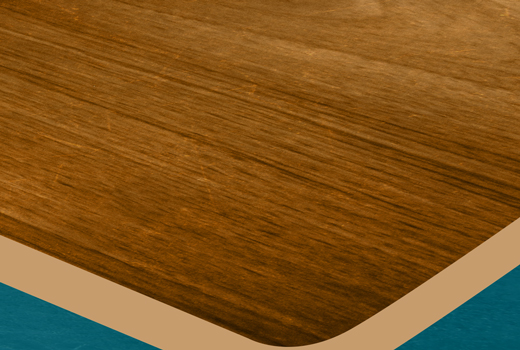
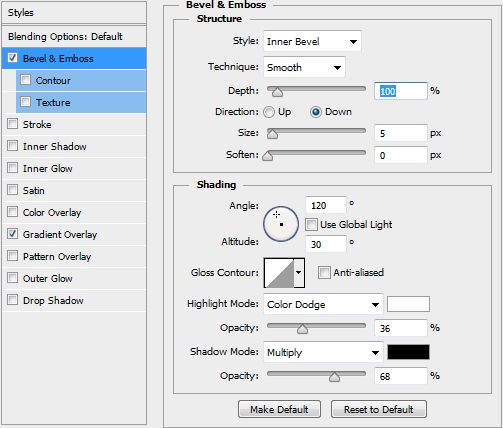
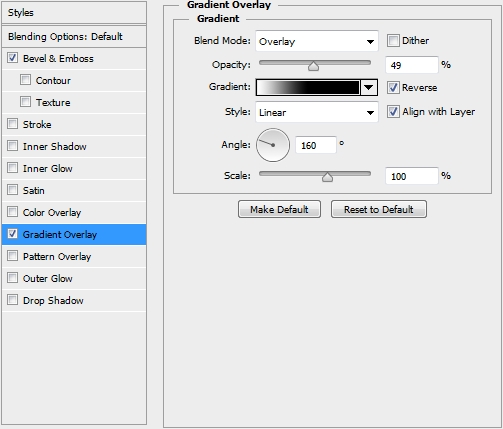
Create a new layer and grab the Pen Tool (P) again. Draw a shape like the one on the image below and add the following styles (color: #c69c6d).
Step 20
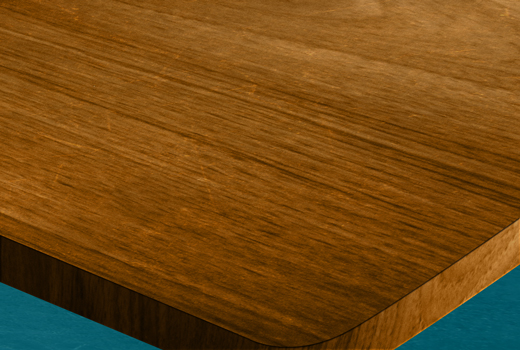
Duplicate the Wood texture and distort it. Clip it to the layer created in the previous step.
Step 21
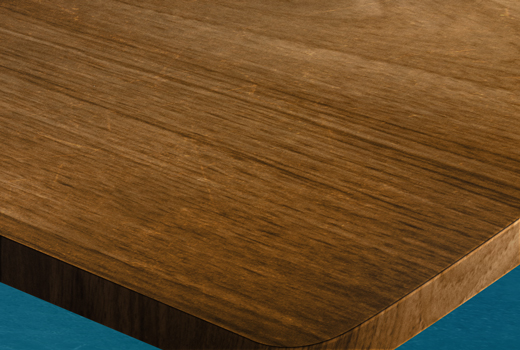
Create a new layer and add some highlights.
Step 22
Add some more shadows and highlights using a soft round brush.
Conclusion
That’s it. The key is now ready. Feel free to add any effects you want to make it look even better. If you have any questions, post them in the Comments Section and we’ll answer asap. We hope you enjoyed the tutorial.


its really a great tutorial……..
Superb graphic design tutorials and thanks for share….
Great tutorial Alan!I want to try this and I hope I can do it.
I want to do this graphic design but I don’t know where to start.
What site I’m going to search to start this thing?
Thanks Alan for this tutorial,it helps us a lot.
It looks hard to do.
The one who made this is very capable to be a graphic designer.
Nice tutorial,thank you.
Nicely done, the key looks real good. Keep up the work and great tutorials