In this tutorial we’re going to create a nice animation that you can use in your videos as an intro or credits. The effect is inspired from the Battlefield 3 video game and as you’ll see it’s very easy to create it.
Tutorial Details
- Program: Adobe Photoshop
- Version: CS6
- Difficulty: Intermediate
- Estimated Completion Time: 1.5 hour
Final Result

Design
Step 1
Create a new file in Photoshop. Use any preferences you want (we picked 1280×720 px, 8 bit RGB, 330dpi, background color: #000000).
Step 2
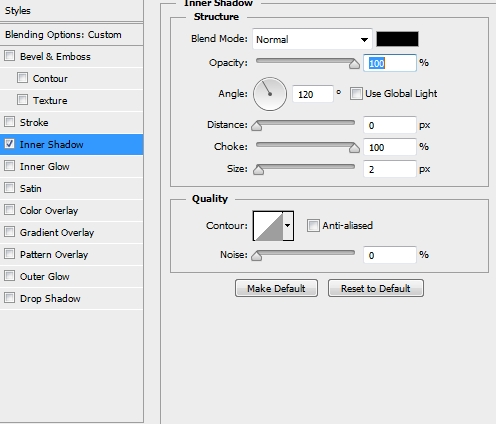
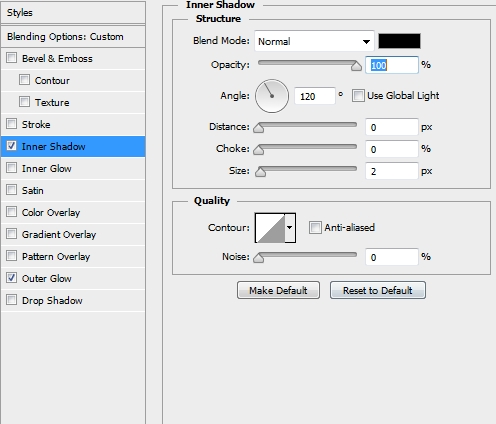
Grab the Type Tool (T) and write anything you want. The font we chose is called Walkway Black and you can download it from dafont.com. Size: 75 px, color: #ffffff. If you choose the same font we did, add the following style.
Step 3
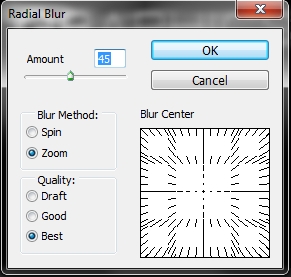
Duplicate this text layer twice. Select the first copy and rasterize it. Pick the Rectangular Marquee Tool (M) and draw a rectangle around your text. Then go Filter->Blur->Radial Blur (you may need to re-apply this filter a couple of times). Rename the layer to Blurred.

Step 4
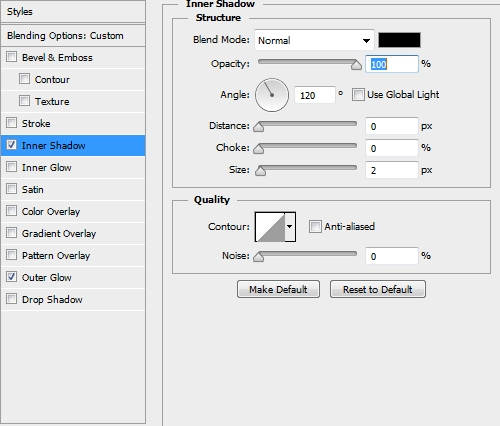
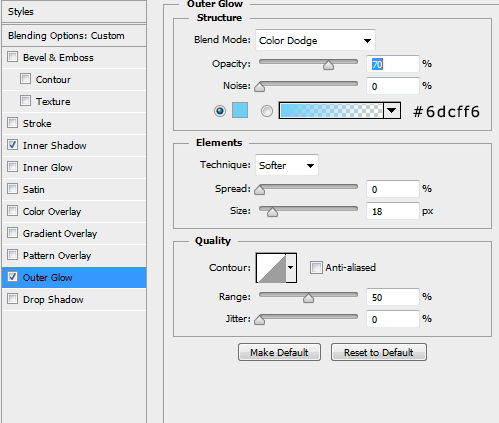
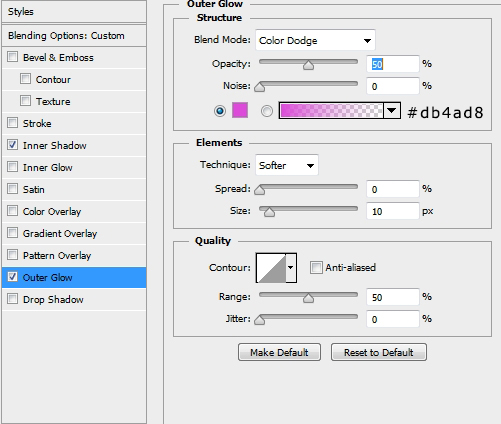
Now, select the second copy, change the text’s color to #00e4ff, lower the Fill to 50% and apply the following styles. Rename this layer to Blue.
Step 5
Select the third copy, change the color of the text to #ec008c, once again lower the Fill to 50% and add these styles. Rename the layer to Pink/Purple.
Step 6
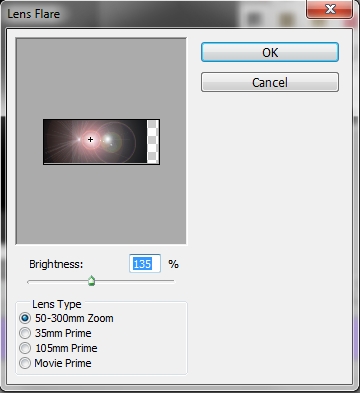
Next, create a new layer and paint the canvas black (#000000). Go Filter->Render->Lens Flare. Open the Hue/Saturation panel (Ctrl+U), check the Colorize box and drag the Hue left or right until you get a nice light blue color (you may need to lower the Saturation a bit). Change the Blend Mode to Color Dodge and the Fill to 60%.

Step 7
Duplicate this lens flare layer.
Step 8
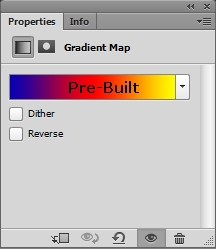
Add a Gradient Map Adjustment Layer. Change its Blend Mode to Color Dodge and the Fill to 20%.
Step 9
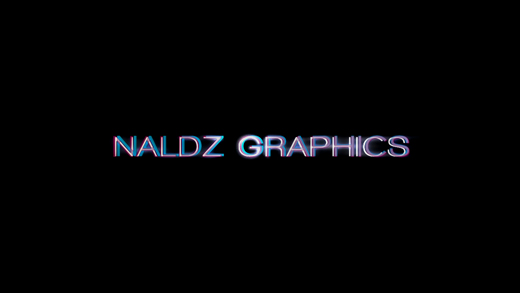
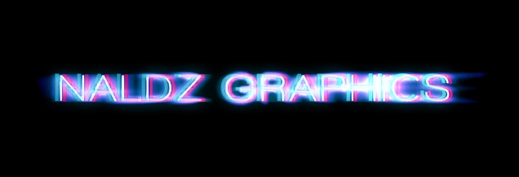
Create a new layer and paint the canvas black or white. Set black as your foreground color and white as the background one. Go Filter->Render->Clouds. Change the Blend Mode to Linear Burn and the Opacity to 25%. Your design should look by now something like this.
Step 10
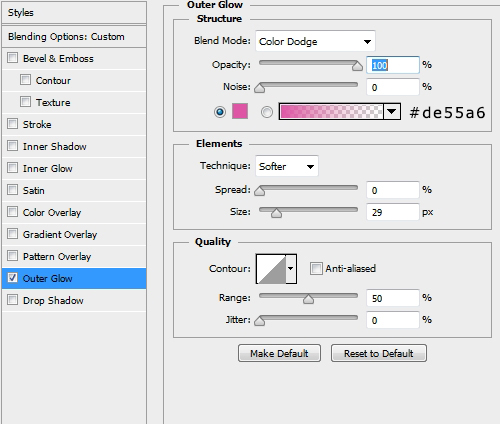
Duplicate your original text layer and place the copy on top of the layers stack. Delete the Inner Shadow style and go Filter->Pixelate->Mosaic (cell size: 8). Apply the following style and turn Fill to 0%. Rename the layer to Mosaic.

Step 11
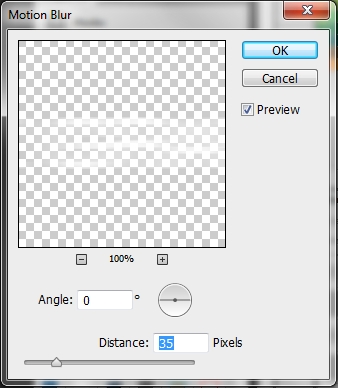
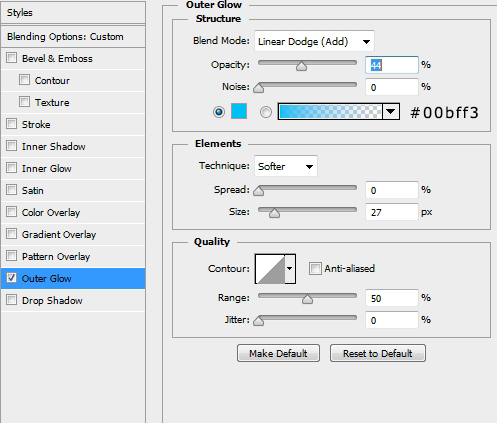
Duplicate the original text layer and once again place the copy on top of the layers stack. Delete the Inner Shadow style and go Filter->Blur->Motion Blur. Lower the Fill to 60%. Rename the layer to Motion Text.
Step 12
Create a new layer and paint the canvas with #db4ad8. Change the Blend Mode to Saturation.
Step 13
Create a new layer, paint the canvas black, go Filter->Noise->Add Noise (20) and then Filter->Blur->Blur. Change the Blend Mode to Color Dodge and the Fill to 25%. Rename the layer to Saturation.
Step 14
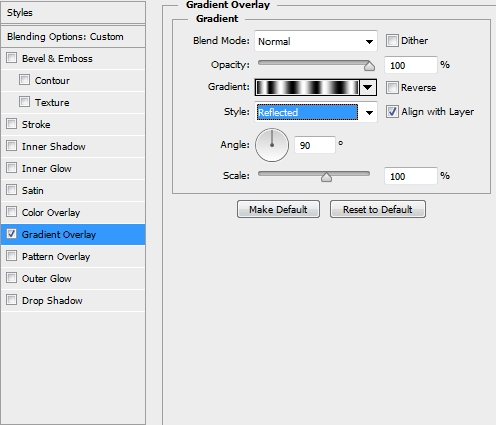
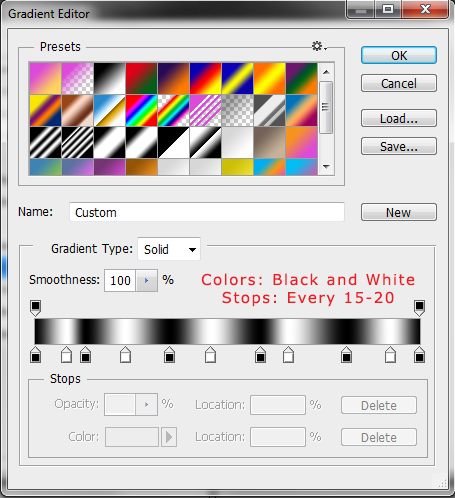
Finally, duplicate one last time the original text layer and place it on top of the layers stack. Replace the Inner Shadow style with the one on the first image. Then, create a new layer and merge these two layers. Next, go Filter->Blur->Motion Blur (Distance: 10). Change the Blend Mode to Color Dodge. Rename this layer to Gradient Text.
Animation
Step 15
There’s no point in writing”place a keyframe here and another there”, so instead I’ll give you screenshots from my timeline for every single layer and all you have to do is “follow” the images. The animation will end at 3:00 (3 seconds) and the timeline images show the whole part from 0:00-3:00.
Step 16
We’ll start straight from the bottom of the layers stack. So, select your original text layer and play with the Opacity.

Step 17
Select the second layer (blurred) and add some Opacity keyframes.

Step 18
Next, select the Blue text layer and play with both the Opacity and the Transform (move the text to random positions using the arrow keys on your keyboard). Each keyframe in the Transform timeline indicates a different position of the text.

Step 19
Procceed to the Pink/Purple text layer and repeat the previous Step, only this time move the text in the opposite directions of the Blue text and change the Opacity values randomly.
Step 20
Select the first lens flare layer and move it to the left until it doesn’t overlap the text anymore. Set a starting Position keyframe and drag the time indicator to something around 2:10. Move the lens flare to the right (again make sure it doesn’t affect the text layer anymore). Set a second keyframe at that position.

Step 21
Repeat Step 20 for the second lens flare layer. However, this time make a right-to-left transition instead of the left-to-right created in the previous step.
Step 22
Skip the Gradient Map,Clouds and Mosaic layers and select the Motion Text layer. Move it to the left and right randomly (Position) and add some fade in and fade out keyframes (Opacity).

Step 23
Select the Saturation layer and simply add some fade in and fade out styles.

Step 24
Finally, select the Gradient Text layer and once again experiment with the Position moving the layer to the left and right randomly.

Conclusion
That’s it, your animation is now ready. You can add any effects to make it look even better. We hope you enjoyed the tutorial and learnt something new. If you have any questions or Tutorial suggestions feel free to post them in the Comments Section.


Simple if you will just see the result but if you will do it,I think it’s difficult especially to those who are new in photoshop.
Interesting tutorial,thanks for the another ideas in doing Photoshop.
I have already tried it and I’m going to agree with you Alan,it is easy to creat.
Thank you:)
Alan,your really a great tutor in doing photoshop.Thank you for the new ideas it’s very effective.
Well done, the procedures are detailed clearly.
can i do this on cs5?