In this article we’re going to create a realistic and detailed Playstation 4 controller using basic shapes and the Pen Tool. As always, you can use Illustrator if you prefer, to create the outline of the shape. So, let’s start.
Tutorial Details
- Program: Adobe Photoshop
- Version: CS6
- Difficulty: Intermediate/Advanced
- Estimated Completion Time: 2,5 hours
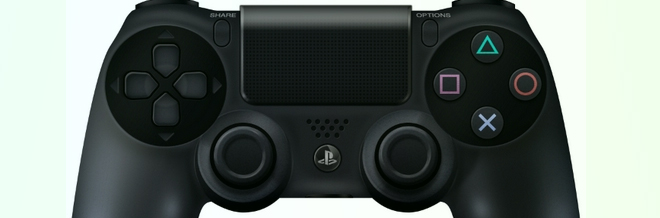
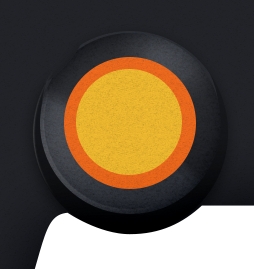
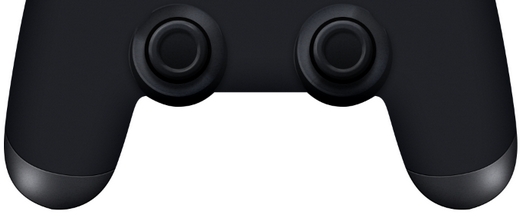
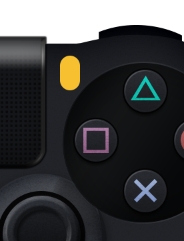
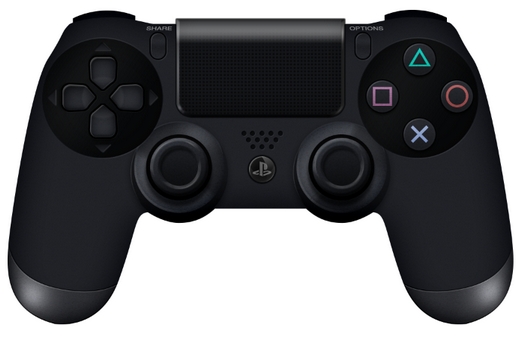
Final Result
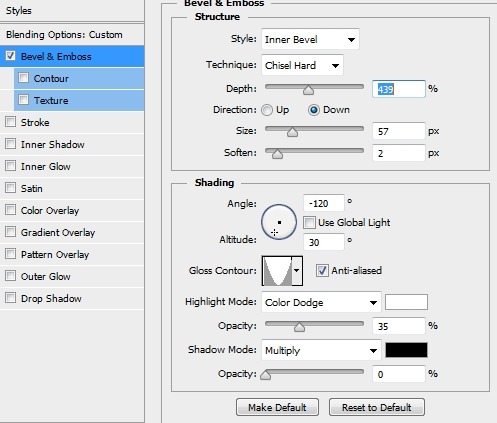
Step 1
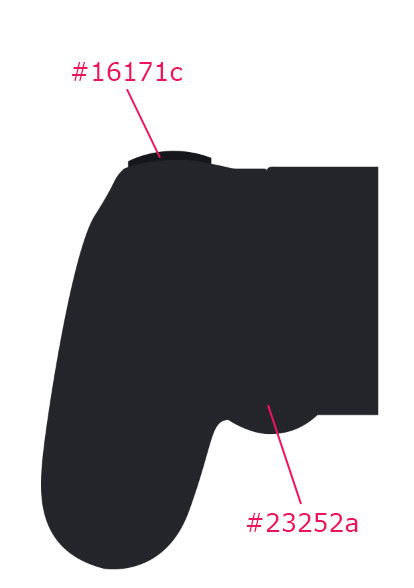
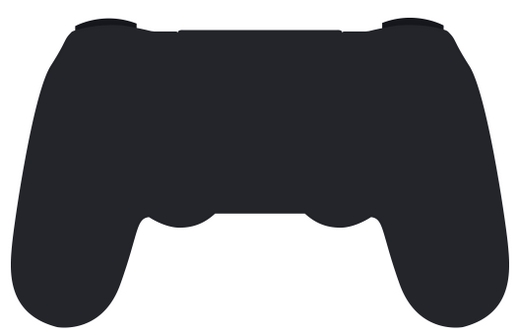
Create a new file in Photoshop. The controller is relatively big so we chose a 1500x1500px, 8-bit RGB, 330 dpi set-up. Now, pick the Pen Tool (P) and start adding anchor points to create the outline of your controller. As always, we’re creating only the half of the final shape. As we mentioned earlier, you can use Illustrator for this process. Feel free to use a reference photo if you have difficulties with the shape. The main color of the shape is #23252a. However, use #16171c for the R/L buttons (the ones on the back of the controller).
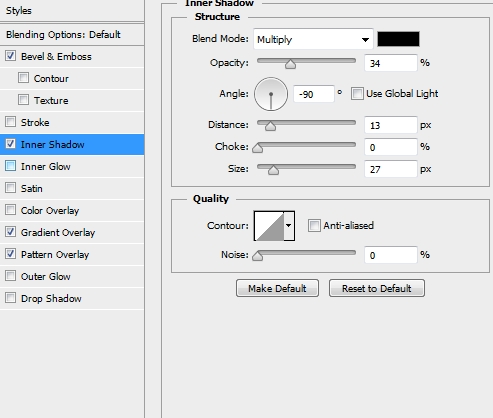
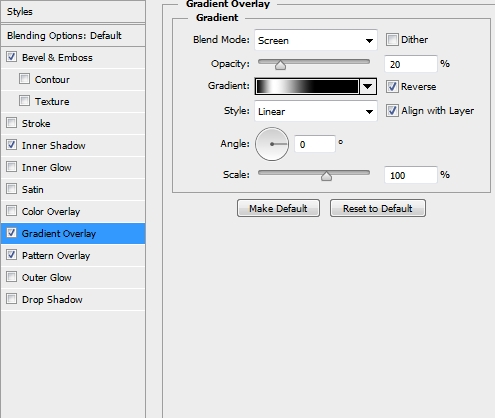
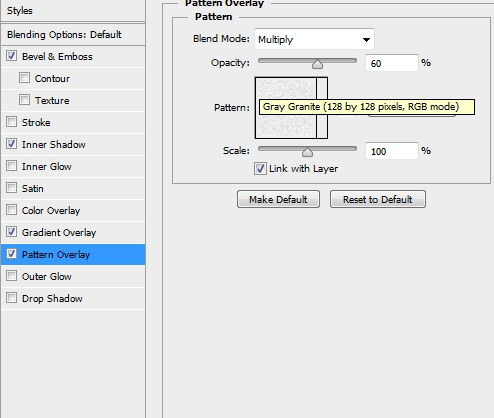
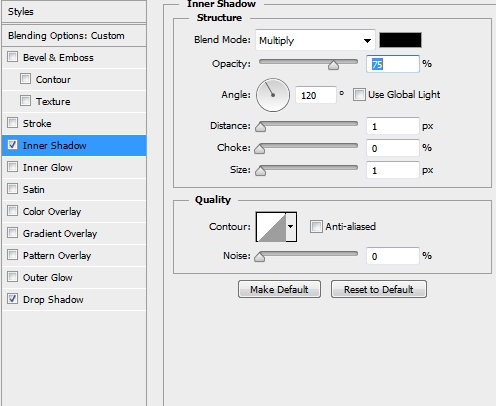
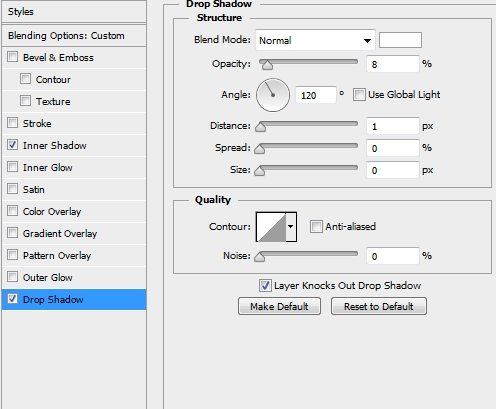
Step 2
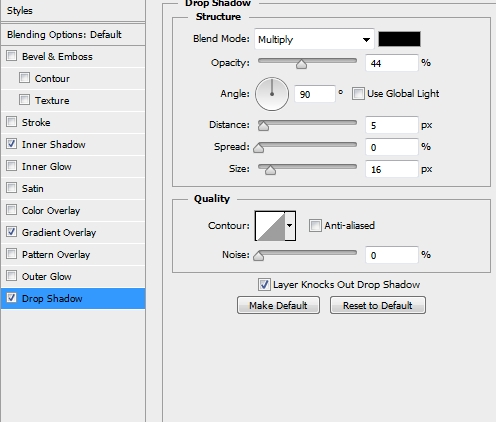
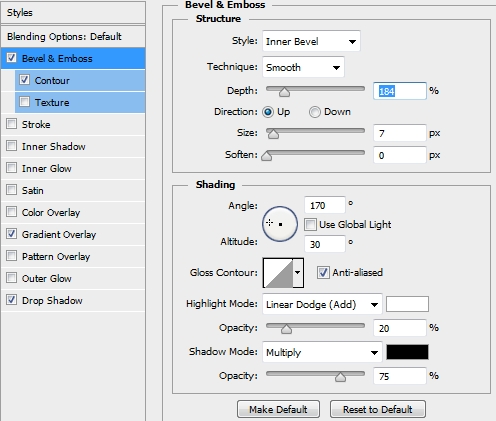
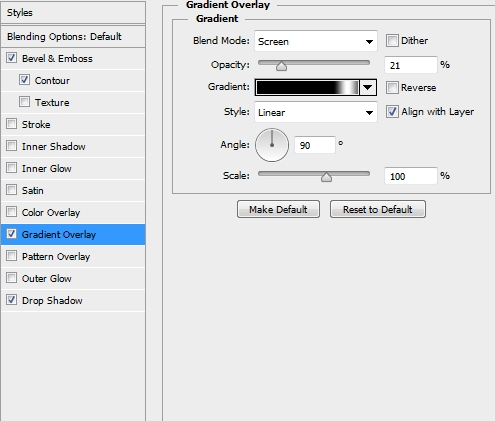
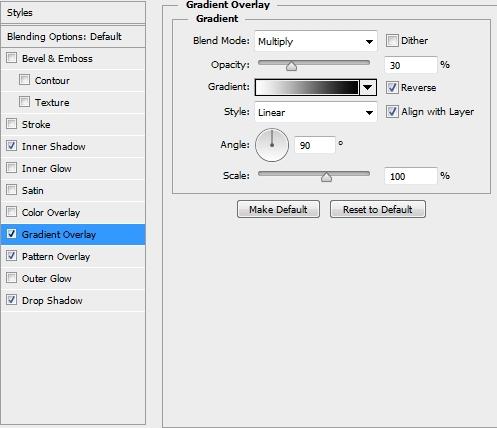
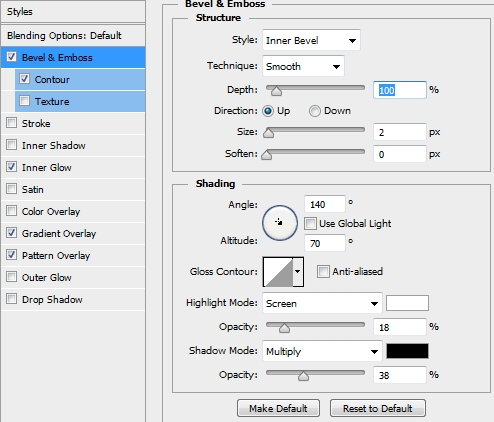
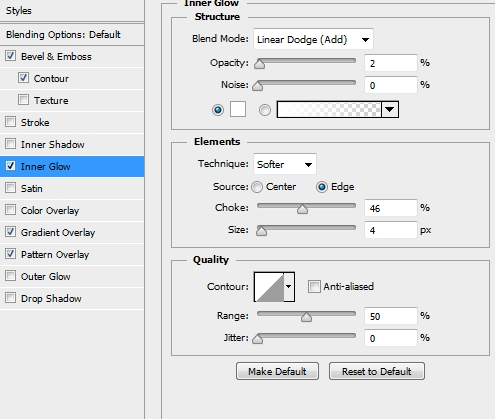
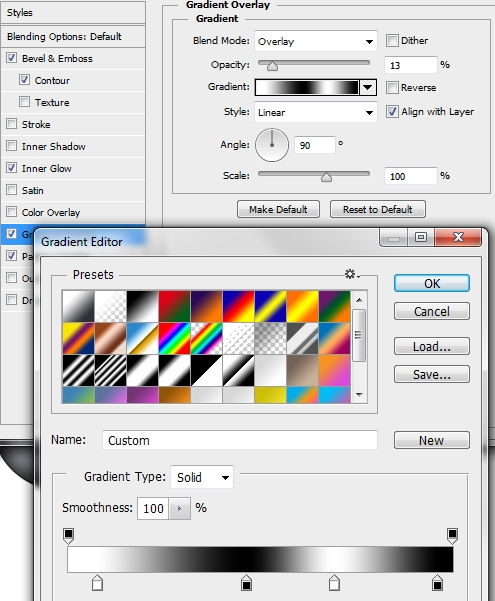
Duplicate this shape (Alt+drag; Photoshop/Illustrator) and flip it horizontally. Make sure there’s no gap between the shapes and merge them. Now, if you used Illustrator switch to Photoshop (don’t forget to copy the shape; Ctrl+C) and paste your shape (Ctrl+V) as a smart object. Name this layer “Basic shape” and apply the following styles.

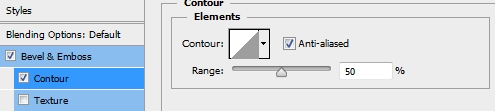
Step 3
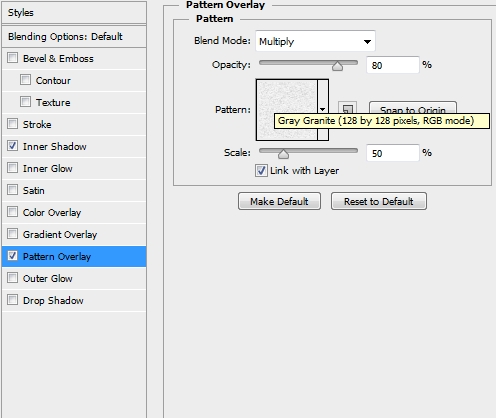
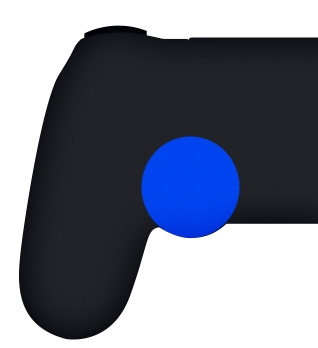
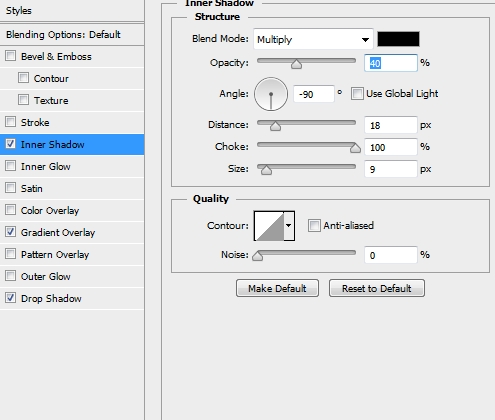
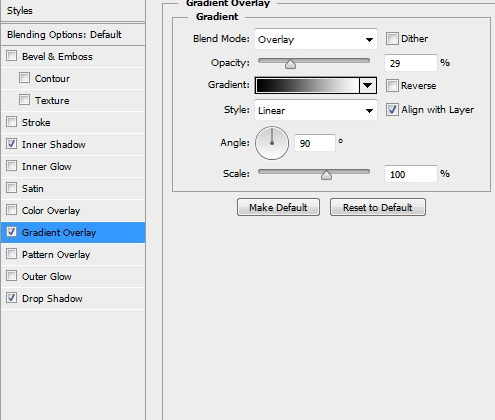
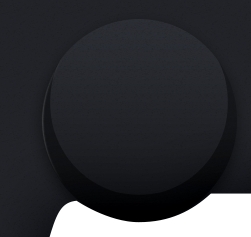
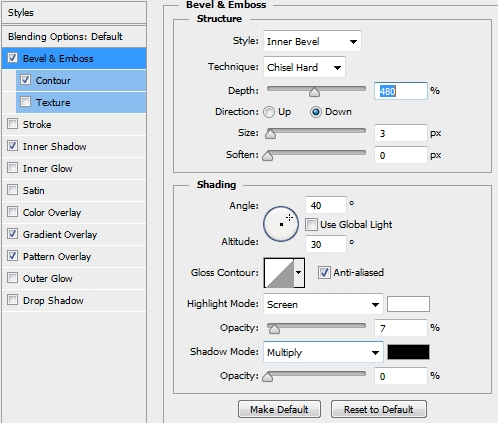
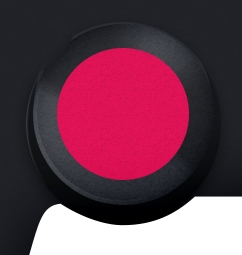
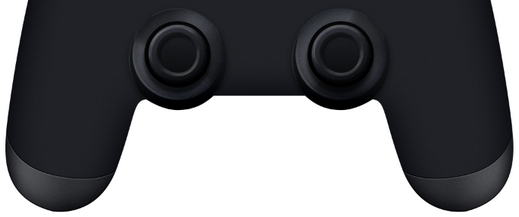
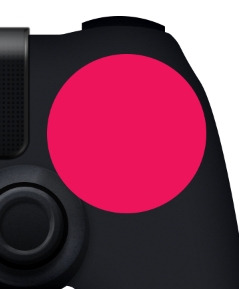
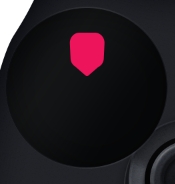
Now that we have created the outline, it’s time to start adding the particular elements of the controller. The first thing that has to be done is the analogue sticks. So, grab the Ellipse Tool (U) and draw a circle. Fill it with #23252a and apply the following styles.
Step 4
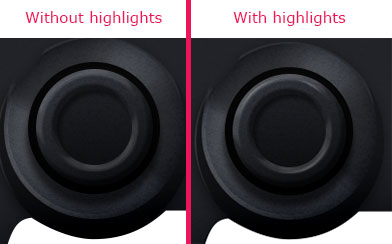
Add some highlights right outside the analogue stick. Simply select the Pen Tool (P) and draw a path. Pick a hard round brush, select a bright cyan color, set the size to 2px and check the Simulate Pressure Box in the Stroke Path dialogue box.
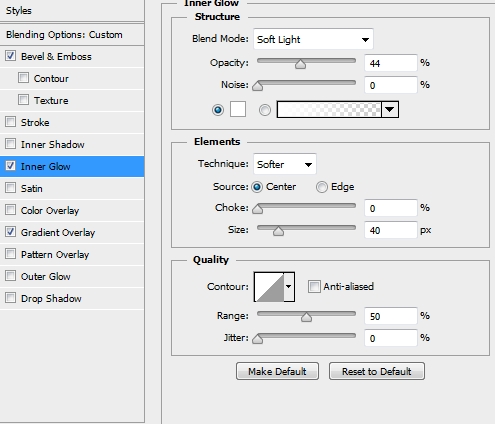
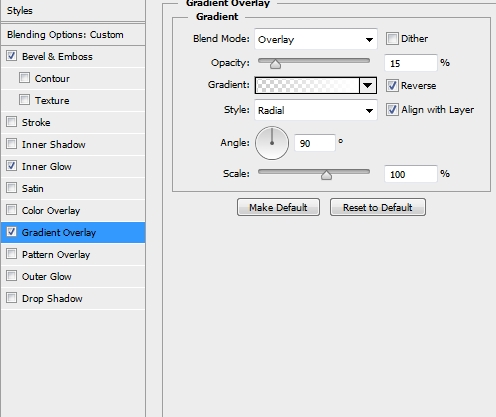
Step 5
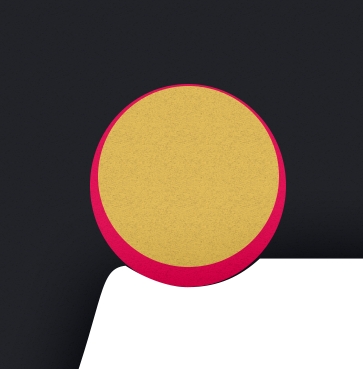
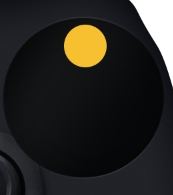
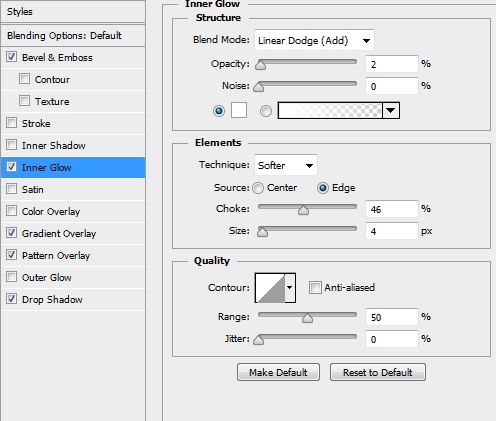
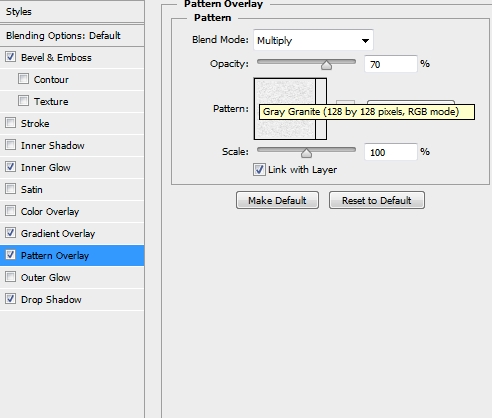
Create a new layer and pick the Ellipse Tool (U). Draw a circle (yellow) inside your original analogue stick shape (pink). Fill it with #23252a. Then, add the following styles.


Step 6
Duplicate this circle and replace the existing styles of the copy with the following one. Make sure to turn the Fill of the copy to 0%.
Step 7
Now, create a new layer and draw an even smaller circle. Fill it with #111111 and apply this style.

Step 8
Create a new layer and once again, draw a circle (yellow). Make it a little bit smaller than the one created in the previous step (orange). Fill it with #23252a and apply the following styles.

Step 9
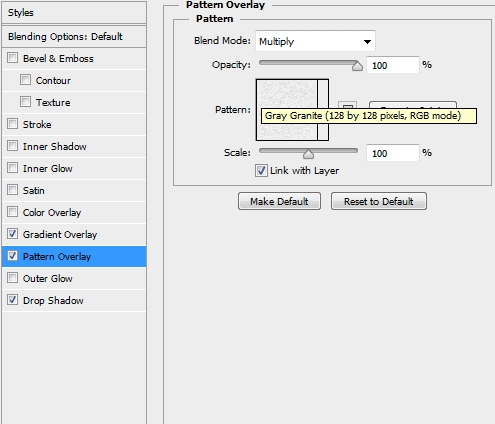
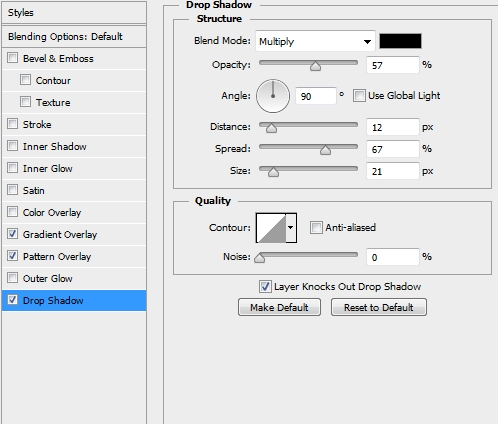
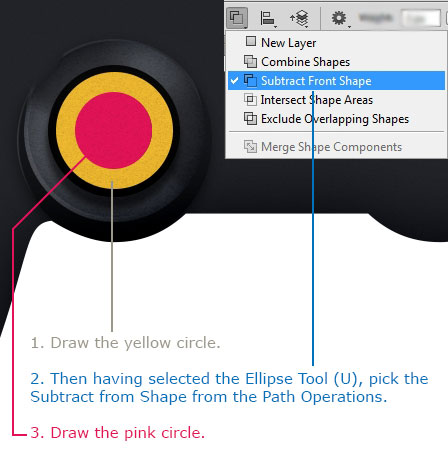
Create a new layer and draw a circle a little bit bigger than the one drawn in the previous step. Then, select the Subtract from Shape in the Path Operations menu. Draw a smaller circle inside to “erase” this part from your initial circle. The image below will make everything clear. Finally, add the following styles.


Step 10
Create a new layer and using the Pen Tool’s Stroke Path technique add some highlights to the analogue stick.
Step 11
Group all the layers created in Steps 3-10 and name the group “Left analogue stick”. Duplicate the group and move it to the right. Rename the group to “Right analogue stick”.
Step 12
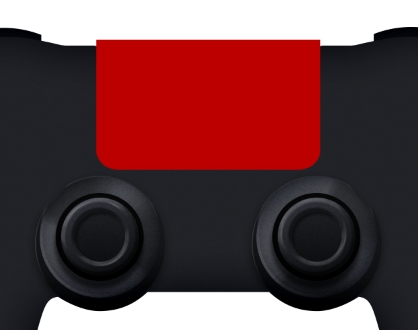
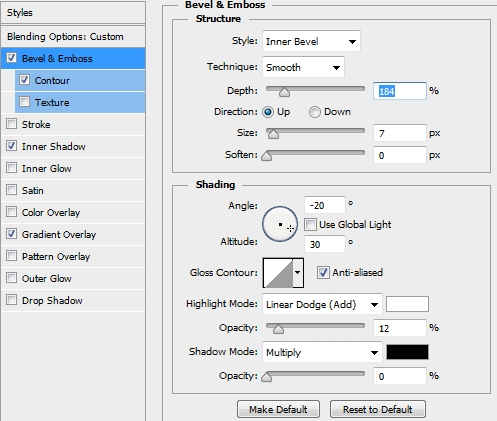
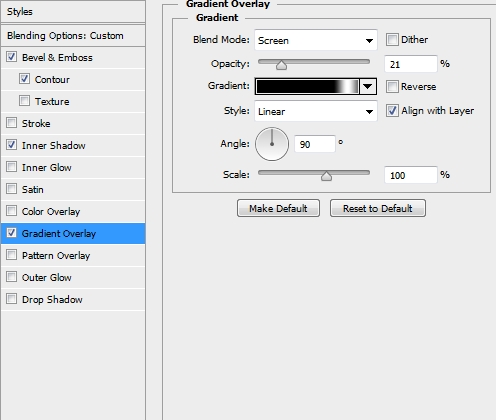
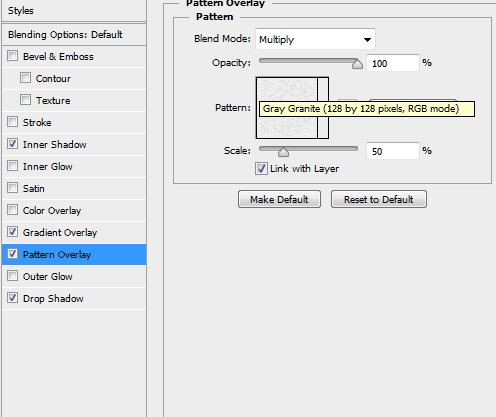
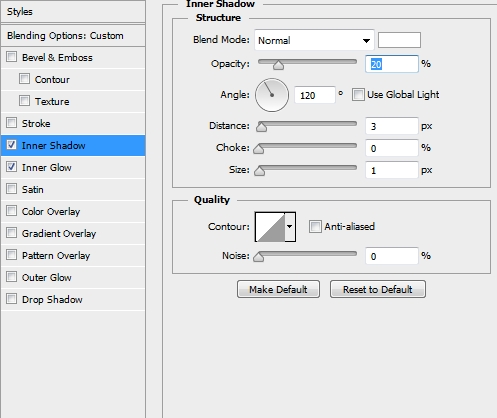
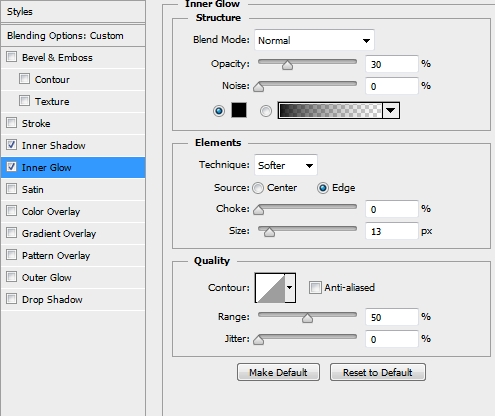
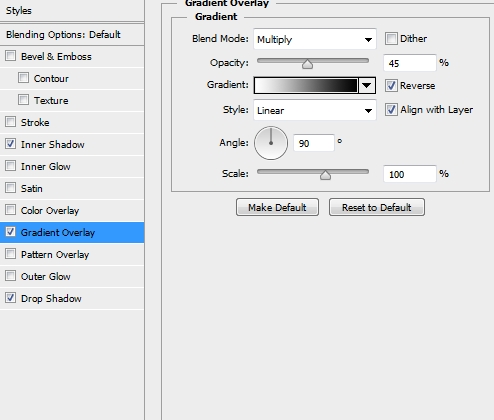
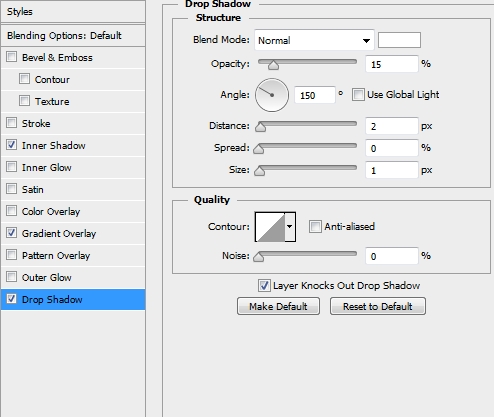
Create a new layer and pick the Pen Tool (P). Draw a shape like the one on the first image. Fill it with #303136 and clip the layer to your “Basic Shape” (this will “hold” the shape inside the outline of the controller and most important, the layer styles will not exceed the outline). Then simply apply these styles.

Step 13
Duplicate this shape, flip it horizontally and place it on the other side of the controller (don’t forget to change the gradient’s angle to its opposite; eg. 180->0).
Step 14
On a new layer add some highlights using a big soft round brush.
Step 15
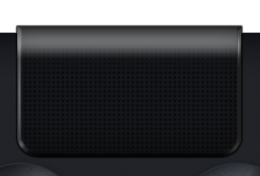
The next step is to create the “trademark” of the new controller; the touchpad. So, pick the Pen Tool (P) and draw a shape like the one on the first image. Create only the left (or right) half, duplicate it, flip it horizontally and merge the two layers. Fill the shape with #141518 and apply these styles.


Step 16
Duplicate this shape, turn the Fill of the copy to 0% and replace the existing styles with these.


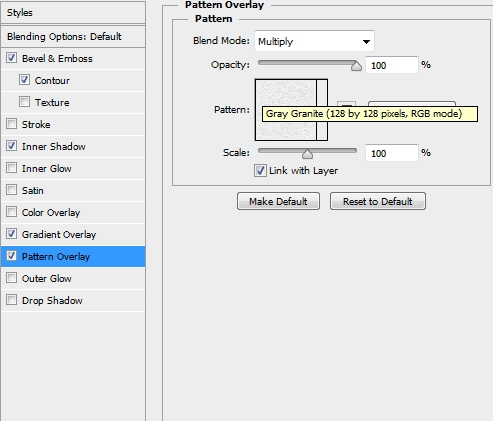
Step 17
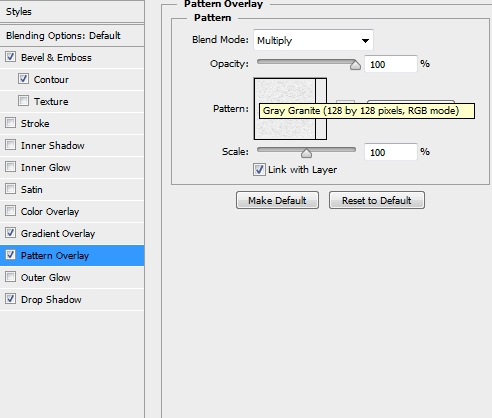
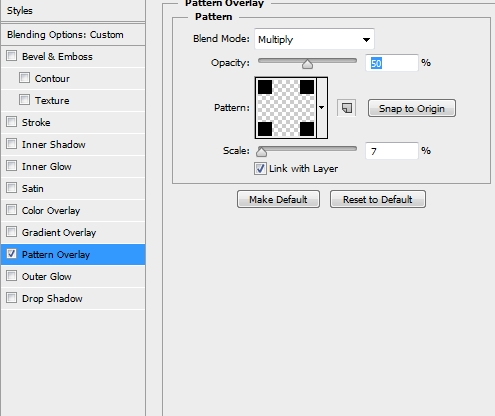
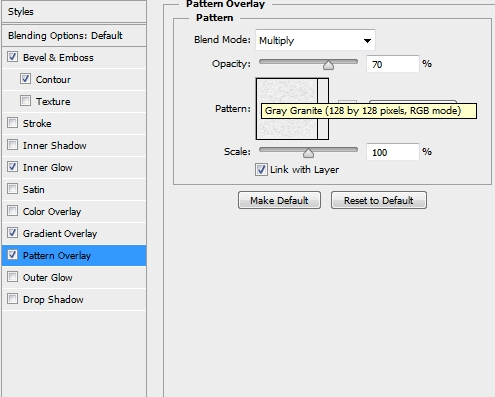
Create a new layer and select the touchpad’s pixels (Ctrl+Click on the thumbnail in the layers stack). Go Select->Modify->Contract (2-3px). Fill the selection with a random color, turn the Fill to 0% and apply the following pattern. To create the pattern simply create a new file in Photoshop (100x100px) and draw a 50x50px square right in the middle of the canvas. Then go Filter->Other->Offset (don’t forget to rasterize the shape). Set both parametres to +50 (horizontal/vertical) and check the Wrap Around box. Finally, go Edit->Define Pattern.
Step 18
Create a new layer and add some highlights using the Pen Tool’s Stroke Path technique.
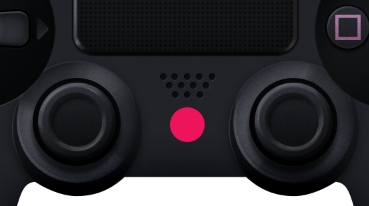
Step 19
Group the layers created in Steps 15-18 and name the group “Touchpad”. Now it’s time to create the buttons. Pick the Ellipse Tool (U) and draw a relatively big circle. Fill it with #070809 and apply the following styles.


Step 20
Create a new layer and draw a small circle. Fill it with #23252a and apply the following styles.


Step 21
Duplicate this circle three times and place them accordingly to the image below.
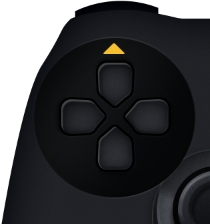
Step 22
Now start decorating the buttons. The colors we chose are #14f2e4 for the triangle, #b6cdff for the cross, #e3898f for the circle and #fbbbf6 for the square. Change the Blend Mode of the traingle/square/cross/circle to Difference for a better result.
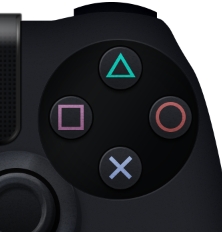
Step 23
Group all the layers created in Steps 19-22 and name the group “Buttons”. Next, duplicate the very first layer of this group, place it above the Buttons group and move it to the left. This will be the “base” for the d-pad.

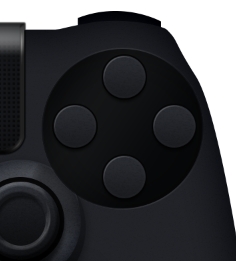
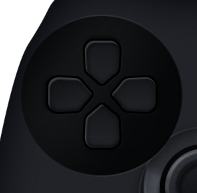
Step 24
To create the arrows we’ll need to combine two shapes; a Rounded Rectangle (radius: 3-5px) and the Sign 3 (custom shape tool). So, draw a rounded rectangle, fill it with #23252a and then draw a rounded triangle (sign 3). Fill it with the same color and merge these two shapes. Next, apply the following styles to this newly formed layer.


Step 25
Duplicate this shape, turn the Fill to 0% and replace the existing styles with these ones.
Step 26
Duplicate these two layers three times and place them accordingly to the image below. Don’t forget to tweak the angle of the layers.
Step 27
Create a new layer and select the pixels of the d-pad buttons. Fill the selection with a random color, turn the Fill to 0% and add these styles.

Step 28
Create a new layer and select the Custom Shape Tool (U). Pick the Sign 3 shape from the list and draw a small triangle. Fill it with #212328 and apply the following styles.
Step 29
Duplicate this shape three times and place the copies as shown on the image below.
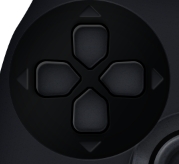
Step 30
Create a new layer and add some highlights using a soft round brush (erase any parts outside the d-pad buttons).
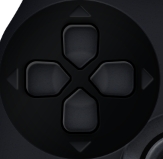
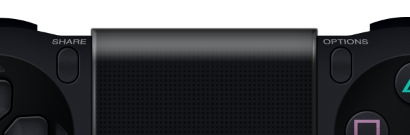
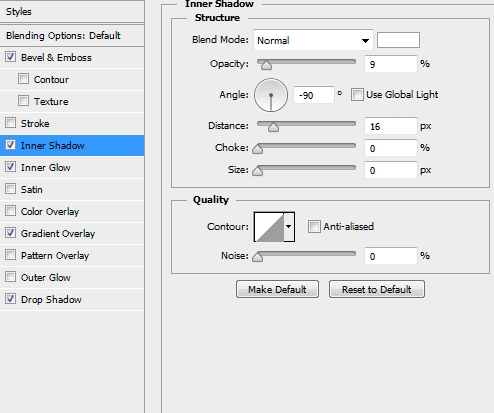
Step 31
Group the layers created in Steps 23-30 and name this group “D-pad”. Now we’ll add a couple of buttons (Share and Options). So, pick the Rounded Rectangle Tool (U), set the radius to 30-50px and draw a shape like the one on the first image. Fill it with #23252a and apply the following styles.

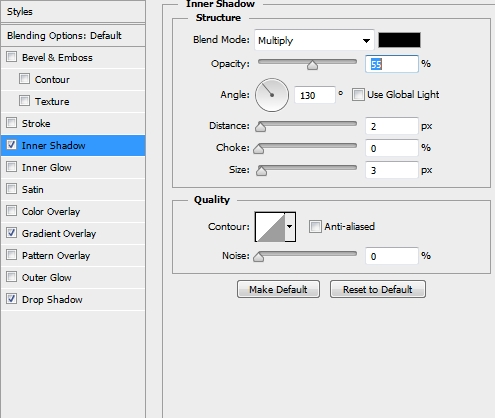
Step 32
Create a new layer and place it before the rounded rectangle created in the previous step. Select the pixels of this rectangle and expand the selection by 1-2px. Fill it with #111111 and apply this style.
Step 33
Duplicate these two layers and move the copies to the other side of the controller. Add some text to decorate the buttons. The font we used is Verdana, size: 15px, color: white, Fill: 50%.
Step 34
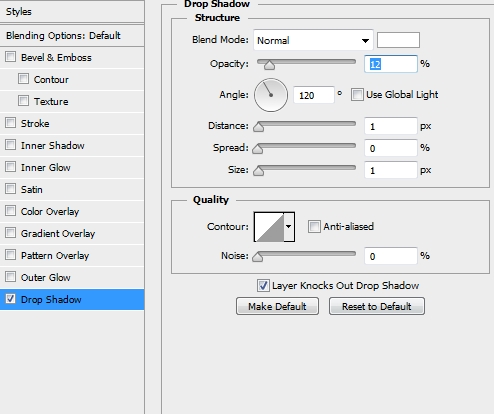
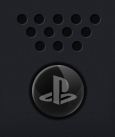
Group all the layers created in Steps 31-33 and name the group “Share/Options buttons”. Create a new layer and select the Ellipse Tool (U). Draw a very small circle and fill it with #111111. Duplicate it 11 times and place the copies accordingly to the first image. Merge all these circles, change the Blend Mode to Multiply, lower the Fill to 70% and apply the following styles.
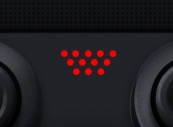
Step 35
Create a new layer and draw a small circle. Fill it with #000000 (black) and apply the following styles.

Step 36
Add your logo or the Playstation logo (color: white, opacity: 35%) and some highlights (you can use the Gradient Tool).
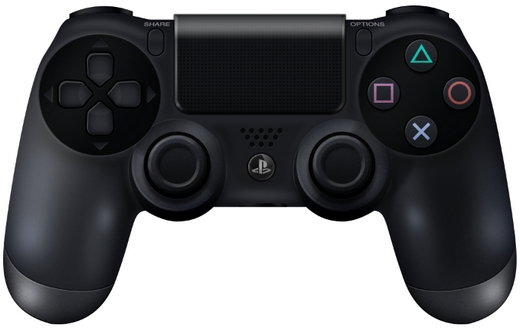
Step 37
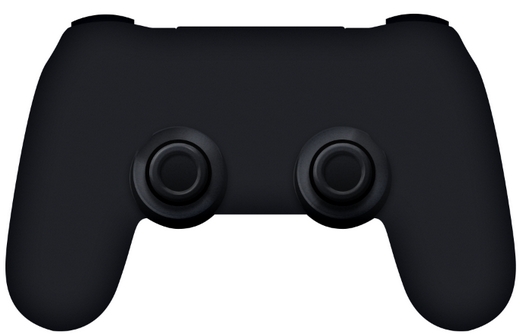
Group all the layers created in Steps 34-36 and name the group “Logo/Speakers”. Your design should looks by now like this.
Step 38
The controller is basically ready. All you have to do now is to add some layers with shadows and highlights to make it look more realistic. Keep painting with a soft round brush until you have something like this. You don’t have to be very precise.
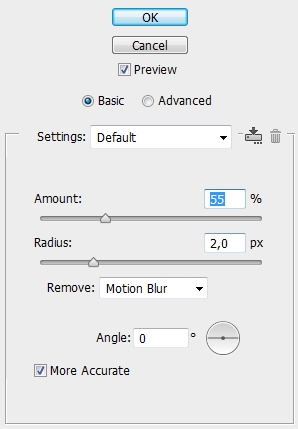
Step 39
Group all the layers (except from the background) and duplicate the group. Merge the copy group and go Filter->Sharpen->Smart Sharpen. Lower the Opacity to something around 70%.
Conclusion
That’s it. Your Playstation 4 controller is now ready. We hope you enjoyed the tutorial and if you have any questions or tutorial requests feel free to post them in the Comments Section.


Long tutorial but interesting.
Cool!! I will try this but I think it will takes a long time,but it’s okey.
Thanks Alan, you have delivered your article very well.
Great tutorial. Very well explained.
Amazing..
Is it not hard for a beginner to do this tutorial?
It can be a little bit tricky for beginners at some points, but overall it doesn’t require any exceptional skills.
Your really an expert,cool!!
Thank you for sharing a great article..