As we mentioned in our previous tutorial, we will continue this sort of tutorial series to make an iPhone 4s as a complement for our Siri Icon. If you have been through all the steps from the previous tutorial, I am sure this one would be much easier for you to complete.
And before we begin to work around, you can first search for an example iPhone model that we are going to re-create it later in Photoshop. You can visit Apple.com or if you are lucky that you got an iPhone for Christmas gift, you can look over it and examine its detail.
Once you sufficiently explore its details and ready to go, you can start to the Step 1 and let’s get started.
Step 1
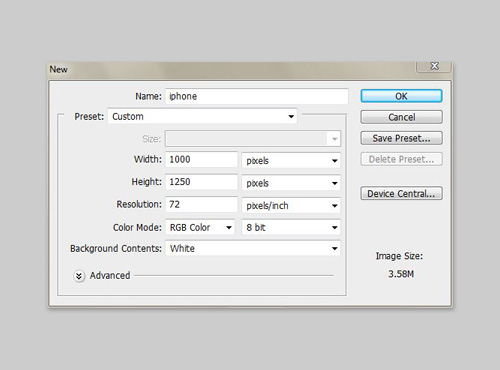
Firstly (and always), create a new document (Cmd/Ctrl+N) with dimension of 1000×1250 pixels with 72 dpi resolution and fill the background with grey (#CDCDCD).
Step 2
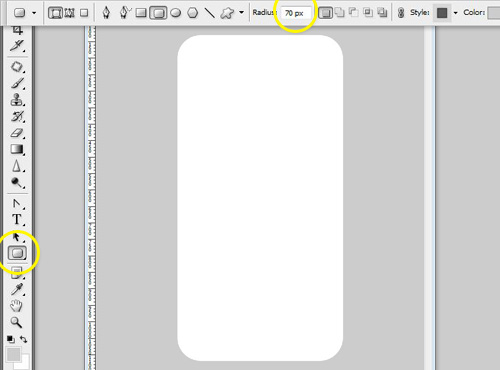
In this step, we are going to make the iPhone 4S main body. To make this body, first, select Rounded Rectangle Tool (U) with 70px rounded radius. Then draw a rounded rectangle that is about 500 by 988px. Fill this this object with white (#FFFFFF) color.
Step 2.1
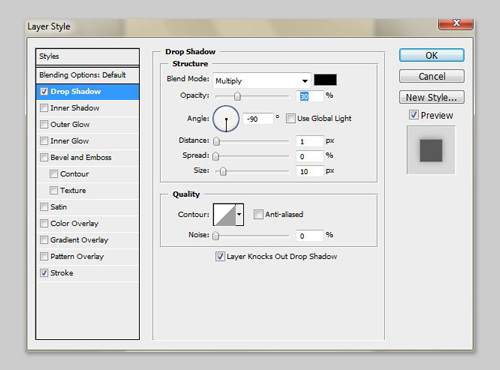
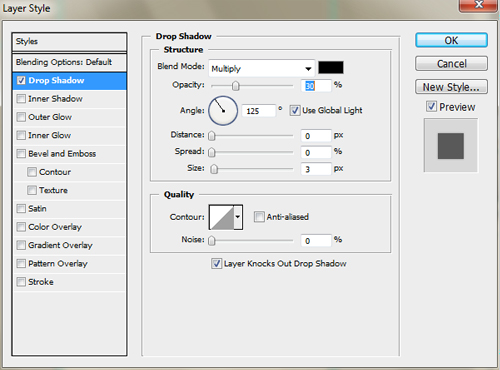
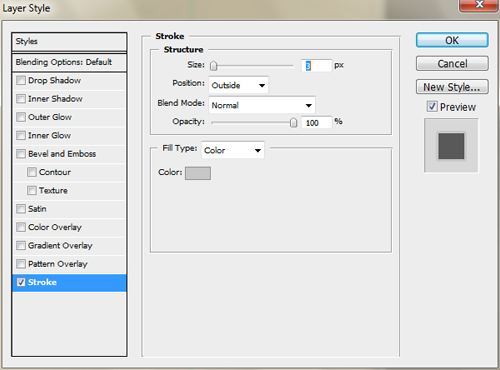
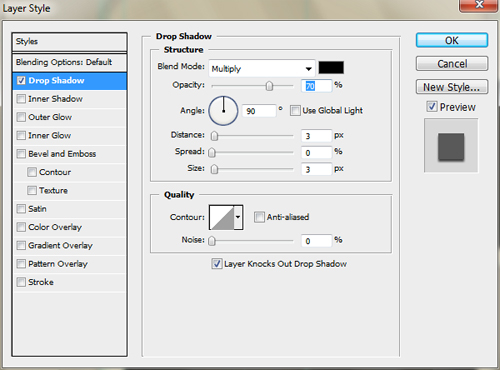
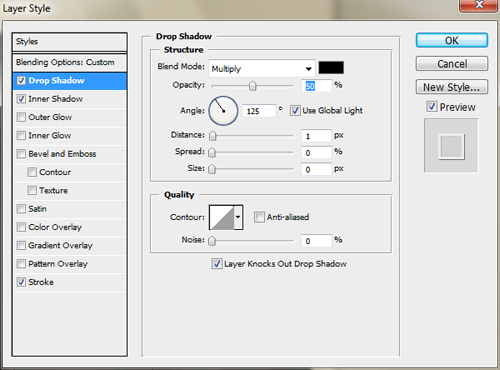
Then apply the following layer styles to the object. Drop Shadow & Stroke.
Step 3
After that, draw another rectangle object about 3px smaller than the first one. Fill this object with slightly white color (#F3F3F3).
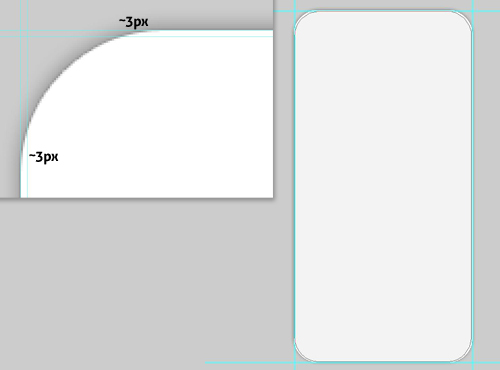
Tips: To gain precision you can display some guidelines for help. To display these guidelines just drag the rulers that appear along the top and the left side of your active window.
Step 3.1
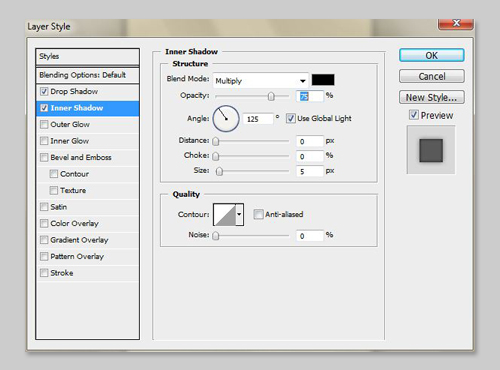
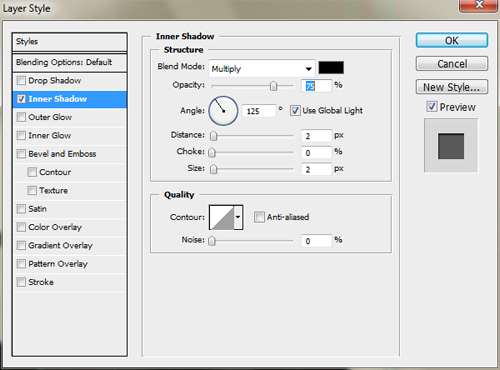
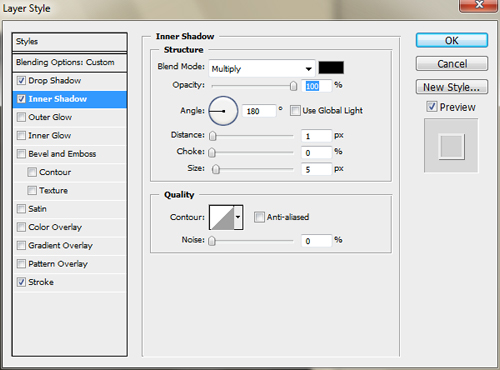
Next, to make this second object alive, apply Drop Shadow and Inner Shadow on it.

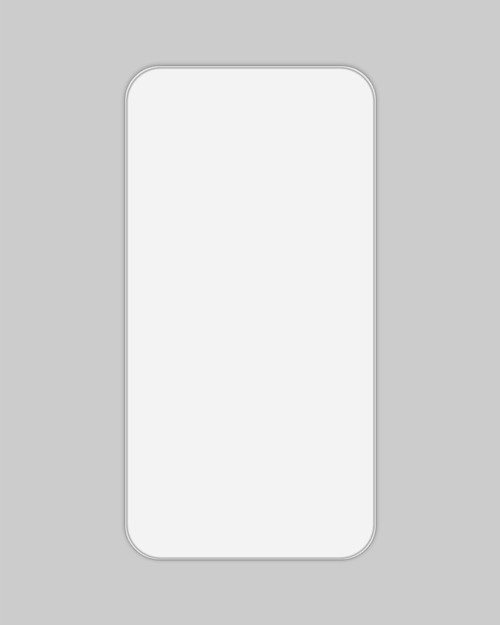
We see what the object is going to be look like for a while:
Step 4
In this step, draw another rounded rectangle, about 10px smaller than the second rectangle we have created in Step 3.
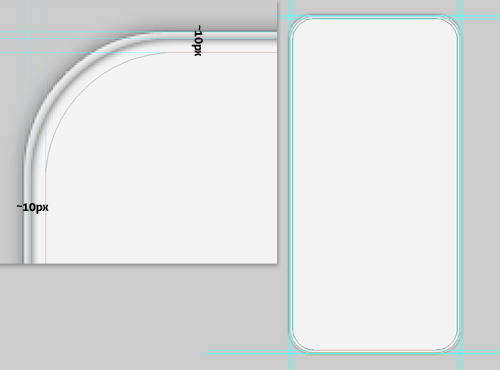
Then, we add Drop Shadow on it.
Step 4.1
Group (Cmd/Ctrl+G) all the layers/objects we have created above and name this group mainbody. Then group the last two objects (again) and name it body-details.
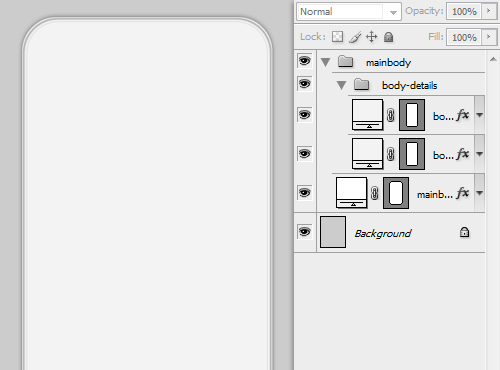
Tips: Naming layers or groups is optional, and names that is appear in this tutorial is only for examples illustration. You are free to name as you want that you think is more suited for it.
Step 5
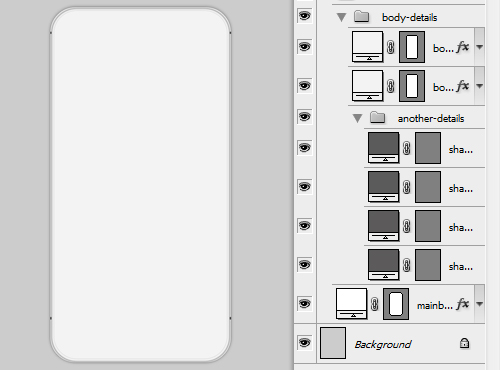
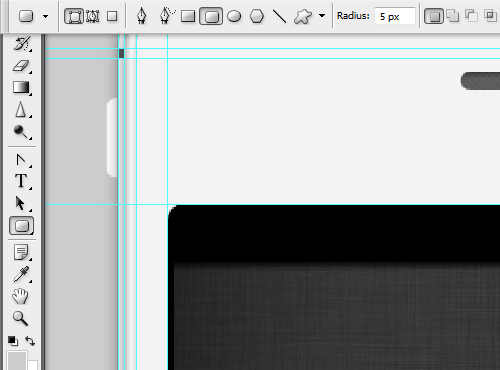
iPhone4S has four dividers on its metal body edge. To make this divider, select Rectangle Tool (U) from the toolbox, then under the body-details group draw a small rectangle about 6px in height below the rounded corner (see the screenshot). Repeat this step to make another three dividers.

This is the mainbody that is going to look like after adding the 4 dividers and if you look at the layer panel, you’ll find that I also group this dividers and name it another-details, but surely you can name it that you think more suited for it.
Step 6
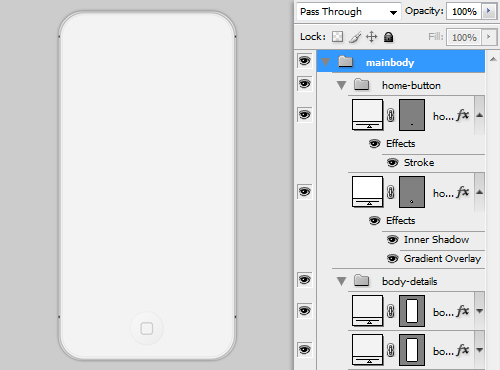
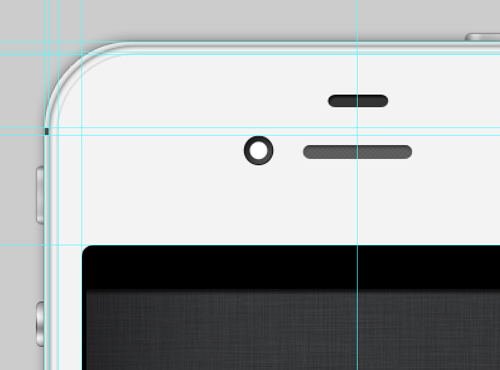
In this step, we are going to make the home button that is used for bringing back to the home screen. To draw this button, select Ellipse Tool (U and create a perfect circle shape as shown in the screenshot below.
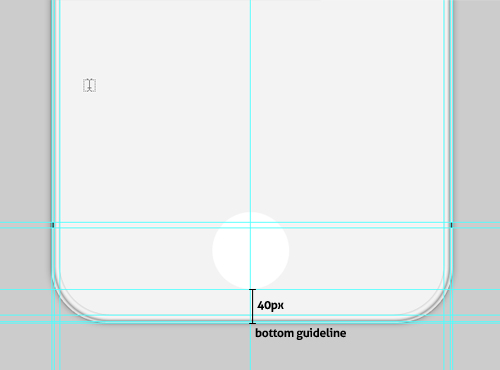
Tips: hold Cmd/Ctrl key to make a perfect circle proportion while dragging in the document area.
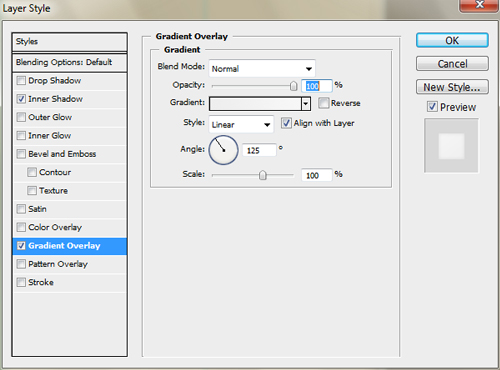
Step 6.1
After that, add Inner Shadow on the circle.
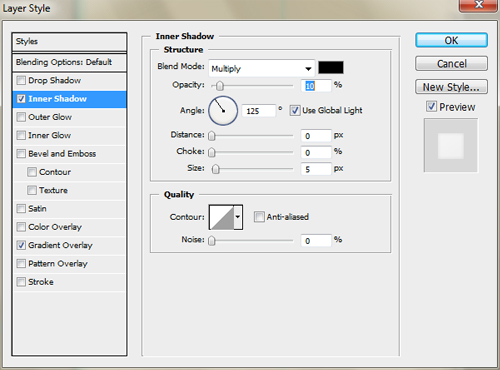
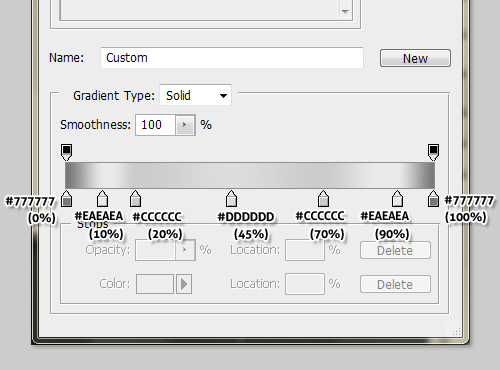
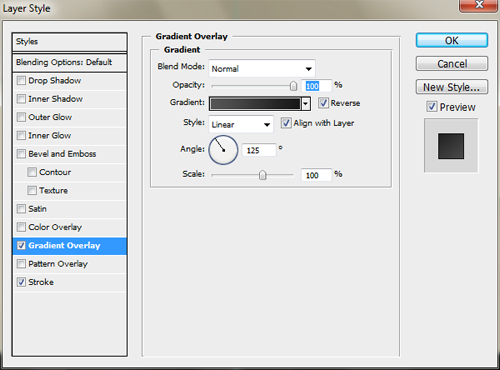
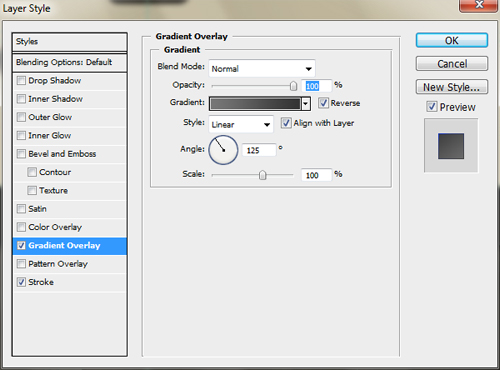
and Gradient Overlay with color gradation from grayish (#EEEEEE) color to slightly white (#F7F7F7).
Step 6.2
Next, draw a rounded rectangle with approximately 5px radius, and then align it in the center of the home button circle.
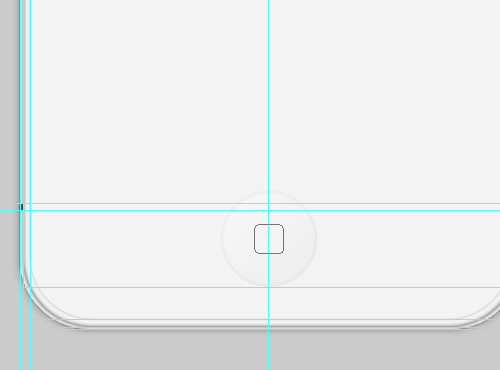
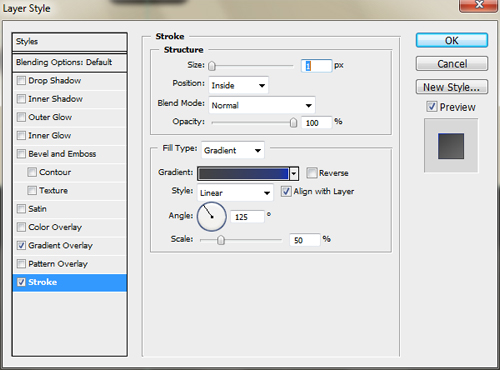
Apply Stroke layer style with gray (#C7C7C7) color on the rectangle.
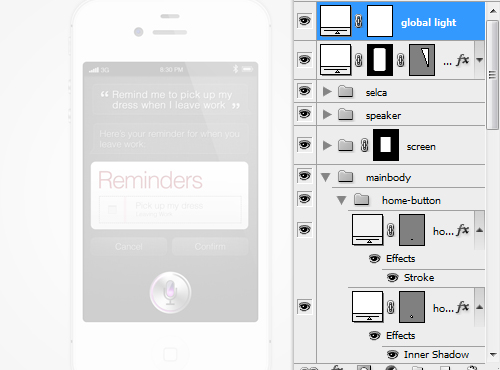
Group (Cmd/Ctrl+G) those layers and name the group home-button. By grouping them, our layers will look neat and more organized.
Step 7
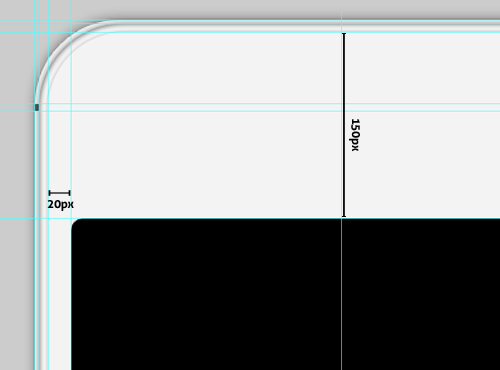
Now it’s time to create the screen. Select Rounded Rectangle Tool (U)< set the radius to about 5px. After that, draw the screen and fill it with black (#000000) color. Align it horizontally centered from the body and 150px from the top (see the screenshot).
Step 7.1
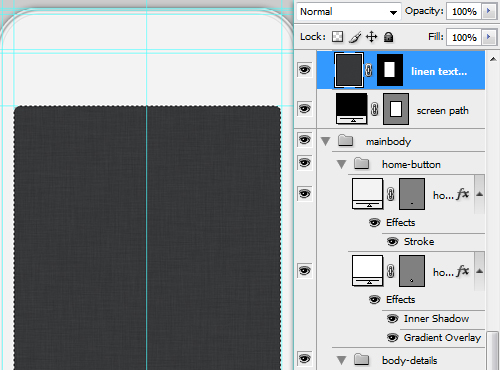
Since we are about to make this iPhone with Siri application, we need a linen texture which is the default background for the Siri apps. The linen texture can be downloaded here.
After downloading it, place the texture above the screen path (see the screenshot), create a selection by holding Cmd/Ctrl key while clicking on the path, then apply Layer Mask on the texture.
Step 7.2
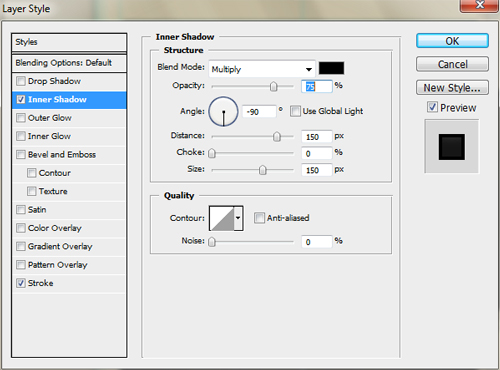
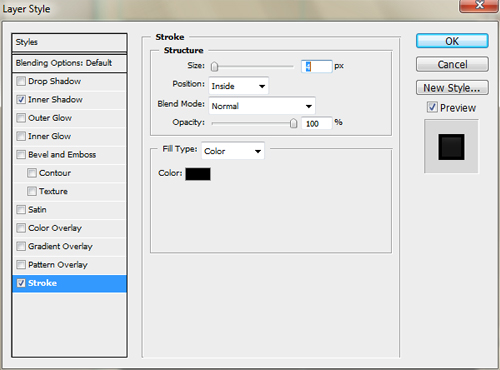
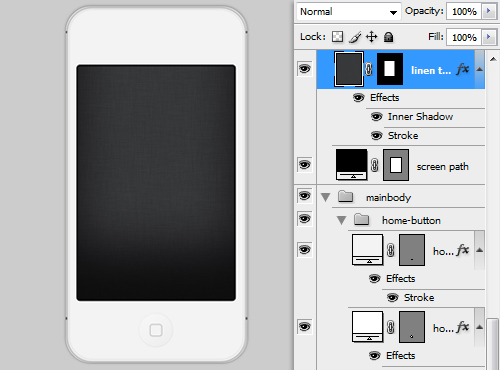
Add Inner Shadow and Stroke on the screen texture.
Let’s take a look at the result.
Step 8
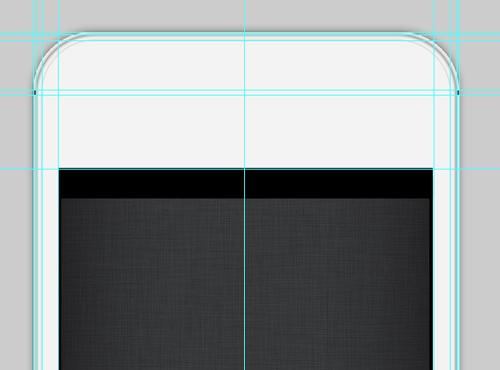
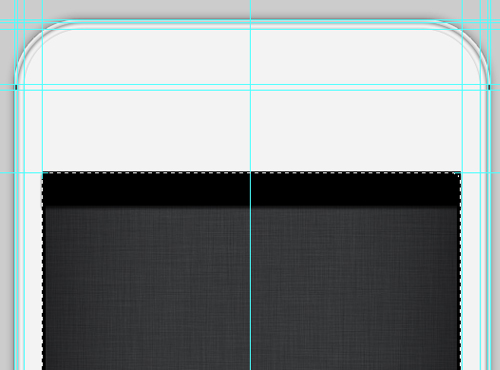
iPhone places some information like carriers, signal bar and time at the top of the screen. So, in this step we are going to make a black bar/panel to put this information into.
First, select Rectangle Tool (U) and draw a rectangle inside the screen, align this bar to the top of the screen and fill it with black (#000000) color.
Step 8.1
Add Drop Shadow on the bar.
Step 8.2
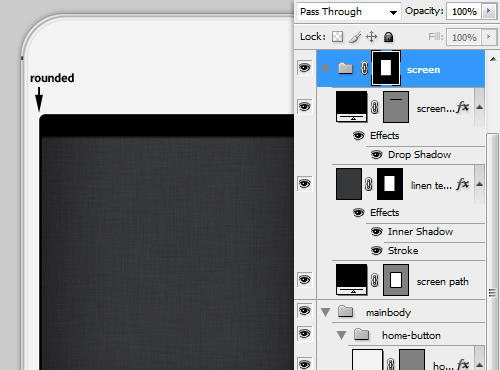
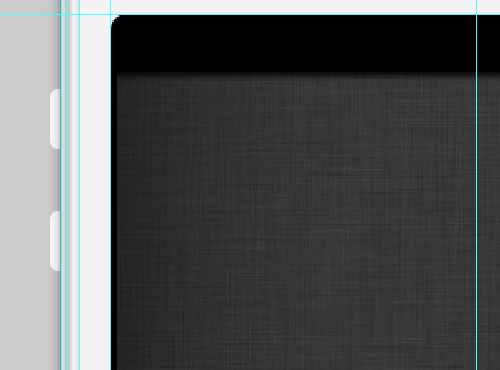
Group all the screen layers including the bar, create a screen-size selection by holding on Cmd/Ctrl key while click on the screen layer. Then, apply Layer Mask on the group, this will make the bar’s top corner rounded and fit in the screen (see the screenshot).
Step 9
Let’s put aside the screen for a while and we’ll be back later.
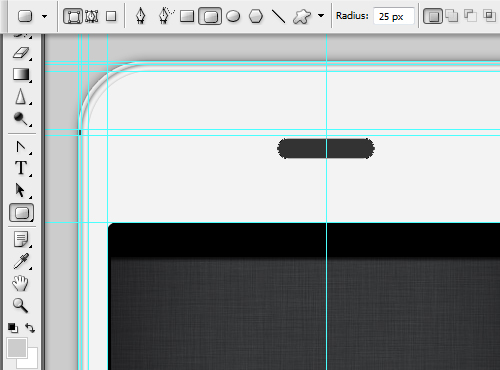
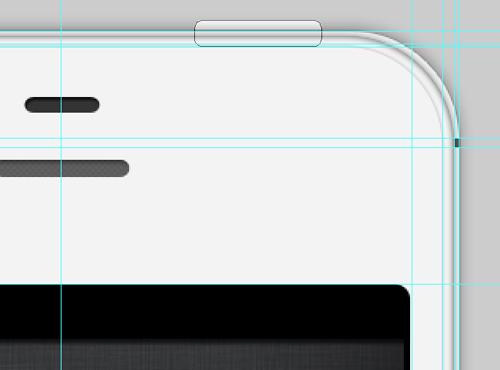
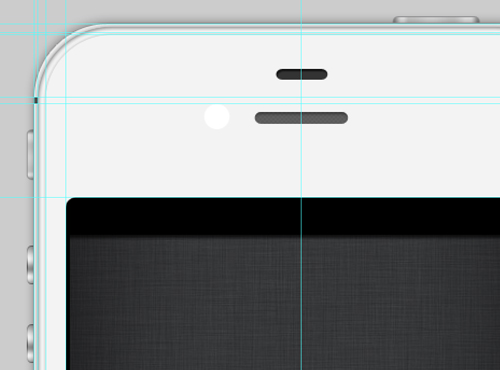
Now, in this step we will make the iPhone speaker. To make this speaker, draw a capsule-like shape using Rounded Rectangle Tool (U) with 25px rounded radius.
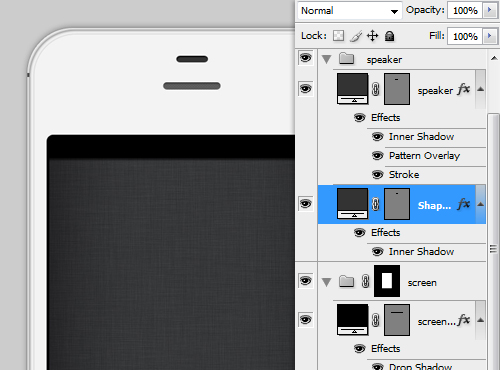
Step 9.1
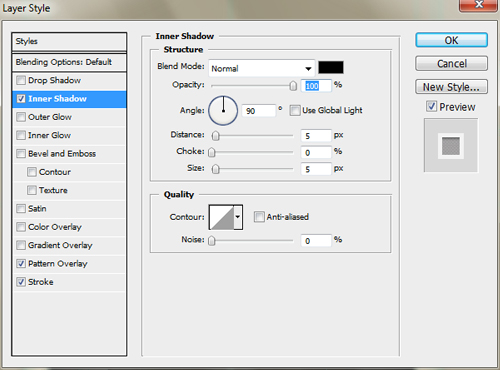
Add details on the speaker by applying some layer styles. First, we add Inner Shadow
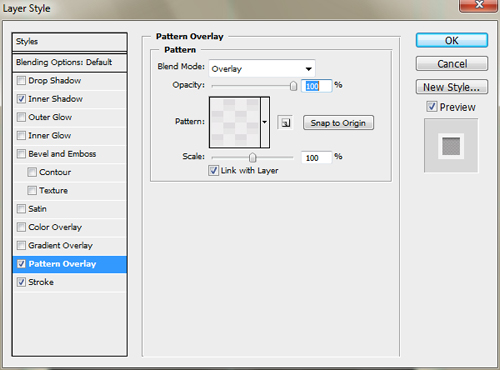
Then Pattern Overlay. Rather than creating the pattern from scratch we can use this pattern to get a close similar appearance of the speaker, this way will simplify your effort to follow this tutorial.
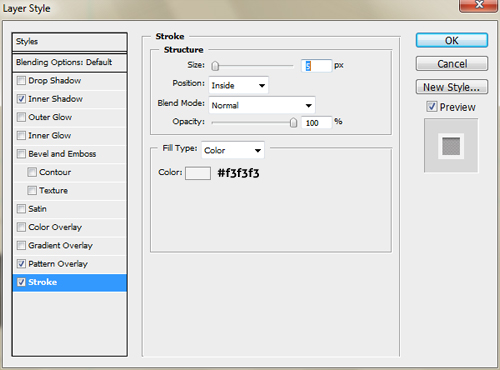
And the last is Stroke
Step 9.2
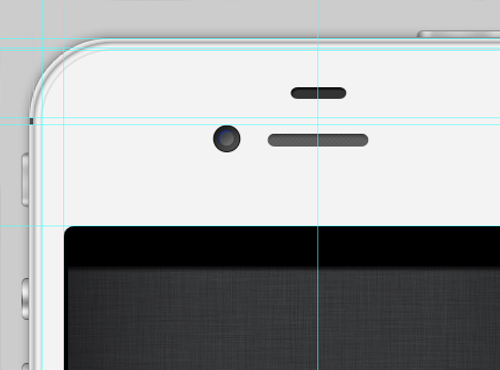
Above the speaker, iPhone 4S has a light censor. Draw this censor using Rounded Rectangle Tool with the same radius (25px).
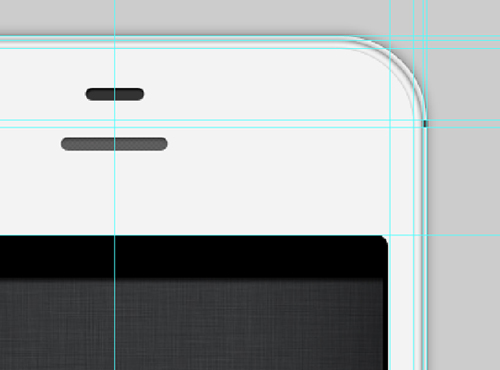
Then add Inner Shadow to this censor.
OK, let’s take a look the result for a while.
Step 10
In this step we will make iPhone 4S switch button, iPhone4S has 3 switch button:
- Mute Switch Button.
- Volume Switch Button.
- Hold (on/off) Switch Button.
First, we draw the Mute Switch Button. Select a Rounded Rectangle Tool (U) with 5px radius, draw this switch button in the left side of the iPhone body.
Step 10.1
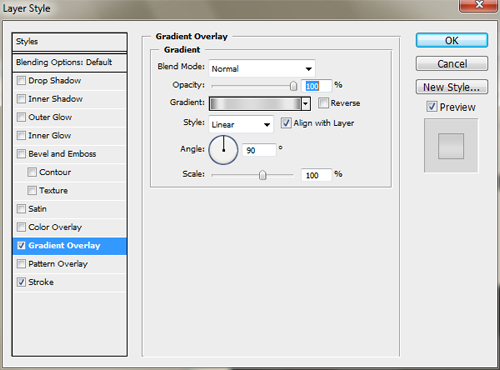
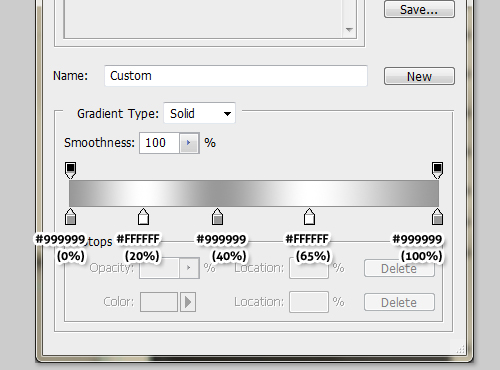
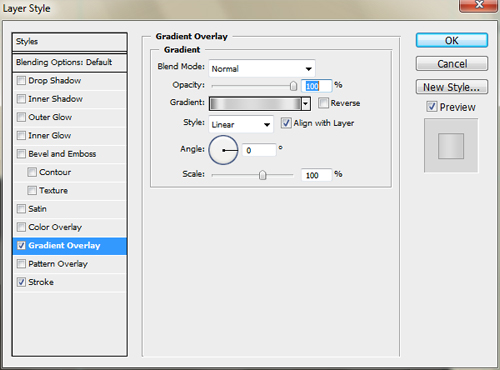
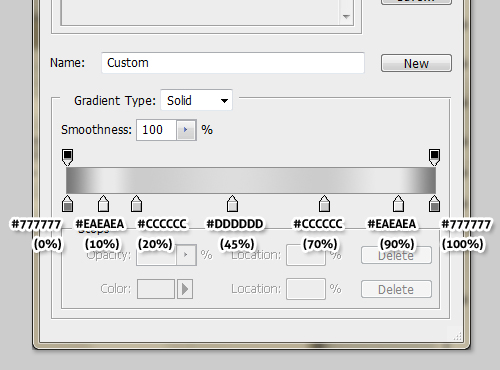
Then, we make this switch button alive. Add detailed Gradient Overlay on it, so it has sort-of real metal-like appearance.
Step 10.2
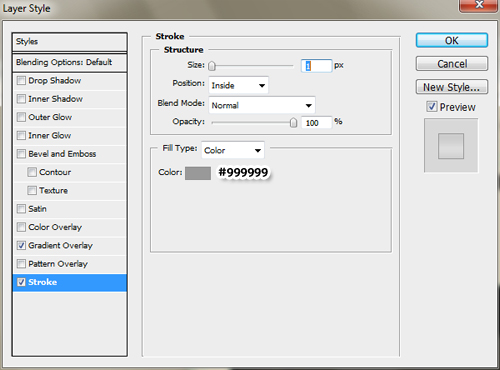
Next add Stroke with gray (#999999) color on the switch button.
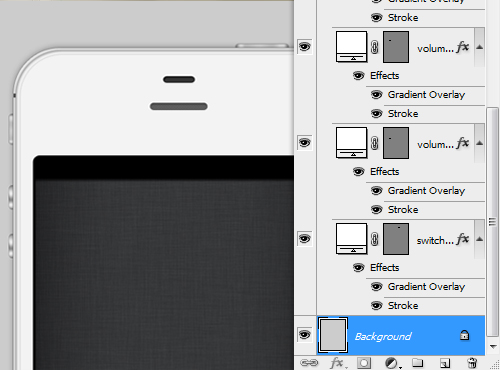
Well, let’s see the result. Quite look like a metal, right?
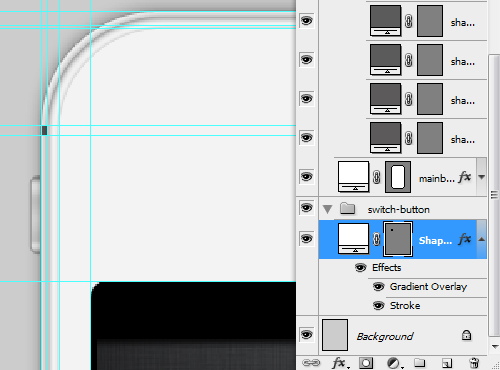
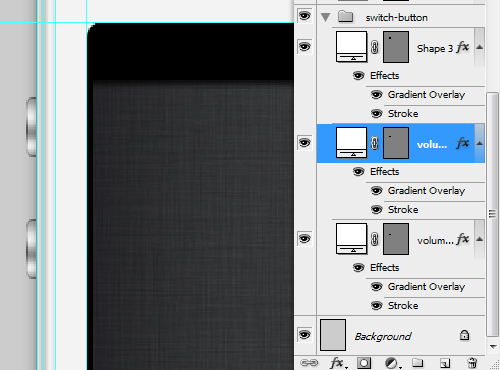
And if you carefully see the screenshot above, I have put this button under switch-button group.
Step 11
Now we will make the volume switch which consists of two button, volume up (+) and volume down (-). Draw both buttons using Rounded Rectangle Tool (U) and put them below the first button; we have created above as shown in the screenshot below.
Step 11.1
Same as the previous button we also add Gradient Overlay for the details to make this button look like a metal.

Step 11.2
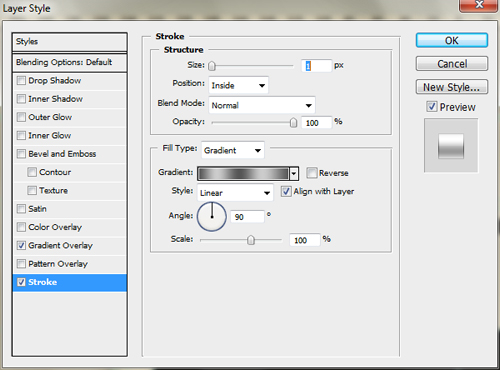
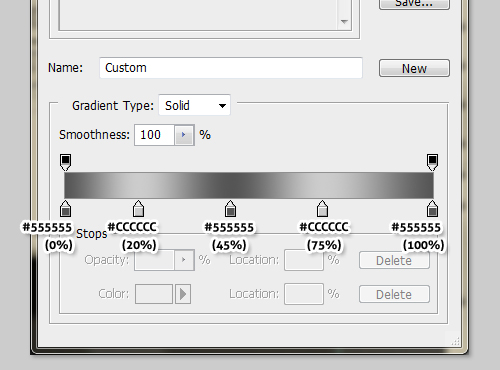
Add Stroke layer style, but it is a bit different. This time we use gradient Stroke.
Let’s see the result for our switch button for a while.
Step 12
Next we create Hold (on/off) switch button. We are still using the same Rounded Rectangle Tool (U) to draw it put it on the top of the iPhone body.
Step 12.1
Add some details on this button as well, using Gradient Overlay.
and Stroke with gray (#999999) color.

Let’s see the result again and our layer structure for a while.
Step 13
Next, we make the iPhone camera. To make this camera, select Ellipse Tool (U) in the toolbox. Then draw a circle in the left side of the speaker.
Step 13.1
Add Gradient Overlay on this circle, with color gradation from #171717 to #555555.
And Stroke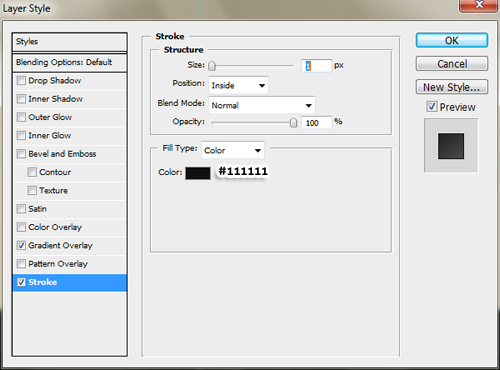
Step 13.2
Again, draw another circle smaller from the first one.
Add Gradient Overlay on the circle, this time with color gradation from #333333 to #777777
And Stroke gradient, with color gradation from #434343 to #1332B6.
Step 13.3
Create a third circle that is smaller than the second one.
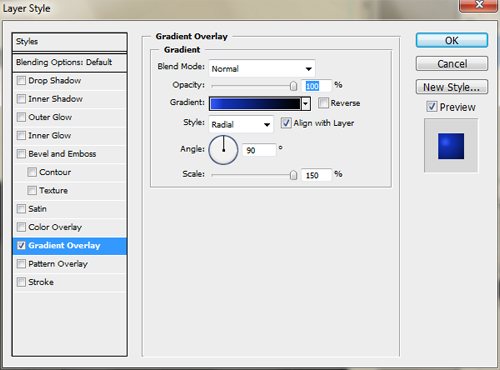
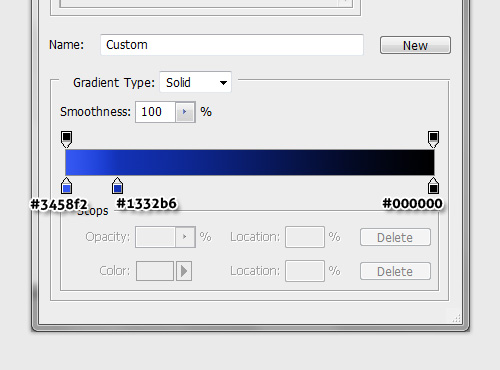
Then add radial Gradient Overlay. The colors that is being used in this gradients are #3458F2, #1332b6 and #000000
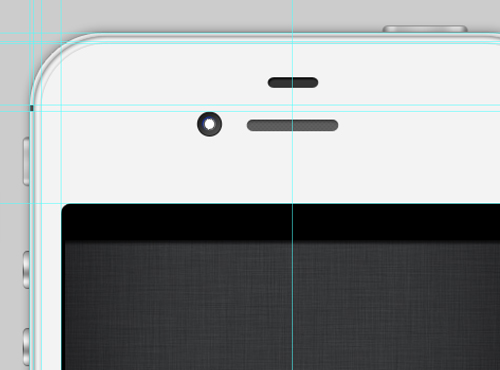
OK, now let’s take a look at the result for a while.
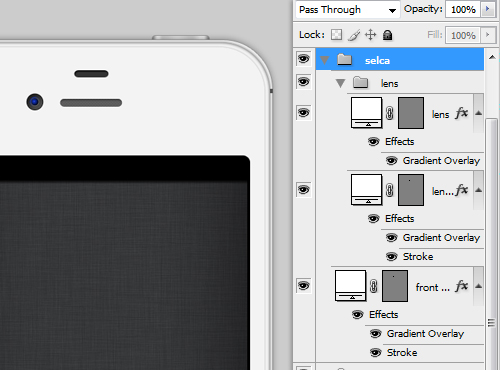
In the screenshot above you see that we put together all the camera layers into one group and name it selca (abbr. self-camera) as most front camera is used to take self-pictures, but you can also name it just camera.
From this step we have made all the main part of the iPhone and in the next following step we will put some elements on the screen.
Step 14
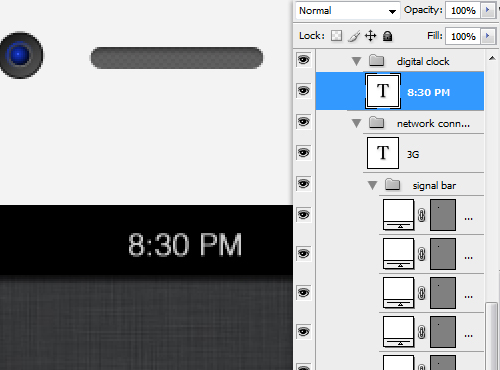
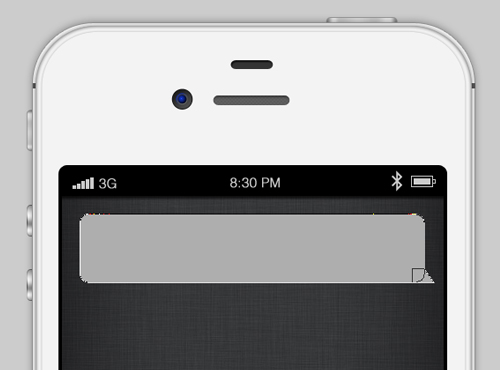
In this step we will make the signal bar that appear on the top left of the screen. We used Rectangle Tool (U) with white (#FFFFFF) color to draw these bars, which each bar represent the signal power.
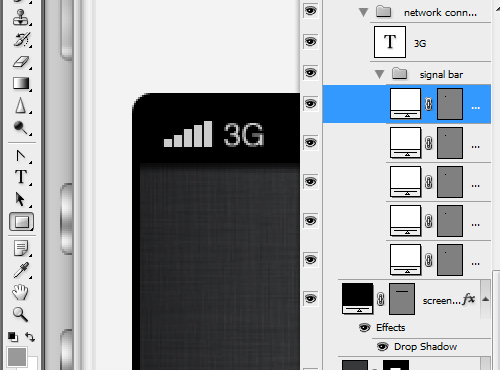
Then group the layers, and name it signal bar. In the right side add 3G text as a sign that the signal is in 3G network.
Step 14.1
Next we add the digital clock which appears in the top center of the screen. We use Helvetica Light typeface for the text, type the time you want, group (Cmd/Ctrl+G) and name it digital clock.
Step 14.2
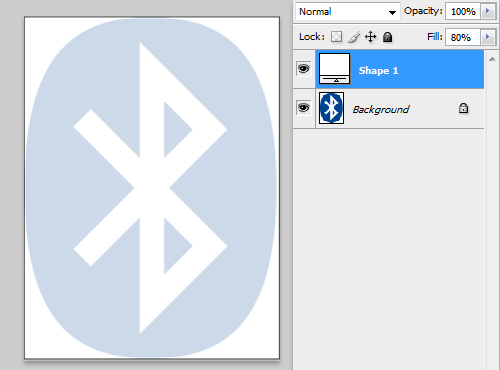
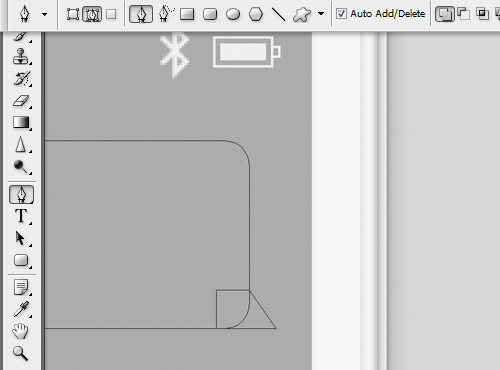
iPhone4S supports Bluetooth wireless technology, so the Bluetooth logo would also appear in the screen when it’s active.
To make this logo, we firstly search for an example in search engine. After finding the desired Bluetooth logo example; open it in Photoshop, create a rectangle shape and delete its Vector Mask (see the screenshot below)
Step 14.2.1
Create a selection from the logo using Magic Wand (W). Select the shape layer and apply Layer Mask on the shape.
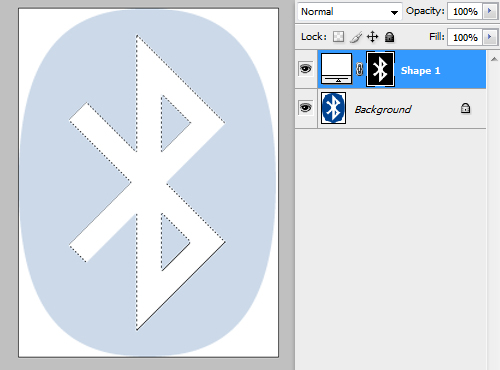
And this is it the Bluetooth logo. Put this logo in our project file.

Resize the logo smaller so it is fit in the screen.

Step 14.3
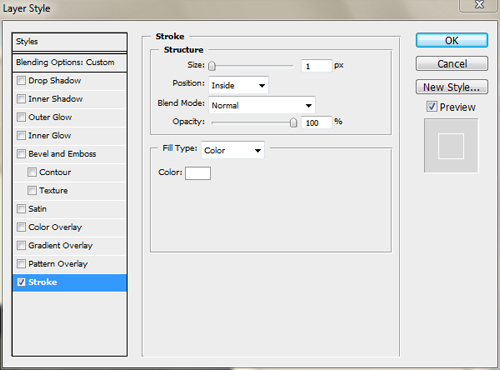
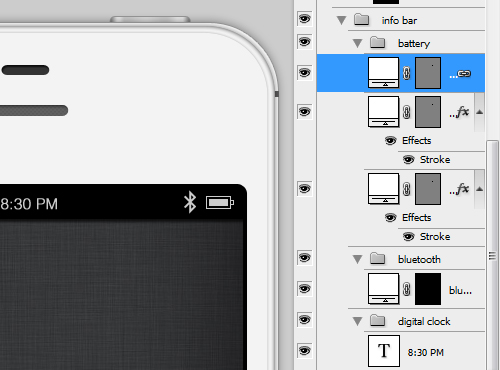
Next, we create the battery life indicator that appears in right top of the screen. To make this battery, select Rectangle Tool (U) from the toolbox, draw a small rectangle right beside the Bluetooth logo. Set the layer’s Fill value 0% and applyStroke layer style.

Step 14.3.1
Draw a small rectangle for the “battery head” and apply the same layer style and specification as the layer above.
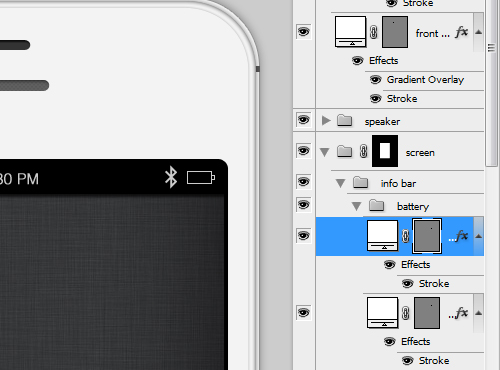
Create a rectangle inside the battery body line; fill it with full white color. Group all these battery layers and name the group battery.
Step 15
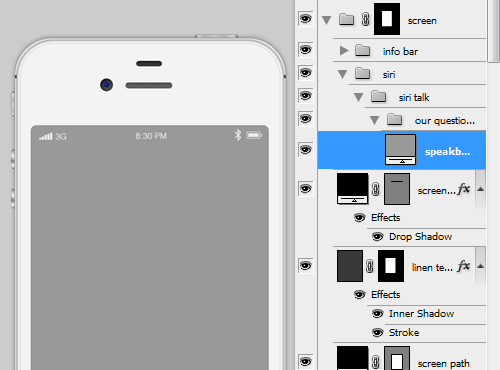
In this step we are going to create the Siri app interface. As we talk to Siri, she (or “it”) will translate our conversation into readable text, which is displayed using sort of “talk bubble”.
To make this Siri interface, we firstly create a group (Cmd/Ctrl+G), name this group siri
After that, draw a rectangle shape using Rectangle Tool (U) under the siri group with gray (#AEAEAE) fill color and delete its vector mask.
We name this layer speakbubble.
Step 15.1
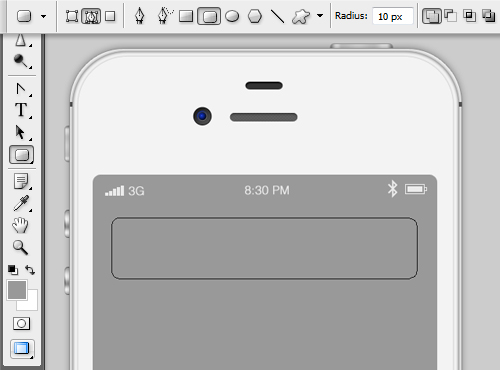
Select Rounded Rectangle Tool (U) with the following specification.
- Radius: 10px
- Mode: Paths
- Path type: Add to path area (+)
Firstly go to Paths tab and Create new path, and then draw a rectangle path as shown in the screenshot below.
Step 15.1
Next, select Pen Tool (P) with the following specification.
- Mode: Path
- Path mode: Add to path area (+)
Then draw a pointed path in the bottom right of the rectangle shape as shown in the following screenshot.
We back to Layers tab. Go to menu Layer > Vector Mask > Current Path to apply layer masking on the “speakbubble” layer.
Step 15.2
Set this speakbubble layer 50% and blend mode Overlay, then we add the following layer styles;
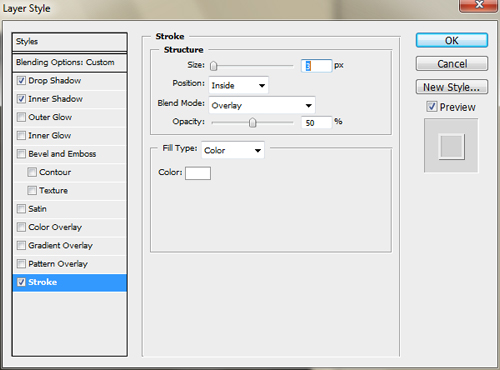
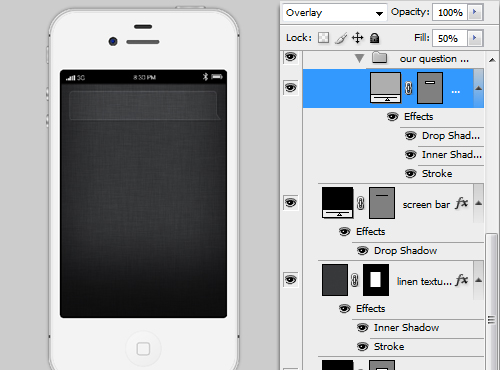
Step 15.3
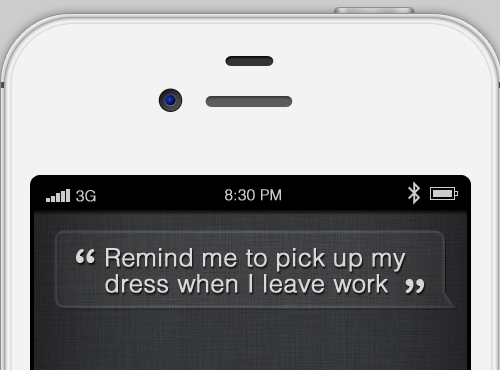
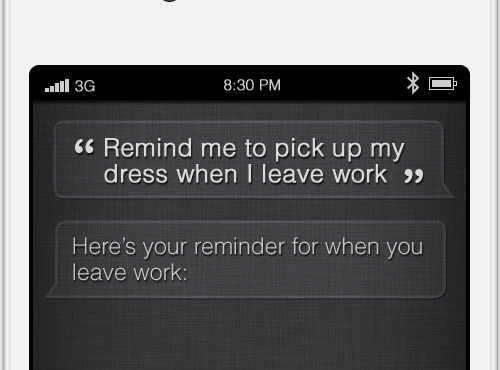
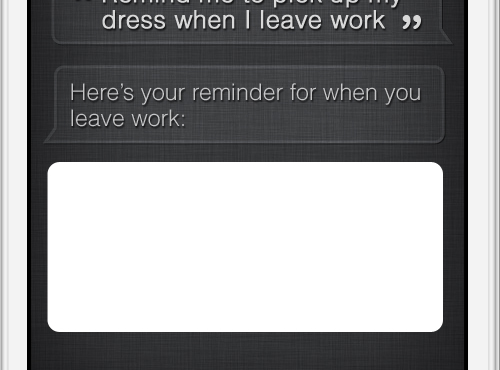
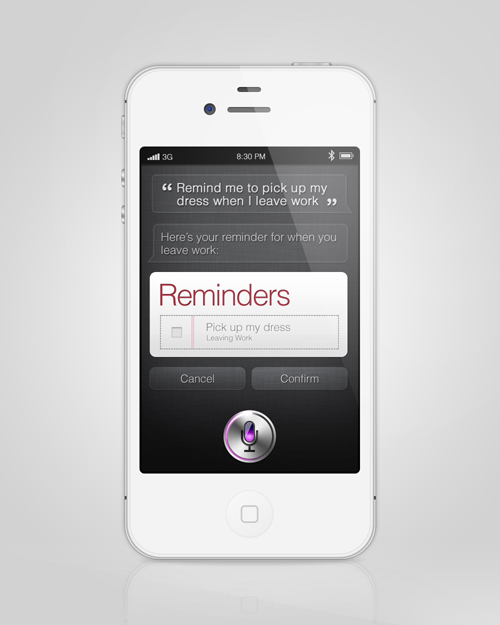
Now we add the conversation in the “speakbubble” using Helvetica font, with Drop Shadow. In this example I order to “Remind me to pick up my Dress when I leave work”.
Duplicate the speakbubble layer, place it below the first bubble, and write the Siri respond to our conversation. In this example Siri gives respond “Here’s your reminder for when you leave work”.
Step 16
Normally Siri will give us an option box, for whether the order will be applied or cancelled.
To draw this box, select Rounded Rectangle Tool (U) in the toolbox, and set about 20px radius. Draw this box below the speakbubble.
Step 16.1
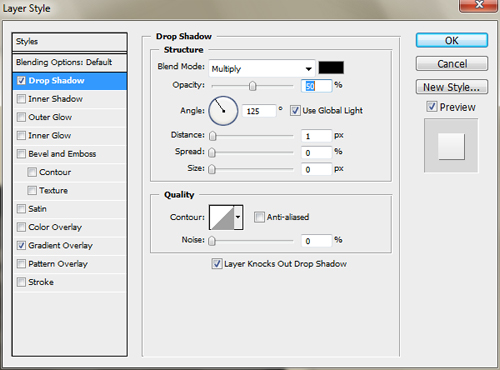
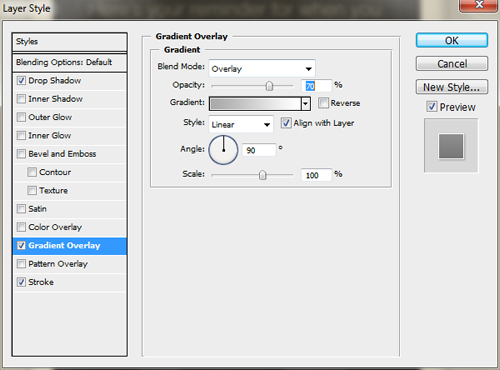
Add Gradient Overlay on this box.

And Drop Shadow.
Step 16.2
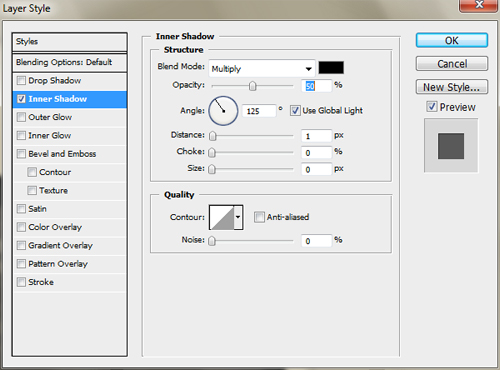
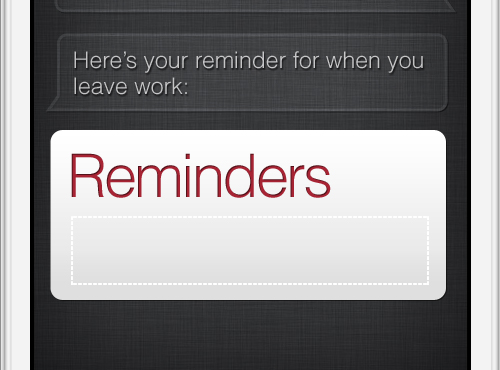
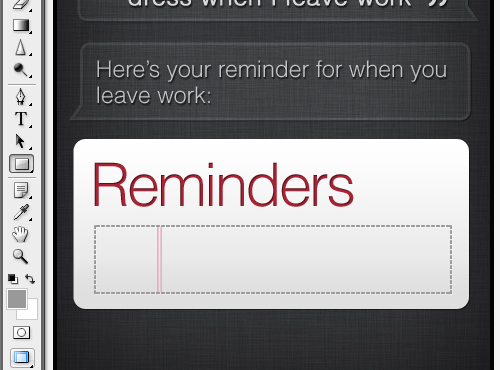
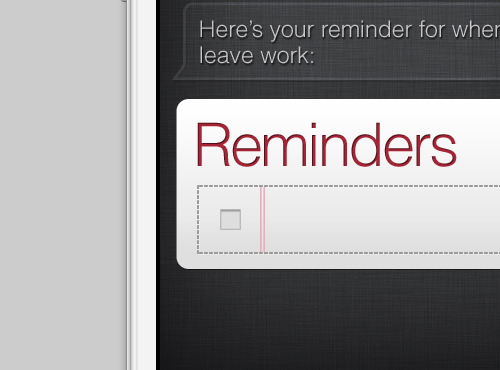
Then, we write “Reminders” inside the box with red (#AF3947) and Inner Shadow.

Step 16.3
Below it I draw a dashed rectangle, well, to make this rectangle you can draw a small rectangle repeatedly, I know this technique is not an efficient way to do.
But, alternatively you can draw this dashed rectangle in a vector program such as Adobe Illustrator or CorelDraw, and then export it to transparent PNG
In this tutorial I made the rectangle from whit (#FFFFFF) color, so I need to add Color Overlay to change its color into gray (#999999).

Step 16.4
OK, now we draw two lines inside using Rectangle Tool (U) with pink color (#E4B5C1) as shown in the screenshot below.
Step 16.5
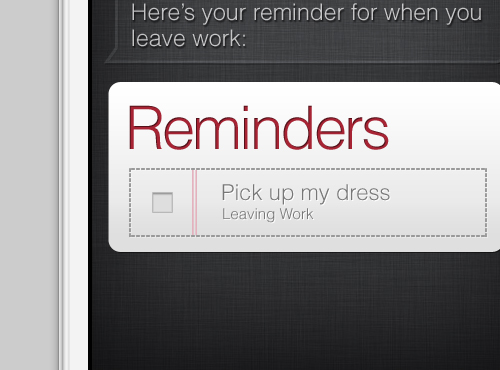
In this step we create a check box which has to be selected before confirming or cancel the Siri respond. We can use Rectangle Tool (U) to draw a check box.
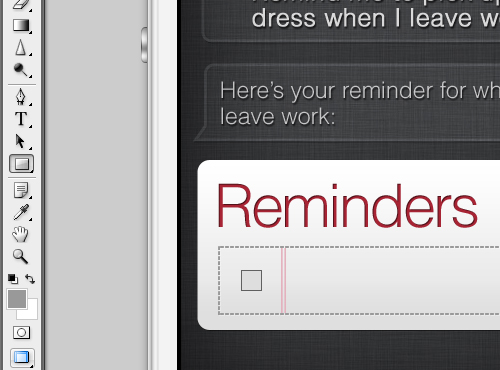
As usual, to make this check box alive we add some layer styles such Inner Shadow and Stroke on this object.
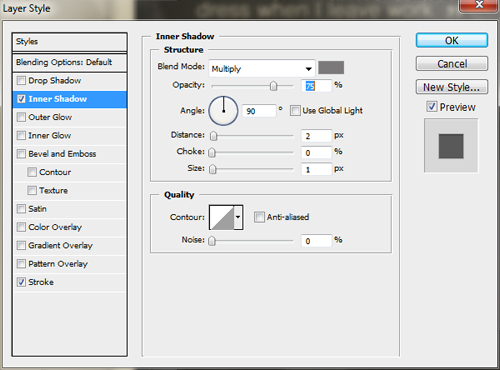
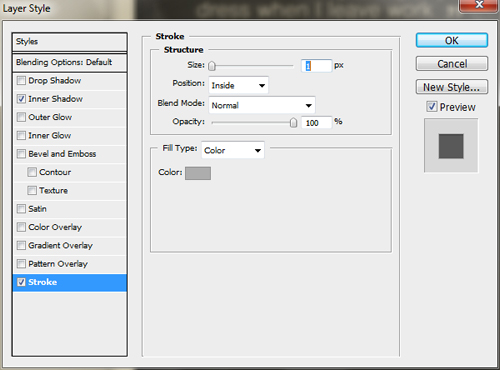
Here it is, our check box now has some depth and looks alive
Step 16.6
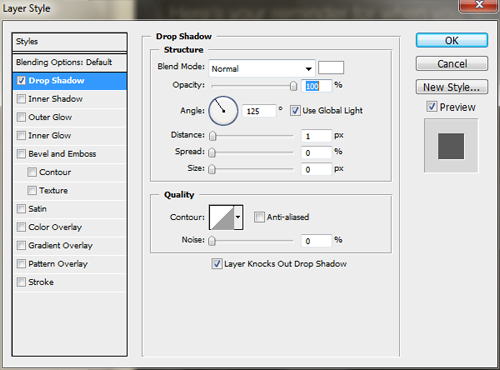
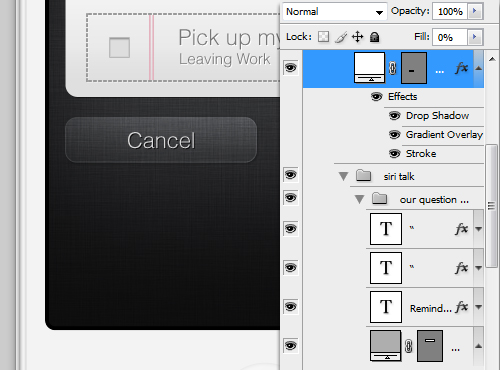
Then we add the option text with gray (#808080) color, in this example Siri responds “Pick up my dress Leaving Work”. Then, we add Drops Shadow with the following specification to give depth to this text:
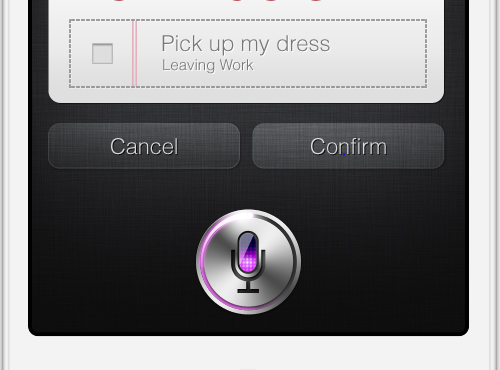
Step 17
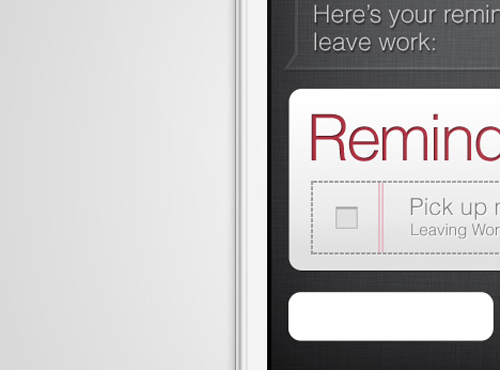
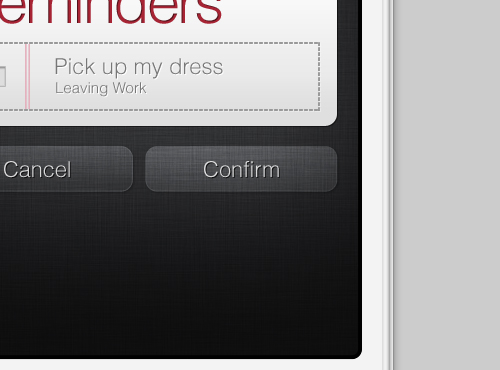
Below the option box, there are two buttons to cancel and confirm to the Siri responds.
To create these buttons, select Rounded Rectangle Tool (U) from the toolbox and draw it inside the screen with about 20px of radius (see the screenshot below).
Step 17.1
Change the layer Fill value to 0% and add the following layer styles. First we add Drop Shadow.

And then, Gradient Overlay, with color gradation from gray (#AAAAAA) to white (#FFFFFF), also change its blend mode to Overlay.
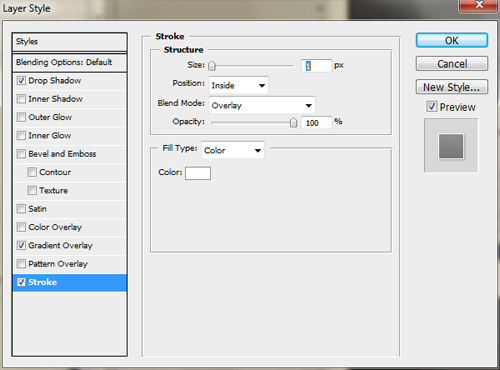
Next, we add white Stroke.
Step 17.2
This is it, our button result. As you can see in the following screenshot, we have added “Cancel” text on the button with Drop Shadow with the following specification:
- Color: #000000.
- Opacity: 75%.
- Angle: 125o.
- Distance: 1px.
- Spread: 0%.
- Size: 0px.
Step 17.3
Duplicate this button and change the text to “Confirm”. However, we also change the gradient opacity 90% (20% larger than the previous button) to make it looks like the selected button.
Step 18
Now, we put the Siri icon under the buttons, if you haven’t made it yet, you can see the tutorial here How to Make a Siri Icon. Then, re-size the icon to be fit in the screen and the remaining spaces under the button (see the screenshot below).
Step 19
Next, we make this iPhone shining. To make this shining effect, Select Pen Tool (P) in the toolbox and draw a right-angled triangle as shown in the following screenshot. Change the Fill value 0%. Name this layer shining.
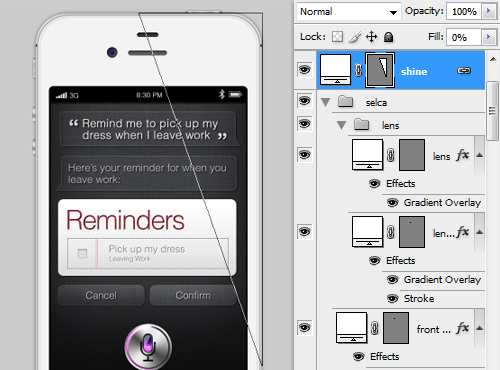
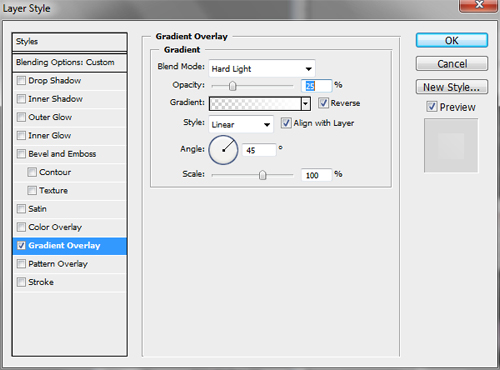
And add Gradient Overlay on this triangle.
Create a full iPhone-sized selection by holding Cmd/Ctrl while click on the mainbody layer. After that, apply Layer Mask on the shining layer.
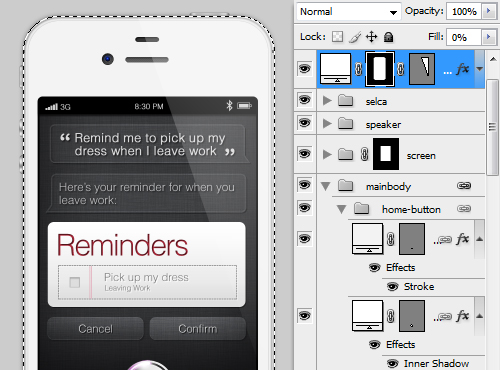
Step 20
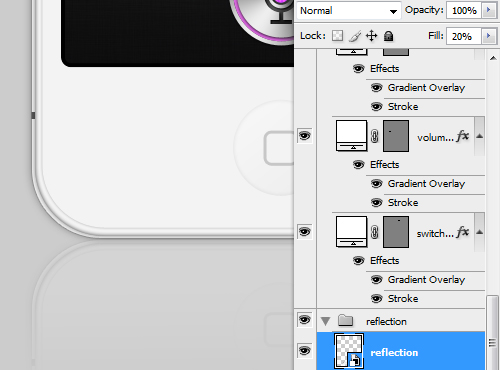
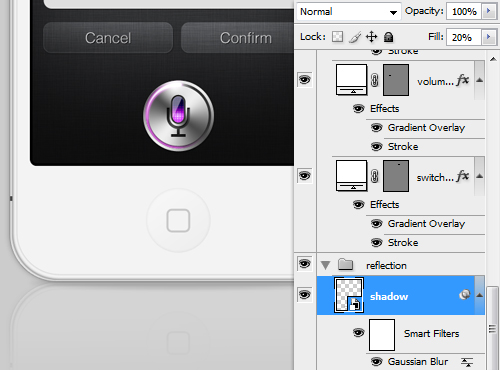
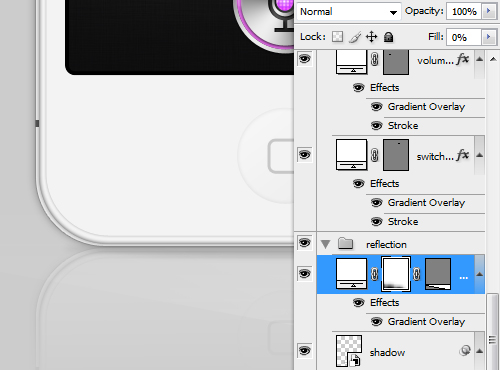
In this step group all the iPhone layers from mainbody to shining layer and convert them to smart layer all together.
Go to menu Edit > Transform > Flip Vertically to flip the layer vertically, put it below the iPhone’s mainbody layer, group this layer and name it reflection. Change the layer’s Fill value to 20%.
Step 21
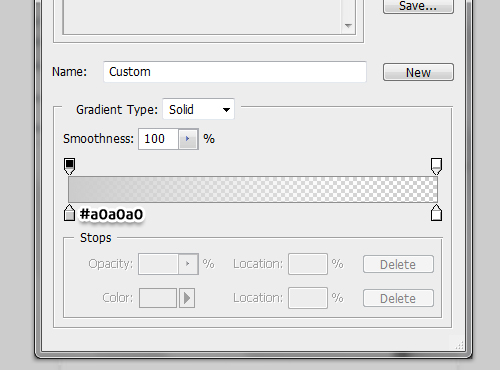
Under the reflection group create an ellipse using Ellipse Tool (U), fill this ellipse with black (#000000) color. As we are going to make a shadow for the iPhone, put this ellipse under the mainbody (see the screenshot below for more detail).
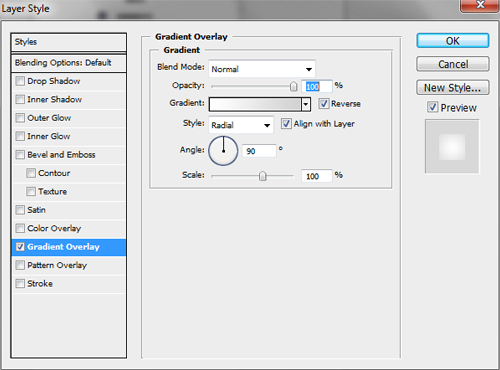
Add the ellipse with Gradient Overlay.
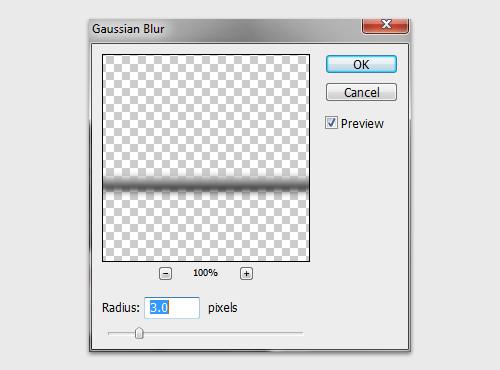
Blur the ellipse by going to this menu Filter > Blur > Gaussian Blur.
Step 22
In this step, we will make the floor a little bit shining as the iPhone is reflected to the floor.
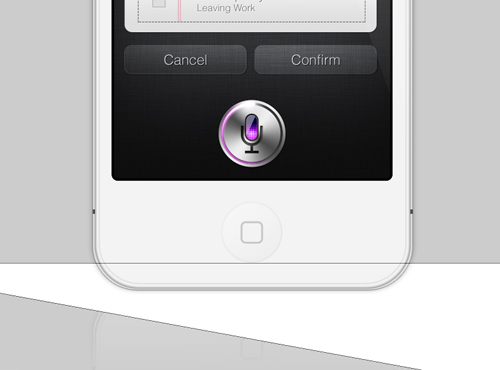
First, select Pen Tool (P) and draw a right-angled triangle under the reflection group. Apply Layer Mask on the layer, select Brush Tool (B) from the toolbox and switch the Foreground color to black (#000000).
Paint the brush on the Layer Mask in the section that is marked with yellow ellipses shown in the screenshot below.
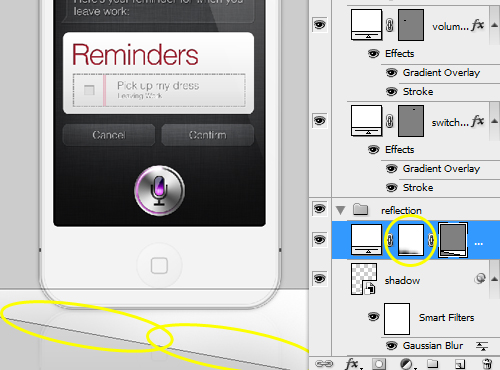
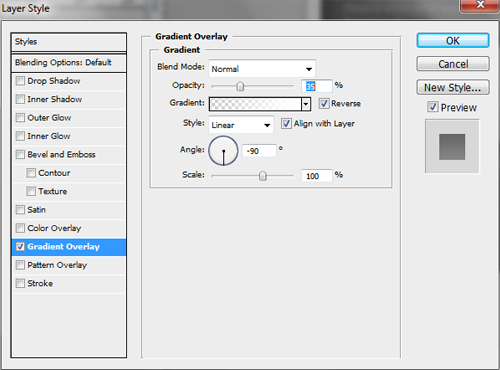
Add this layer with Gradient Overlay.
Then, set the layer Fill value to 0%.
Step 23
In this we create a spotlight effect for the iPhone. Starting from the background, first, we duplicate the (locked) Background and rename this layer bg.

Add this bg layer radial Gradient Overlay with color gradation from gray (#D2D2D2) to white (#FFFFFF).
Let’s take a look the result for a while.
Step 24
And to make the spotlight effect more convincing, create a new full document size of shape layer using Rectangle Tool (U).
The example shown in the screenshot below is made transparent so we can see what is going under.
Add radial Gradient Overlay with gradient color from white to transparent, and then set the layer value to complete 0%.

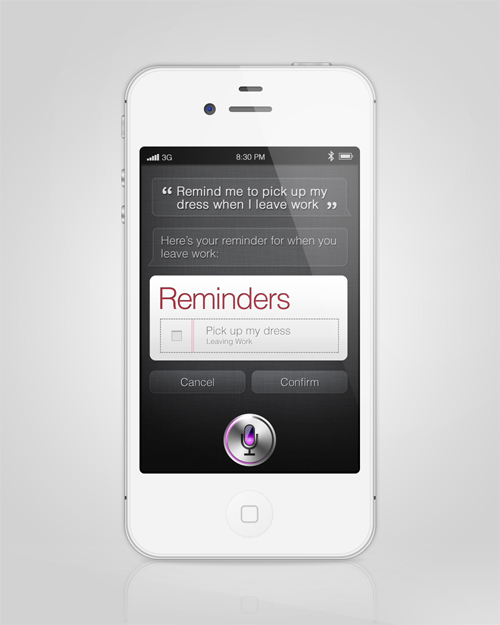
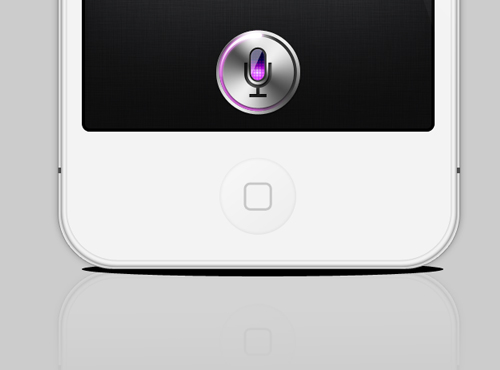
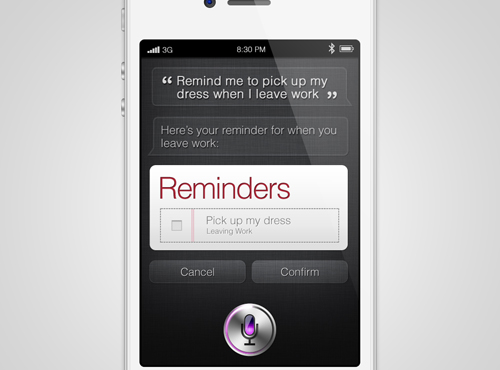
Final Outcome
Well, this is it our final outcome of the iPhone 4S with Siri Icon.
Download Source File
Summary
We have been through all the steps to make a complete iPhone 4S with Siri, a personal assistance with voice recognition. We hope you enjoy this tutorial as well as the final outcome; happy holidays and happy New Year everyone.


very nice thank s for this work
hard~~~